This post may contain affiliate links.
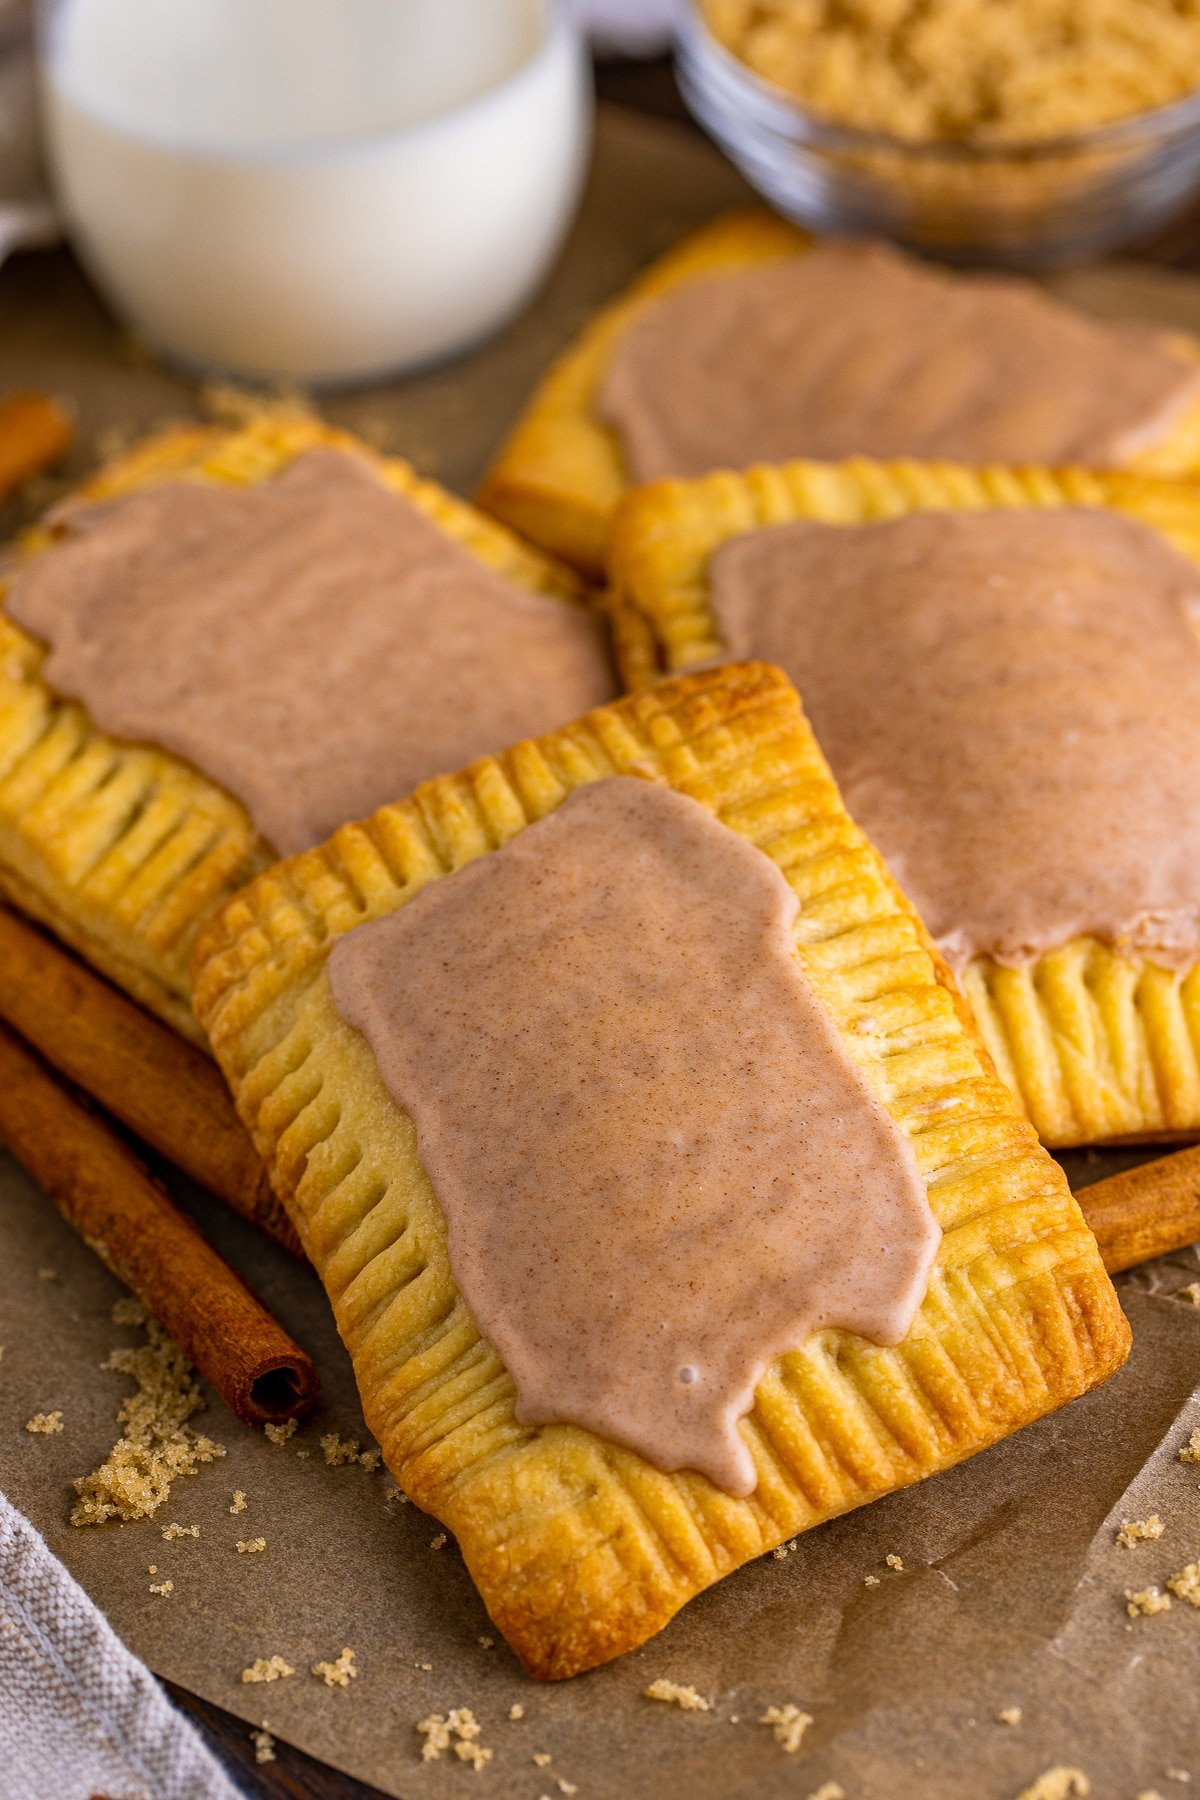
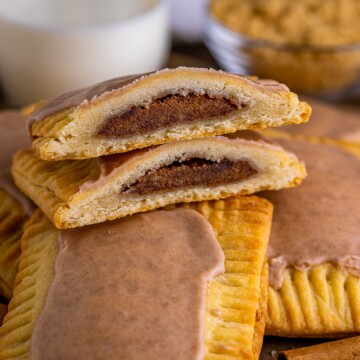
Homemade Pop Tarts are everything you loved about the boxed version but flaky, buttery, and made from scratch, with a gooey brown sugar cinnamon filling and a sweet glaze. I made these on a rainy Saturday when the kids were craving a nostalgic treat, and they declared them way better than the store kind. If you love our easy cinnamon rolls, these homemade pop tarts are your next baking project.
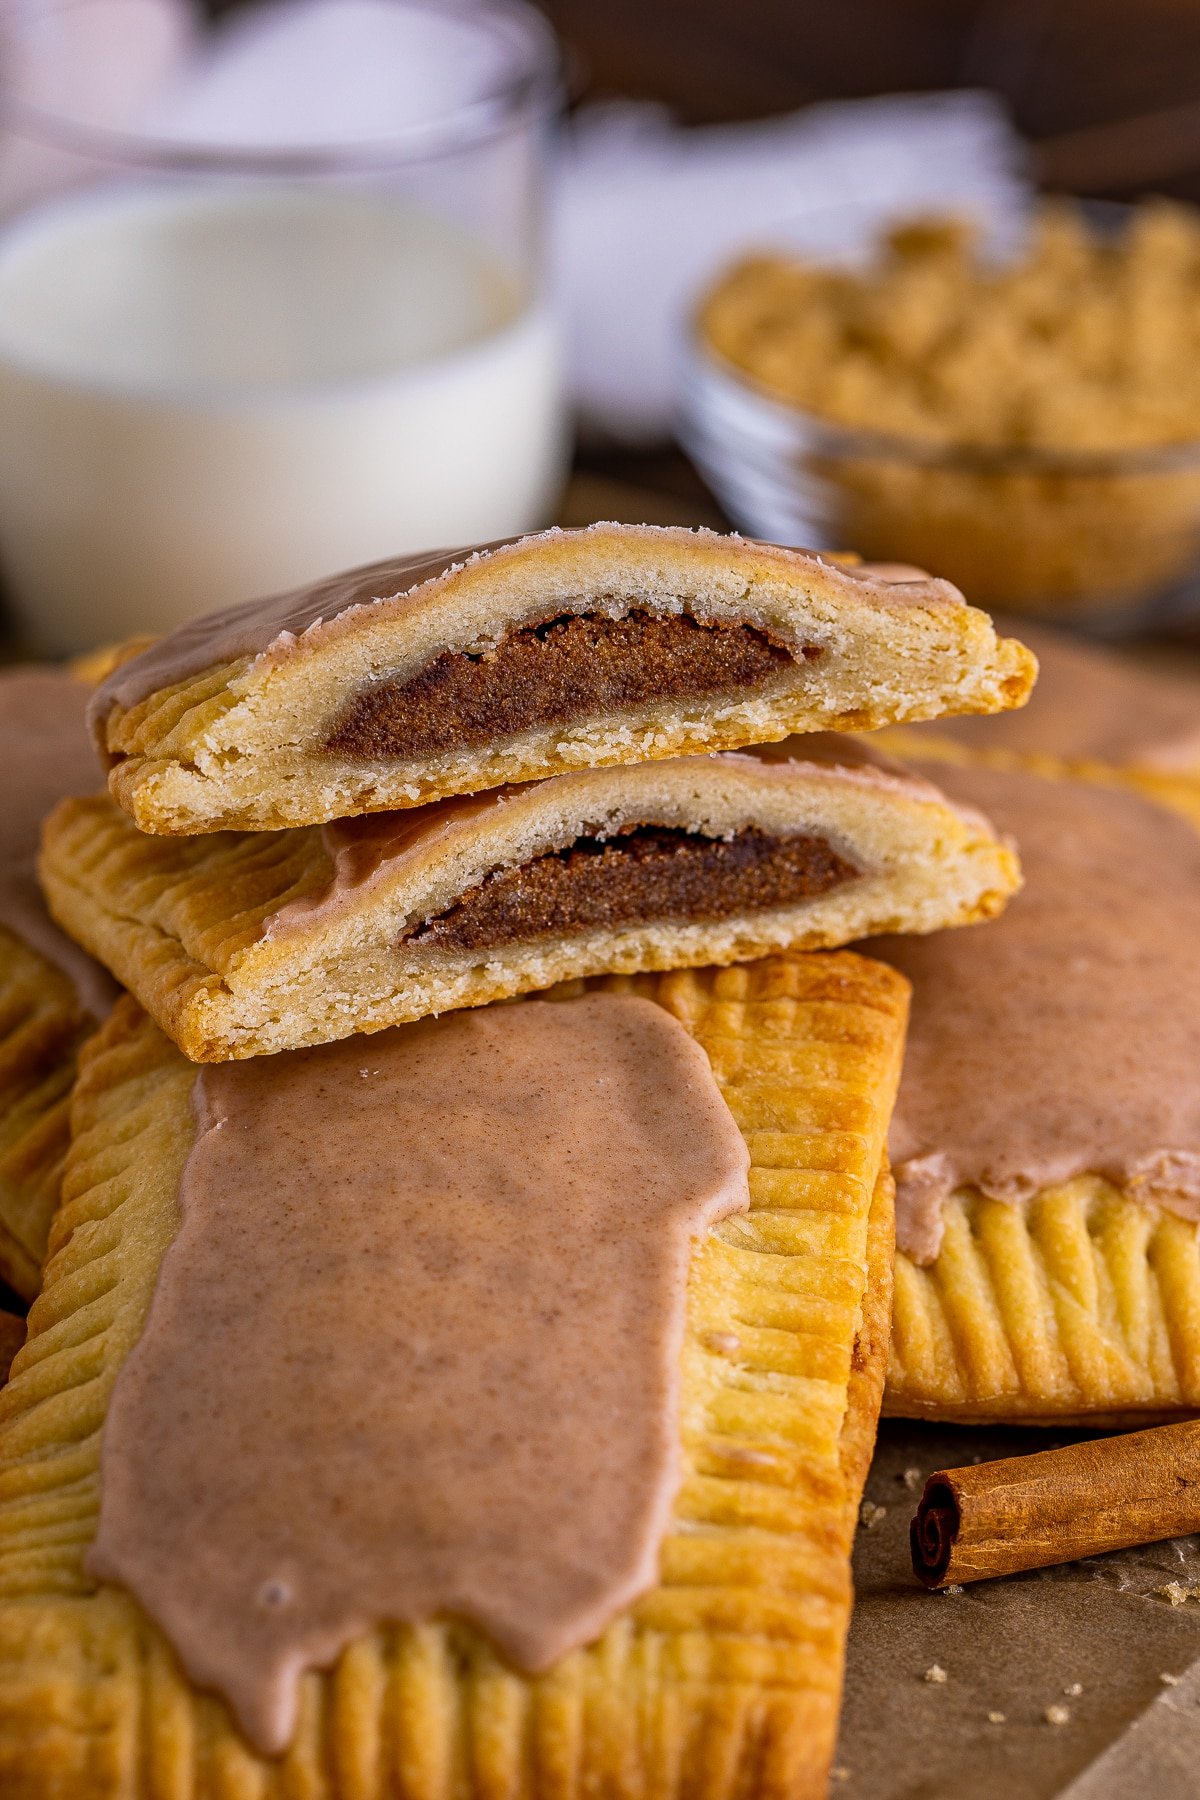
A simple food processor dough and a quick brown sugar cinnamon filling make these homemade pop tarts surprisingly easy to pull off.
Homemade Pop Tarts Quick Look
- 🕒 Prep Time: 20 minutes
- 🌡️ Cook Time: 18 minutes
- ⏳ Total Time: 38 minutes
- 🍽️ Serving: 6 servings
- ⚡ Calories: 654kcal
- 🌶️ Flavor Profile: Buttery, brown sugar, cinnamon
- ✋ Difficulty: Easy, on par with our easy cinnamon rolls
Quick Answer
Pulse a simple butter and flour dough in a food processor, then chill it. Roll it out, cut into rectangles, and fill half with a brown sugar cinnamon filling. Top, crimp, and bake until golden, then finish with a cinnamon glaze. These homemade pop tarts taste far better than the boxed kind.
Jump to:
Why This Recipe Works
Click to see the technique science
- Food processor dough is fast. Pulsing the butter into the flour gives you a flaky pastry in minutes with no overworking.
- Cold butter means flaky layers. Keeping the butter cold creates steam pockets that bake into tender, flaky pastry.
- Brown sugar cinnamon filling. A simple filling of brown sugar, butter, flour, and cinnamon stays gooey and does not leak out.
- Crimping seals them shut. Pressing the edges with a fork keeps the filling tucked inside as they bake.
- The glaze sets the nostalgia. A cinnamon glaze on top gives that classic pop tart look and flavor, only better.
Why You’ll Love This Recipe
- They taste way better than the boxed version and are made from real ingredients.
- The flaky, buttery pastry with gooey cinnamon filling is pure comfort.
- They are a fun baking project the whole family can help with.
- It delivers that same everyone asks for seconds energy as our brown sugar candied carrots.
- It delivers that same everyone asks for seconds energy as our brown sugar bacon wrapped little smokies.
- It earns a spot in the rotation right next to our homemade mini churros.
Key Ingredients
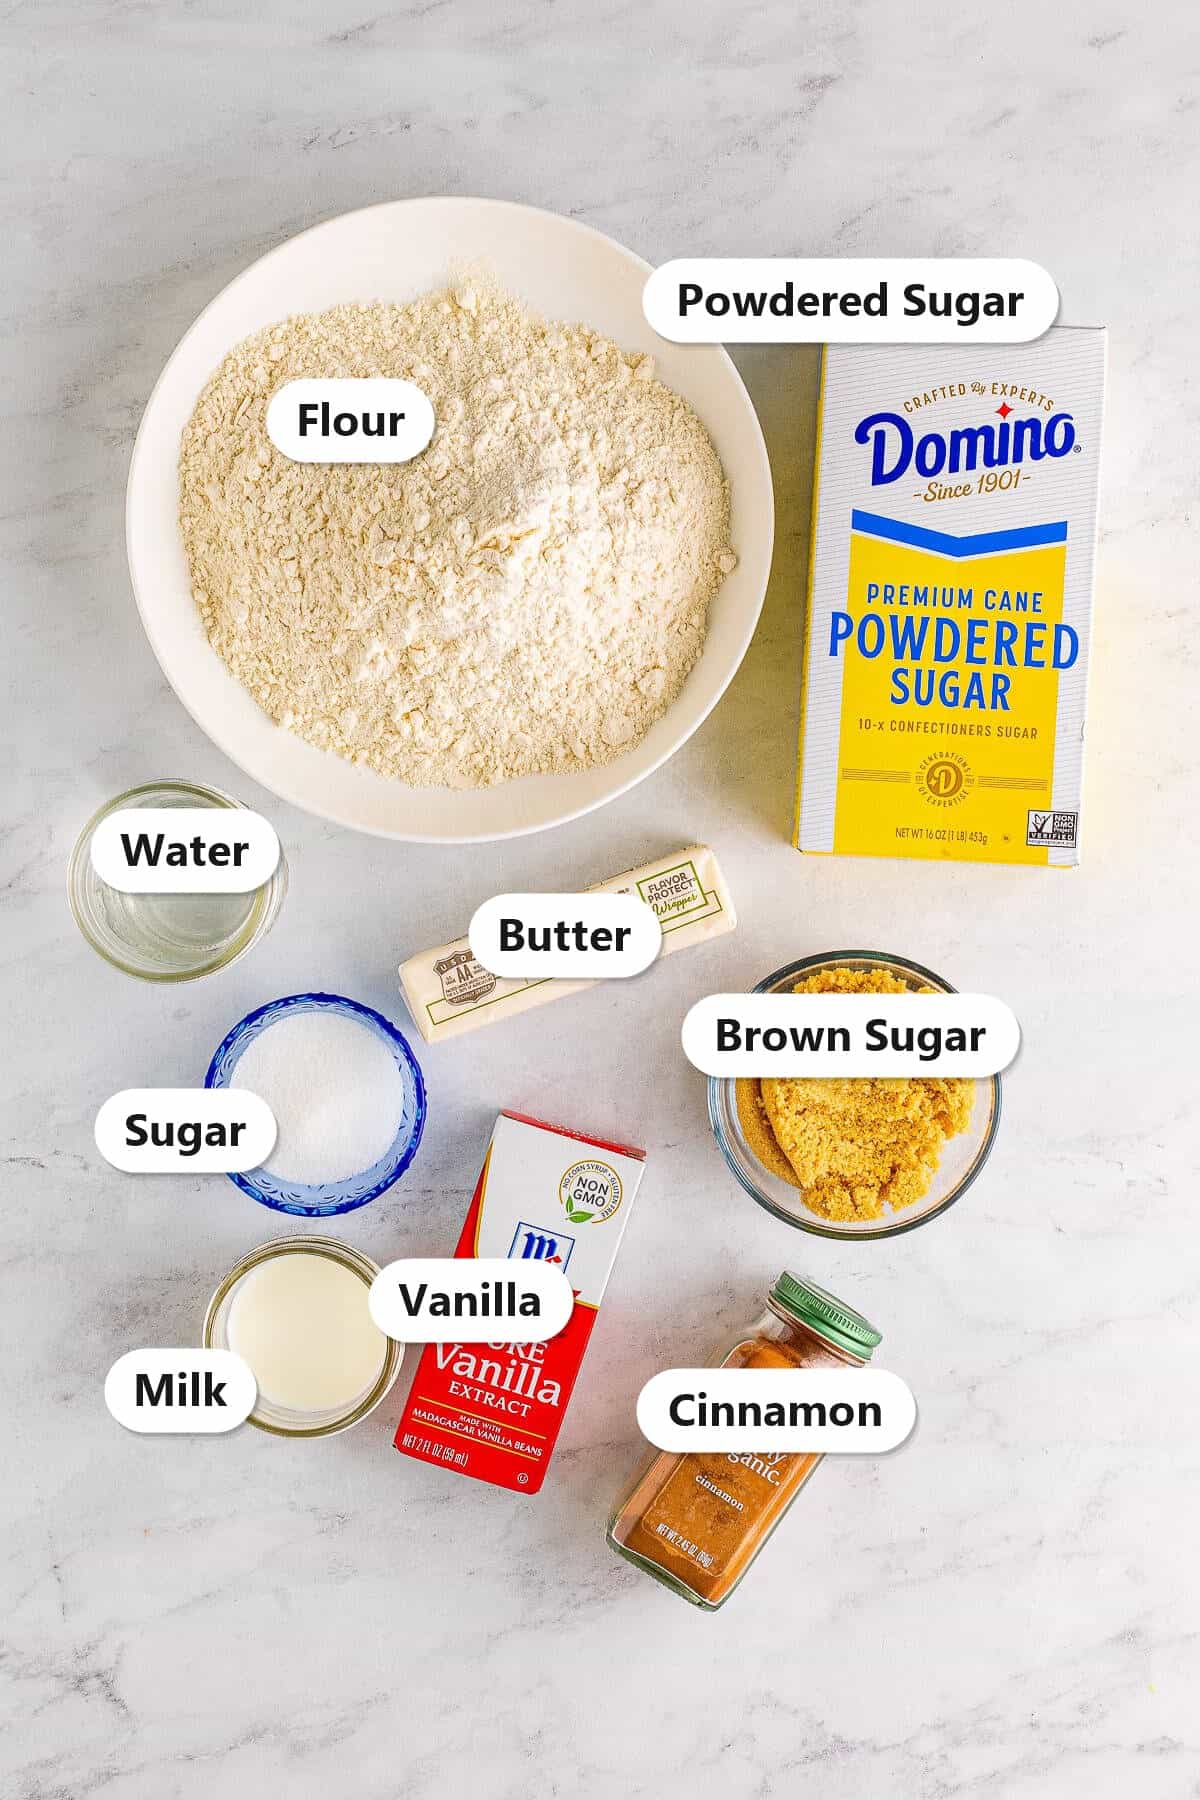
Here is what makes these homemade pop tarts so good. Simple pantry staples.
- Flour and Butter: Cold butter cut into the flour makes the flaky pastry crust.
- Brown Sugar: The base of that gooey, classic cinnamon filling.
- Cinnamon: Warm spice in both the filling and the glaze.
- Powdered Sugar: Whisked with milk and cinnamon for the signature glaze.
- Vanilla: Adds depth to both the dough and the glaze.
See recipe card for exact quantities.
Variations and Substitutions
These homemade pop tarts are easy to customize.
- Fruit filling: Swap the brown sugar filling for a spoonful of thick jam.
- Chocolate: Use a chocolate hazelnut spread or chocolate chips inside.
- Sprinkles: Add rainbow sprinkles to the glaze for a fun look.
- Store bought shortcut: Use refrigerated pie crust to save time.
- Make them mini: Cut smaller rectangles for bite size pop tarts.
- If you want to switch things up, our blueberry pop tart sugar cookies plays on similar flavors in a whole new way.
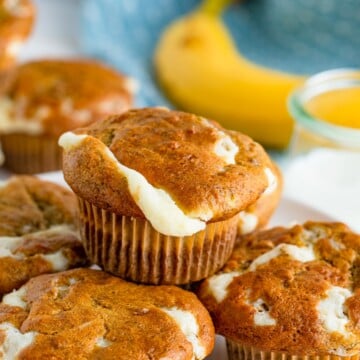
- If you want to switch things up, our banana cupcakes with brown sugar frosting plays on similar flavors in a whole new way.
- In the mood for something different? Our strawberry hand pies scratches a similar itch.
How to Make Homemade Pop Tarts
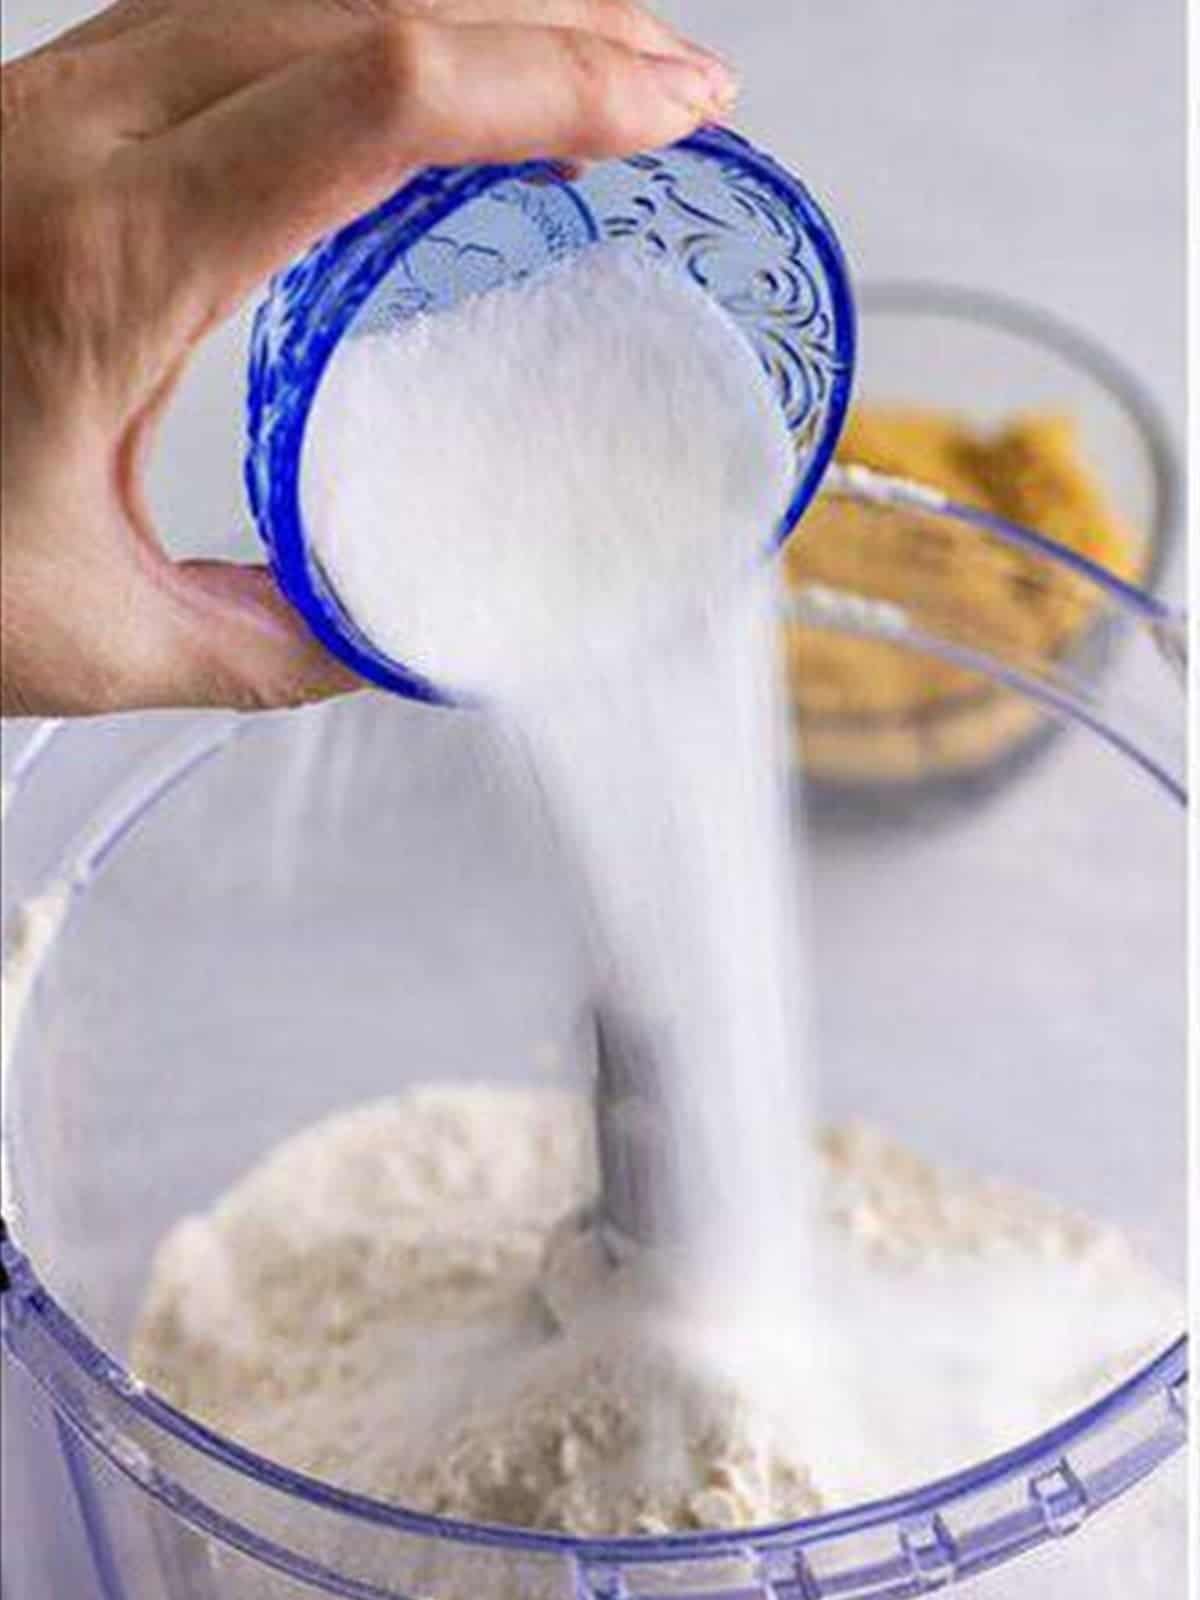
- Pulse the flour and sugar together in a food processor to combine.
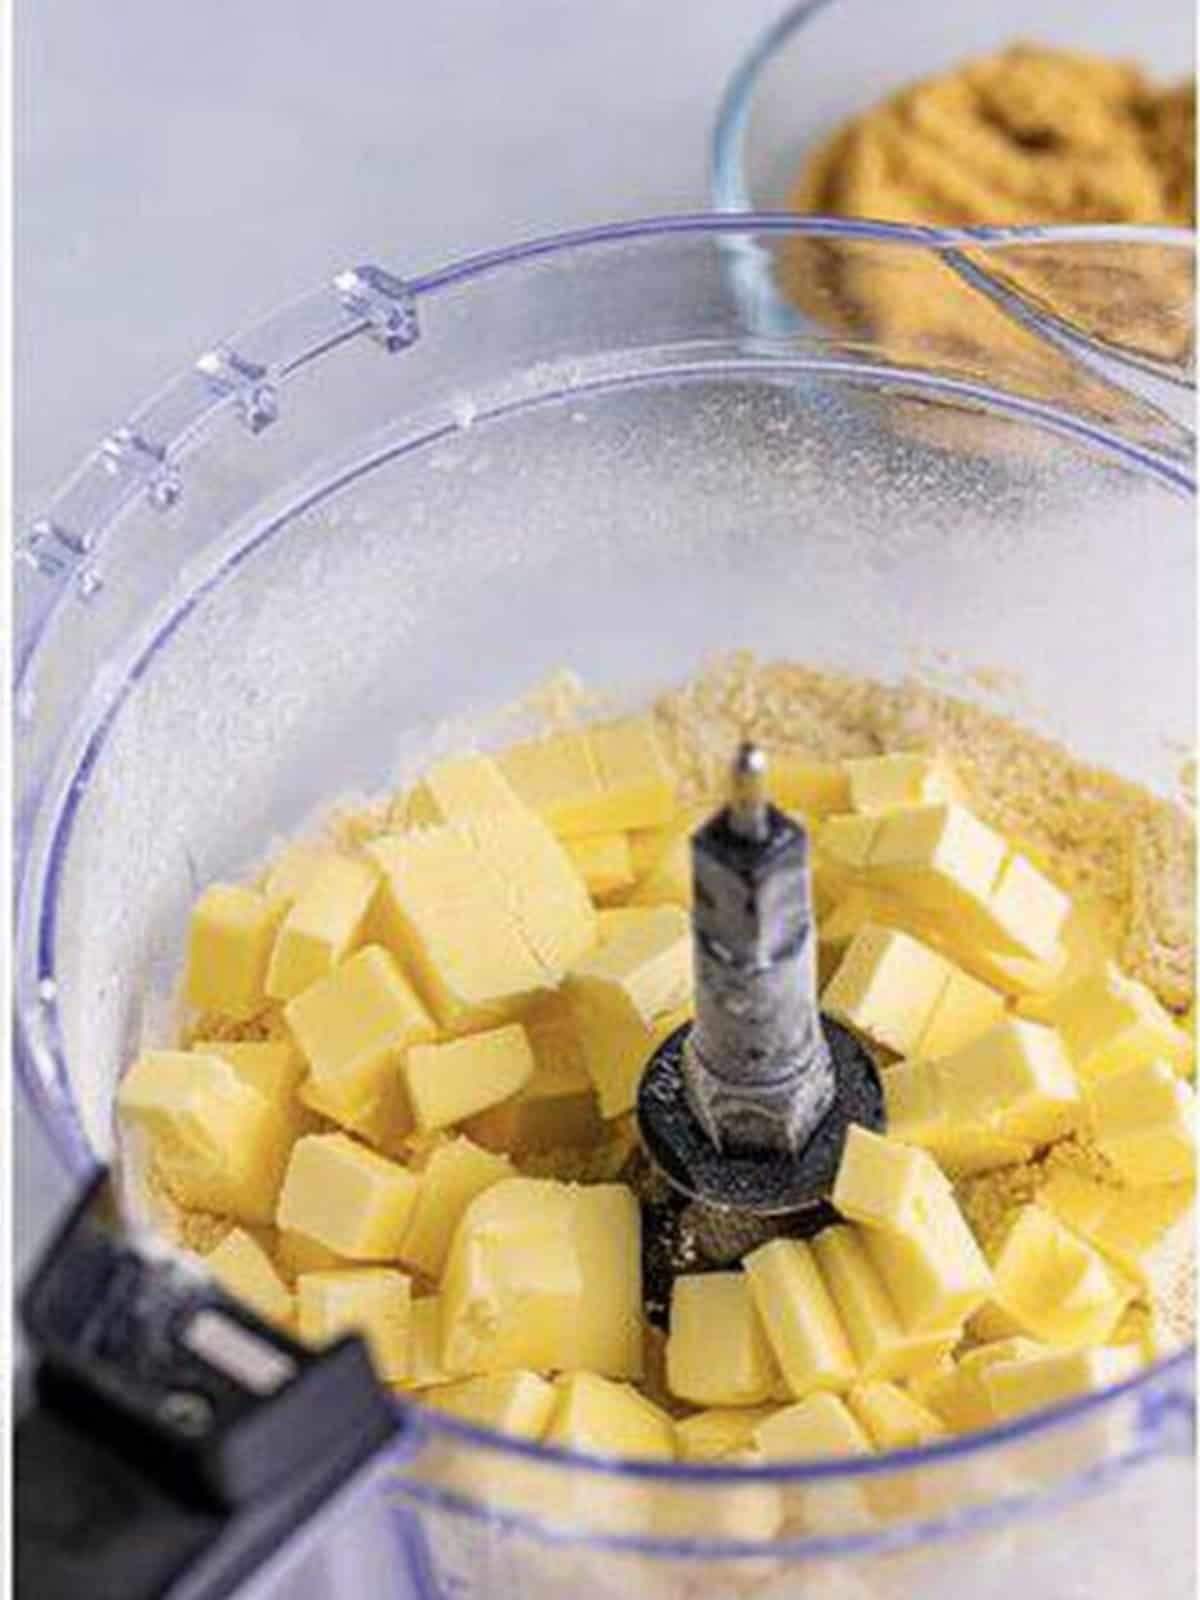
- Add the cold cubed butter to the food processor.
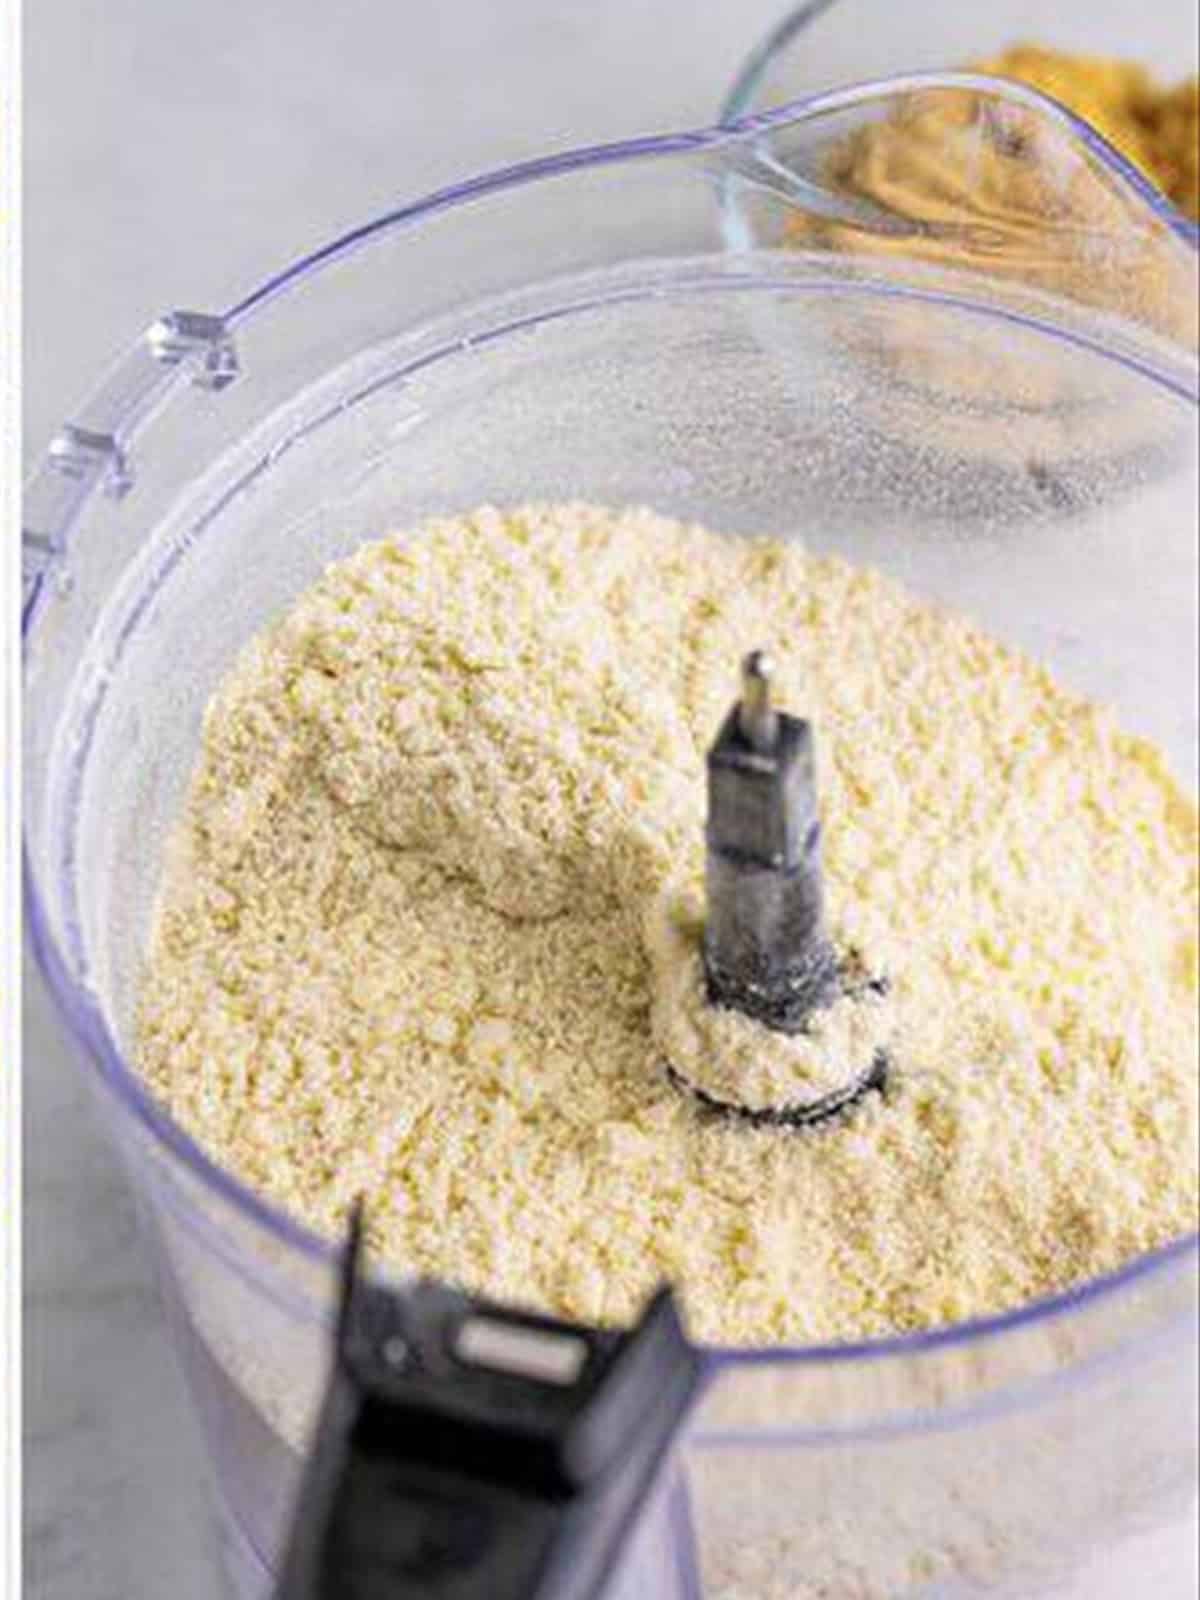
- Pulse until the butter is broken into pea size pieces.
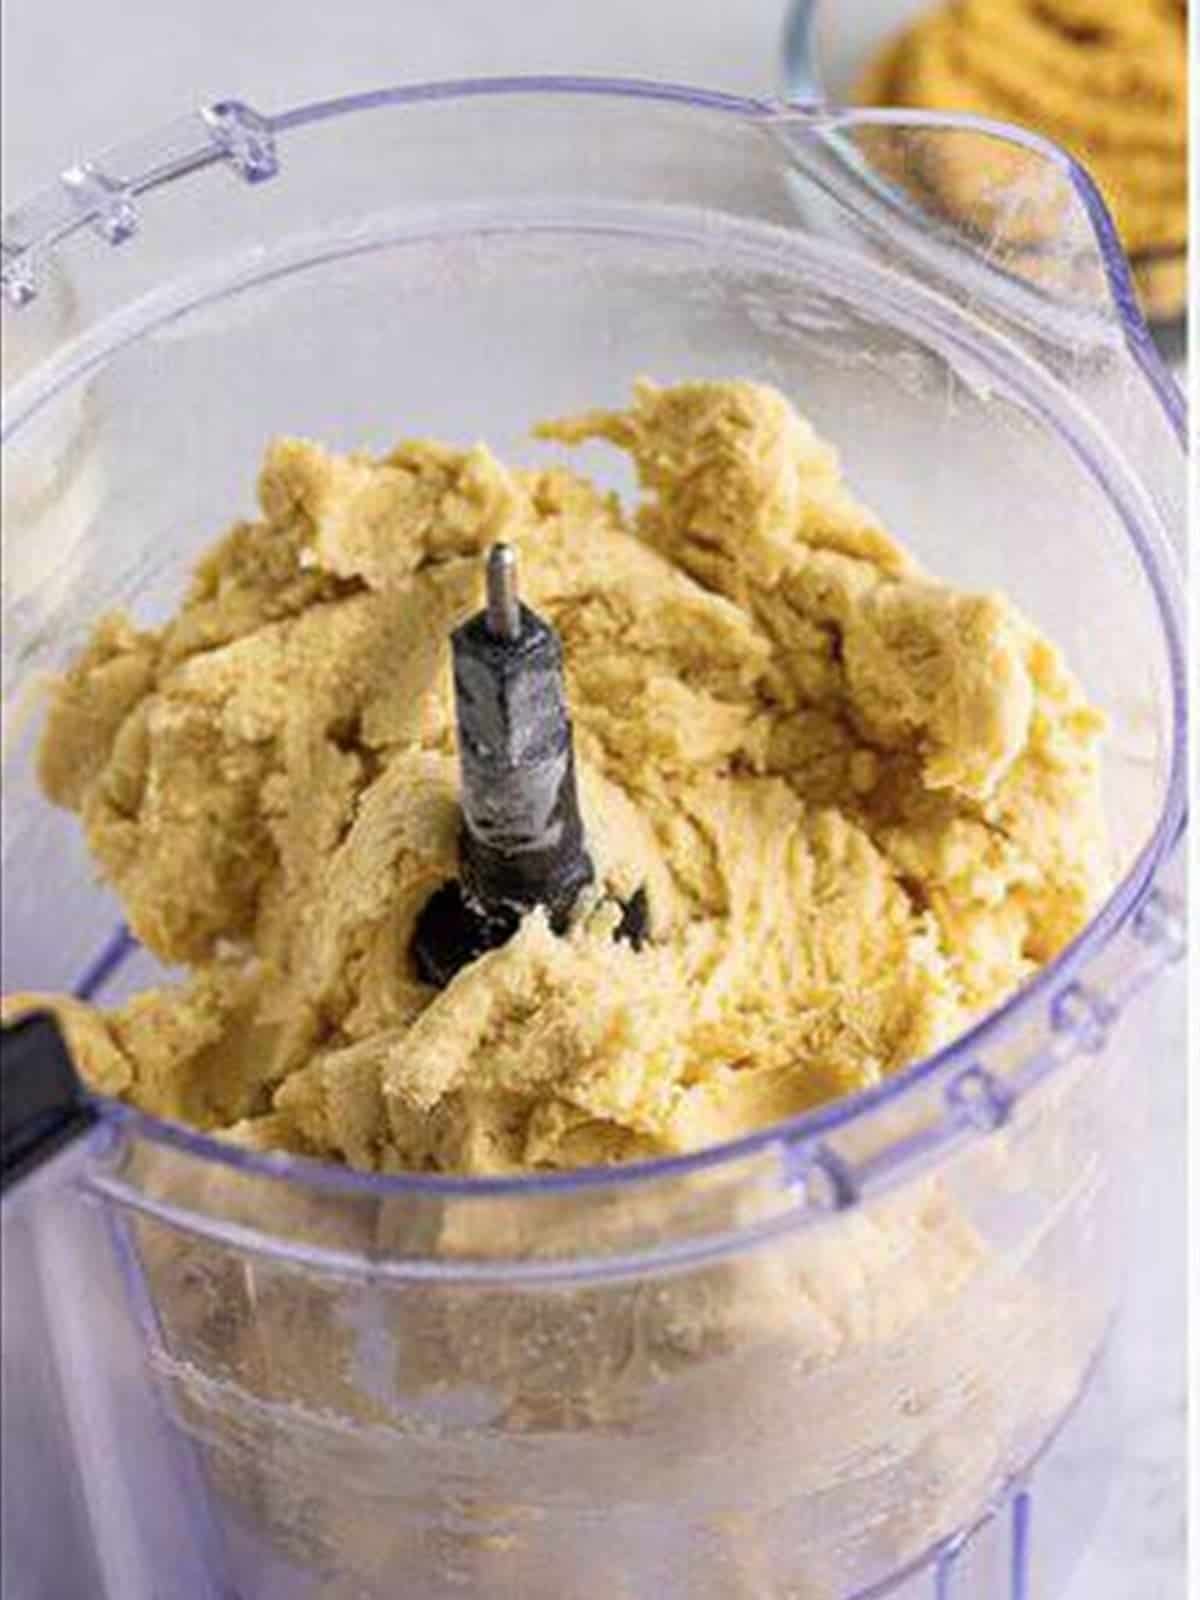
- Add the vanilla and cold water and pulse until the dough just comes together.
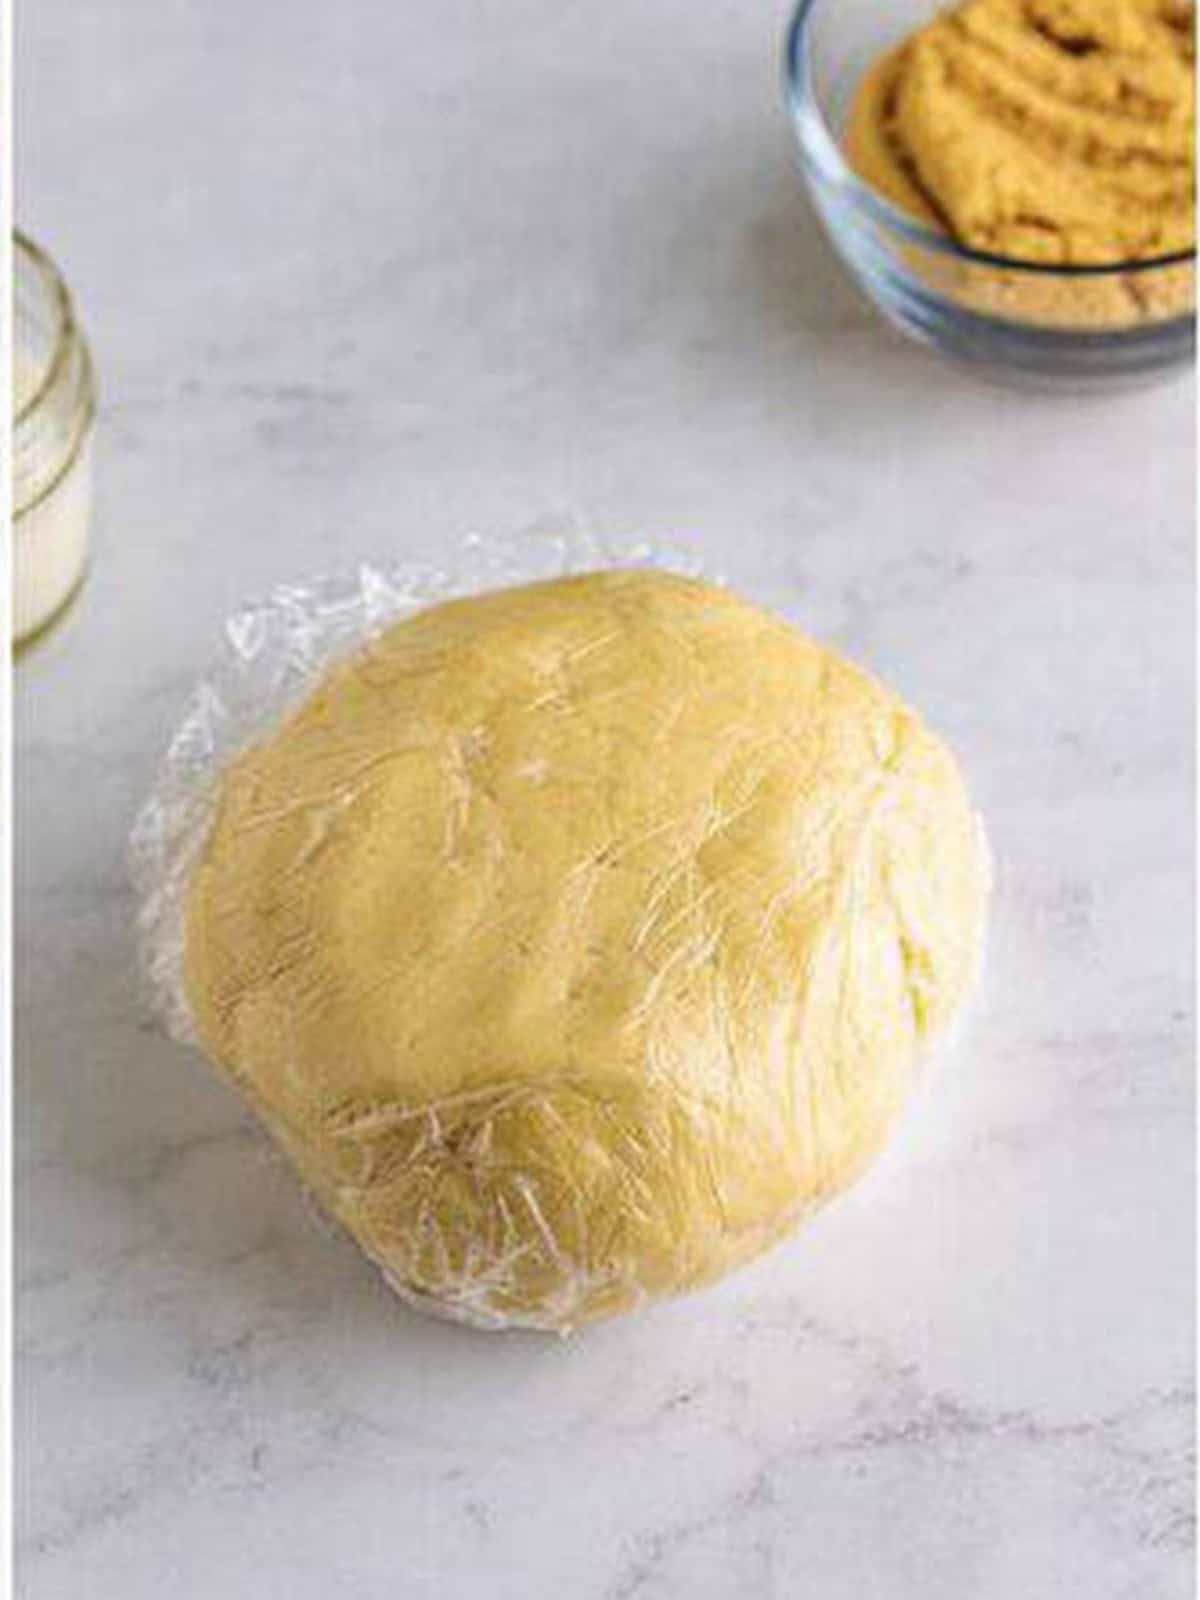
- Shape the dough into a disk, wrap, and chill until firm.
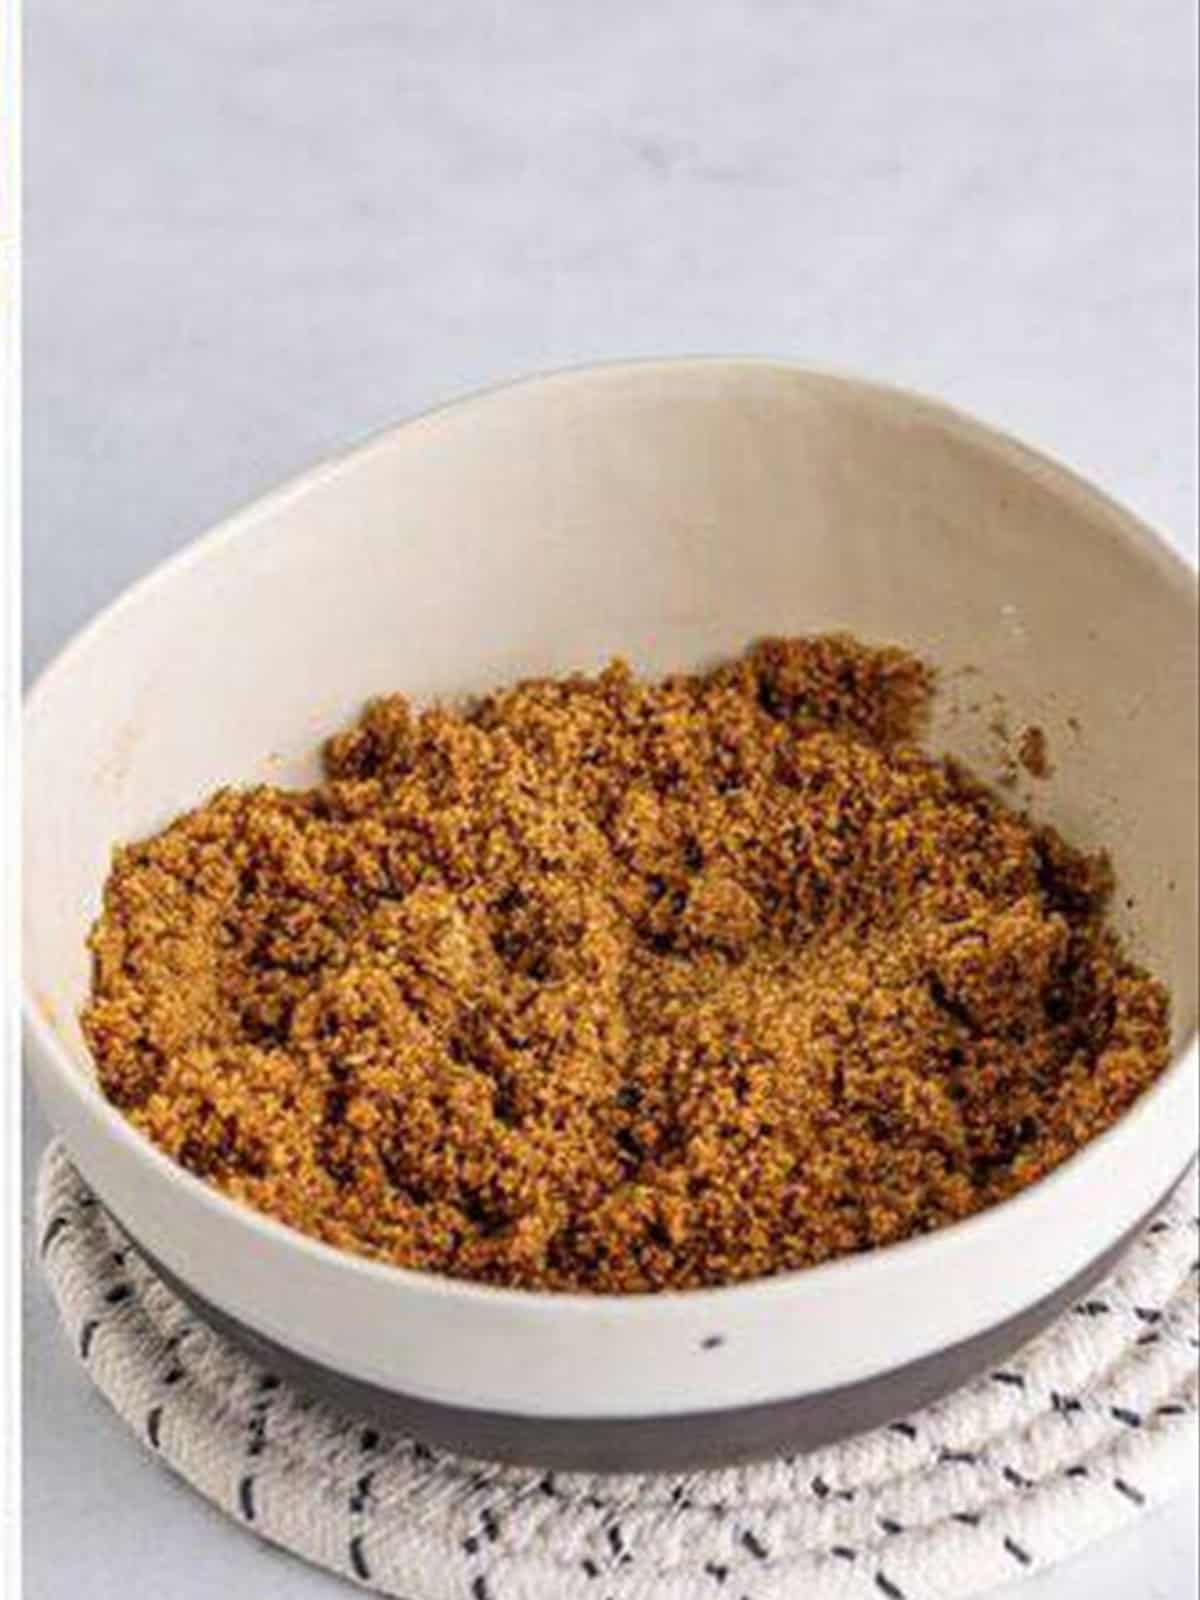
- Mix the brown sugar, melted butter, flour, and cinnamon for the filling.
- Roll out the dough and cut it into even rectangles.
- Spoon filling onto half of the rectangles, leaving a border.
- Top with the remaining rectangles and crimp the edges with a fork.
- Place on a lined baking sheet and bake until golden, then cool.
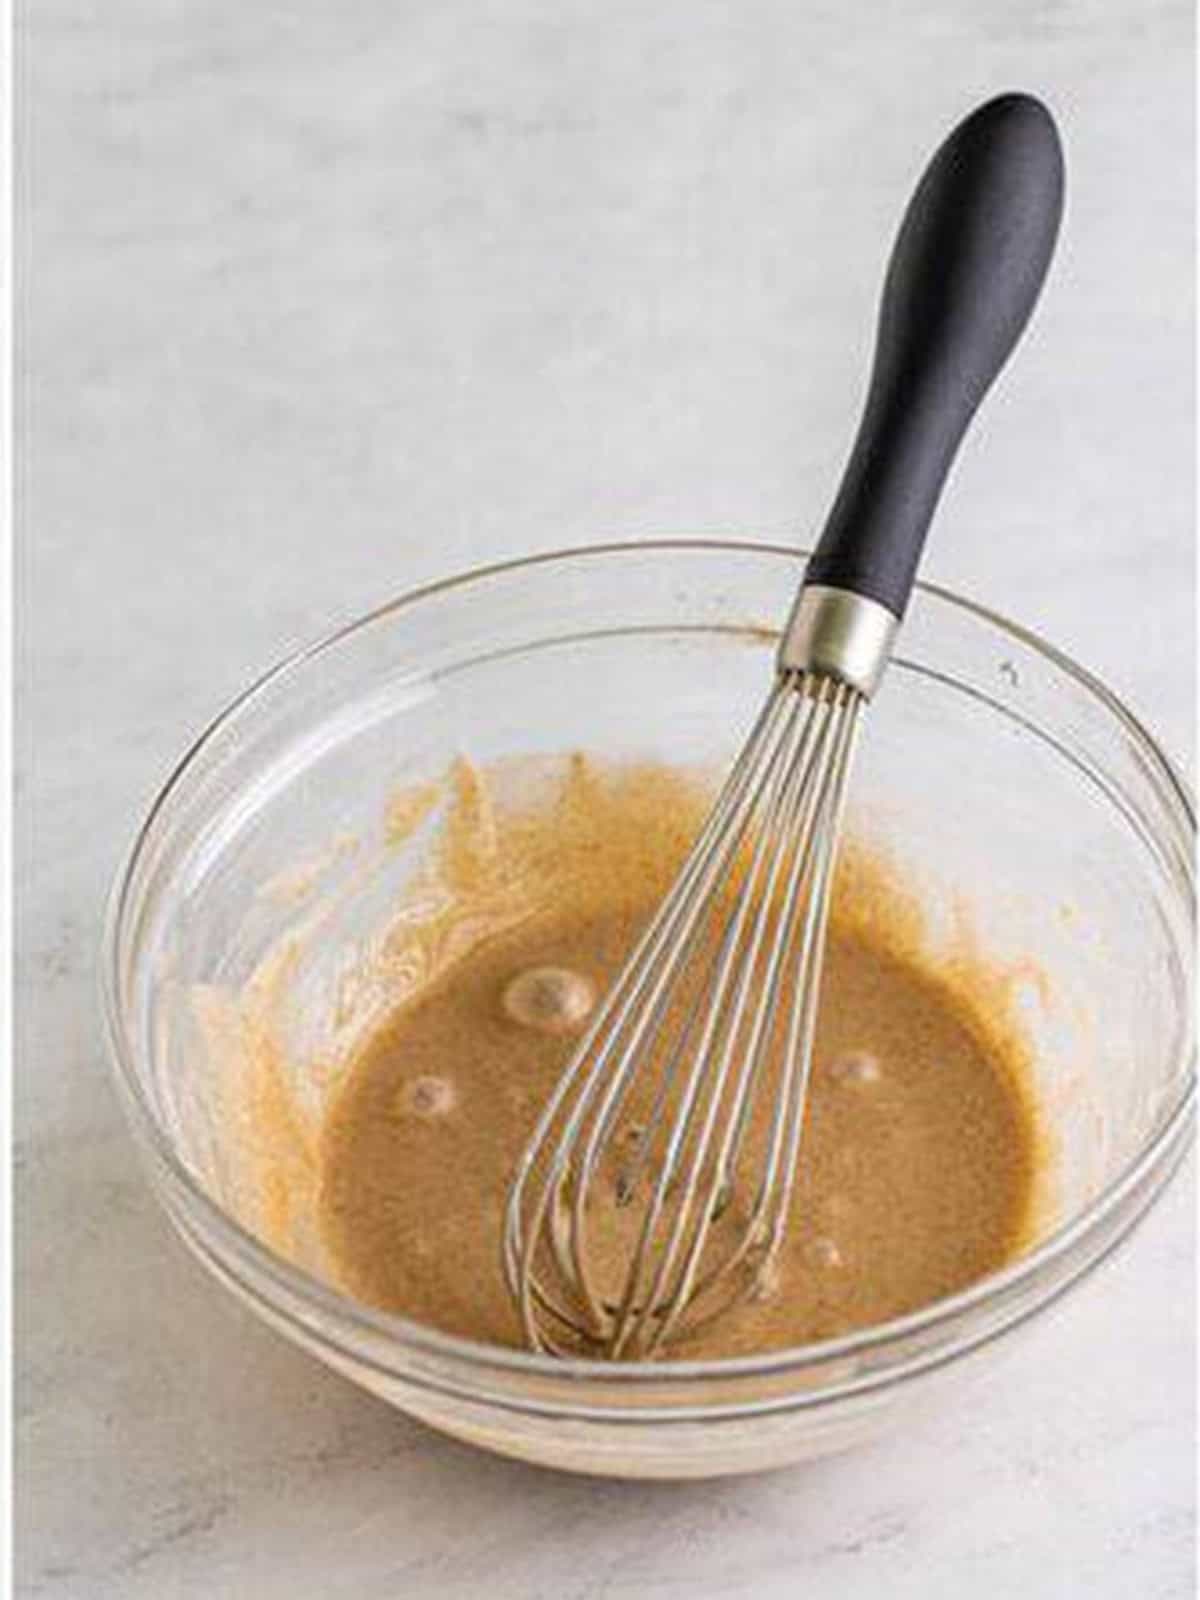
- Whisk the powdered sugar, cinnamon, vanilla, and milk into a glaze.
- Spread the glaze over the cooled pop tarts and let it set before serving.
Recipe Tips & Tricks
- Keep the butter cold for the flakiest pastry, even chilling the dough again if it gets soft.
- Do not overfill or the filling will leak out during baking.
- Crimp firmly with a fork to seal the edges all the way around.
- Vent the tops with a few small holes so steam can escape.
- Cool before glazing so the glaze sets instead of melting off.
- Roll evenly so the rectangles match up and seal cleanly.
- Plan the whole menu. This pairs effortlessly with our cinnamon sugar sweet chex mix when company is coming.
- Plan the whole menu. This pairs effortlessly with our smooth brown sugar frosting when company is coming.
- Make it a full spread. Our strawberry donuts rounds out the table.
Serving Ideas and Suggestions
These homemade pop tarts are a fun breakfast or snack served slightly warm with a cold glass of milk or a hot cup of coffee. They are perfect for a weekend baking morning.
Homemade Pop Tarts FAQs
Most people think so. Homemade pop tarts are flaky and buttery with a real brown sugar cinnamon filling, instead of the processed taste of the boxed kind. They are absolutely worth the small effort.
Yes. You can make the dough a day or two ahead and keep it chilled, or assemble the unbaked homemade pop tarts and refrigerate them until you are ready to bake. Glaze after baking and cooling.
Do not overfill, leave a clear border around the edges, and crimp firmly with a fork. Chilling the assembled homemade pop tarts before baking also helps them hold their shape.
Yes. Freeze the baked, unglazed homemade pop tarts for up to 2 months. Reheat in the oven or toaster and add glaze after warming.
Absolutely. Refrigerated pie crust is a great shortcut for homemade pop tarts. Just cut it into rectangles and fill, top, and crimp as written.
Beyond brown sugar cinnamon, homemade pop tarts are delicious with jam, chocolate spread, or fruit preserves. Use a thick filling so it does not run out while baking.

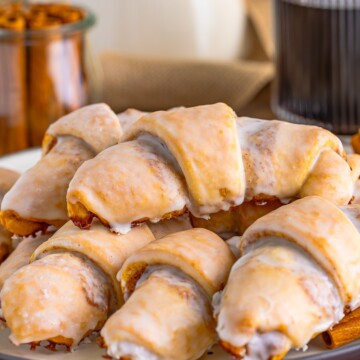
Still filling out the menu? Readers love pairing this one with our pork tenderloin marinade, candied pecans recipe, homemade brown sugar cinnamon pop tarts, and cinnamon sugar graham cracker crack.
And when you are planning next week’s dinners, our banana cream cheese muffins and crescent roll cinnamon rolls keep the same easy comfort going.

Homemade Pop Tarts
Ingredients
For the crust
- 2 & 1/2 cups all-purpose flour
- 2 tablespoons granulated sugar
- 1 cup cold salted butter cut into small cubes
- 1 teaspoon vanilla extract
- 1/2 cup cold water
For the filling
- 1/2 cup light brown sugar packed
- 1 tablespoon salted butter melted
- 1 tablespoon all-purpose flour
- 2 teaspoons ground cinnamon
For the glaze
- 1 cup powdered sugar
- 1/2 teaspoon ground cinnamon
- 1 – 2 tablespoons milk
- 1/2 teaspoon vanilla extract
Instructions
- Place the flour and sugar into a food processor. Pulse a few times to combine.
- Add the cold cubed butter and pulse until combined, the butter should be broken up and there should be no butter pieces larger than a pea.
- Add the vanilla. Slowly stream in the water while the food processor is running. You want the crust just to come together, do not overmix.
- Form the crust into a ball and cover it with plastic wrap. Place in the fridge for 20-30 minutes to chill.
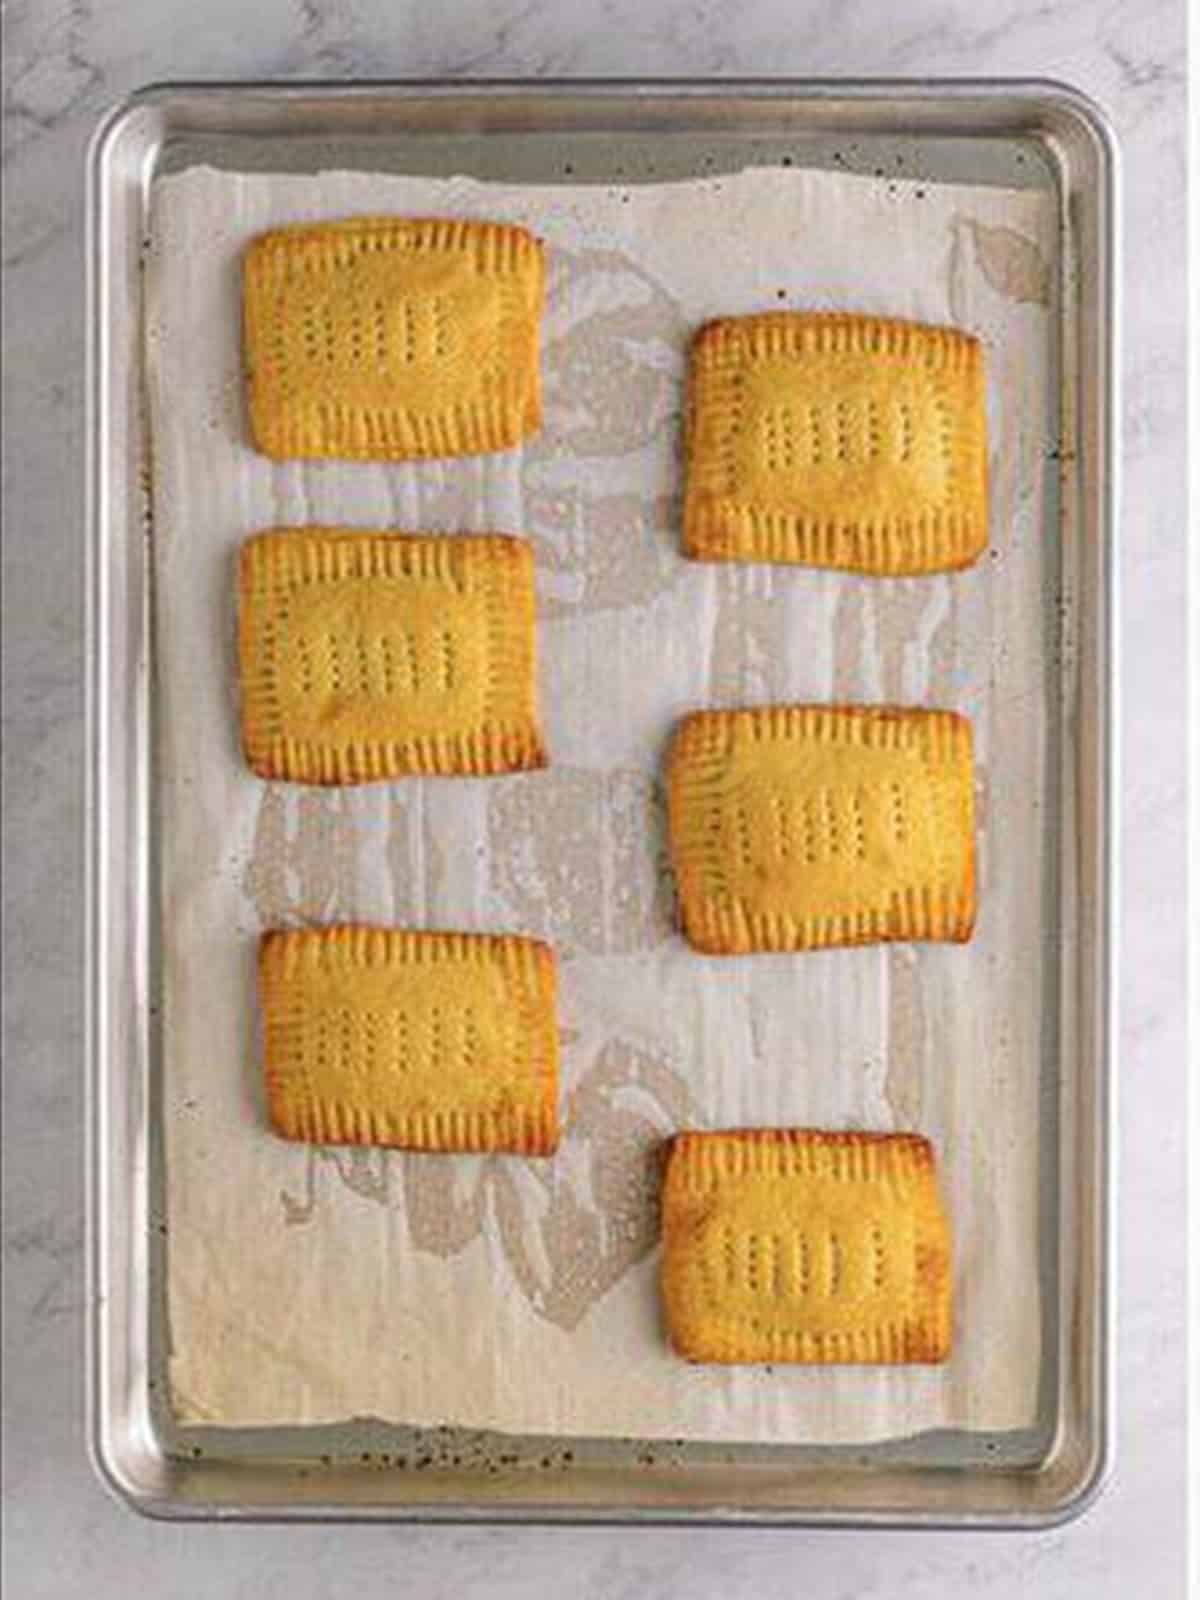
- Preheat the oven to 400°F. Line a large sheet tray with parchment paper, and set it aside.
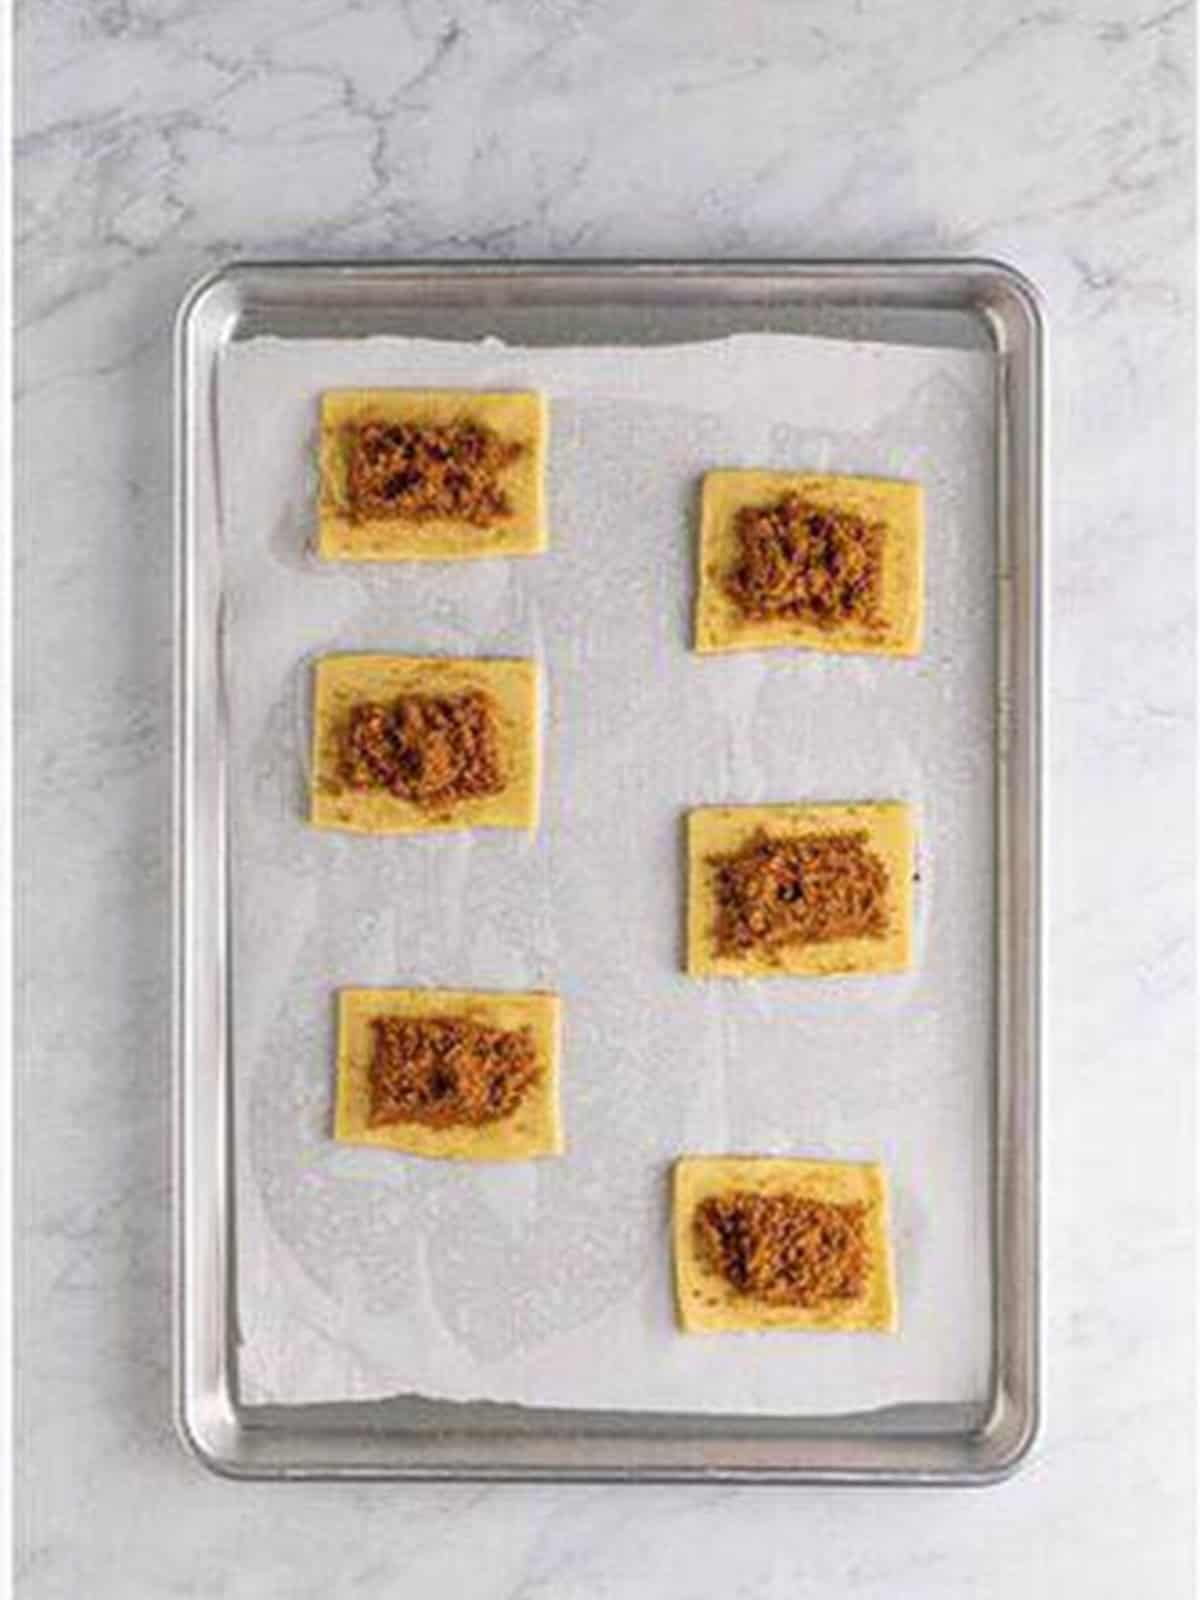
- Make the filling by stirring together the brown sugar, butter, flour, and cinnamon until fully combined. Set aside.
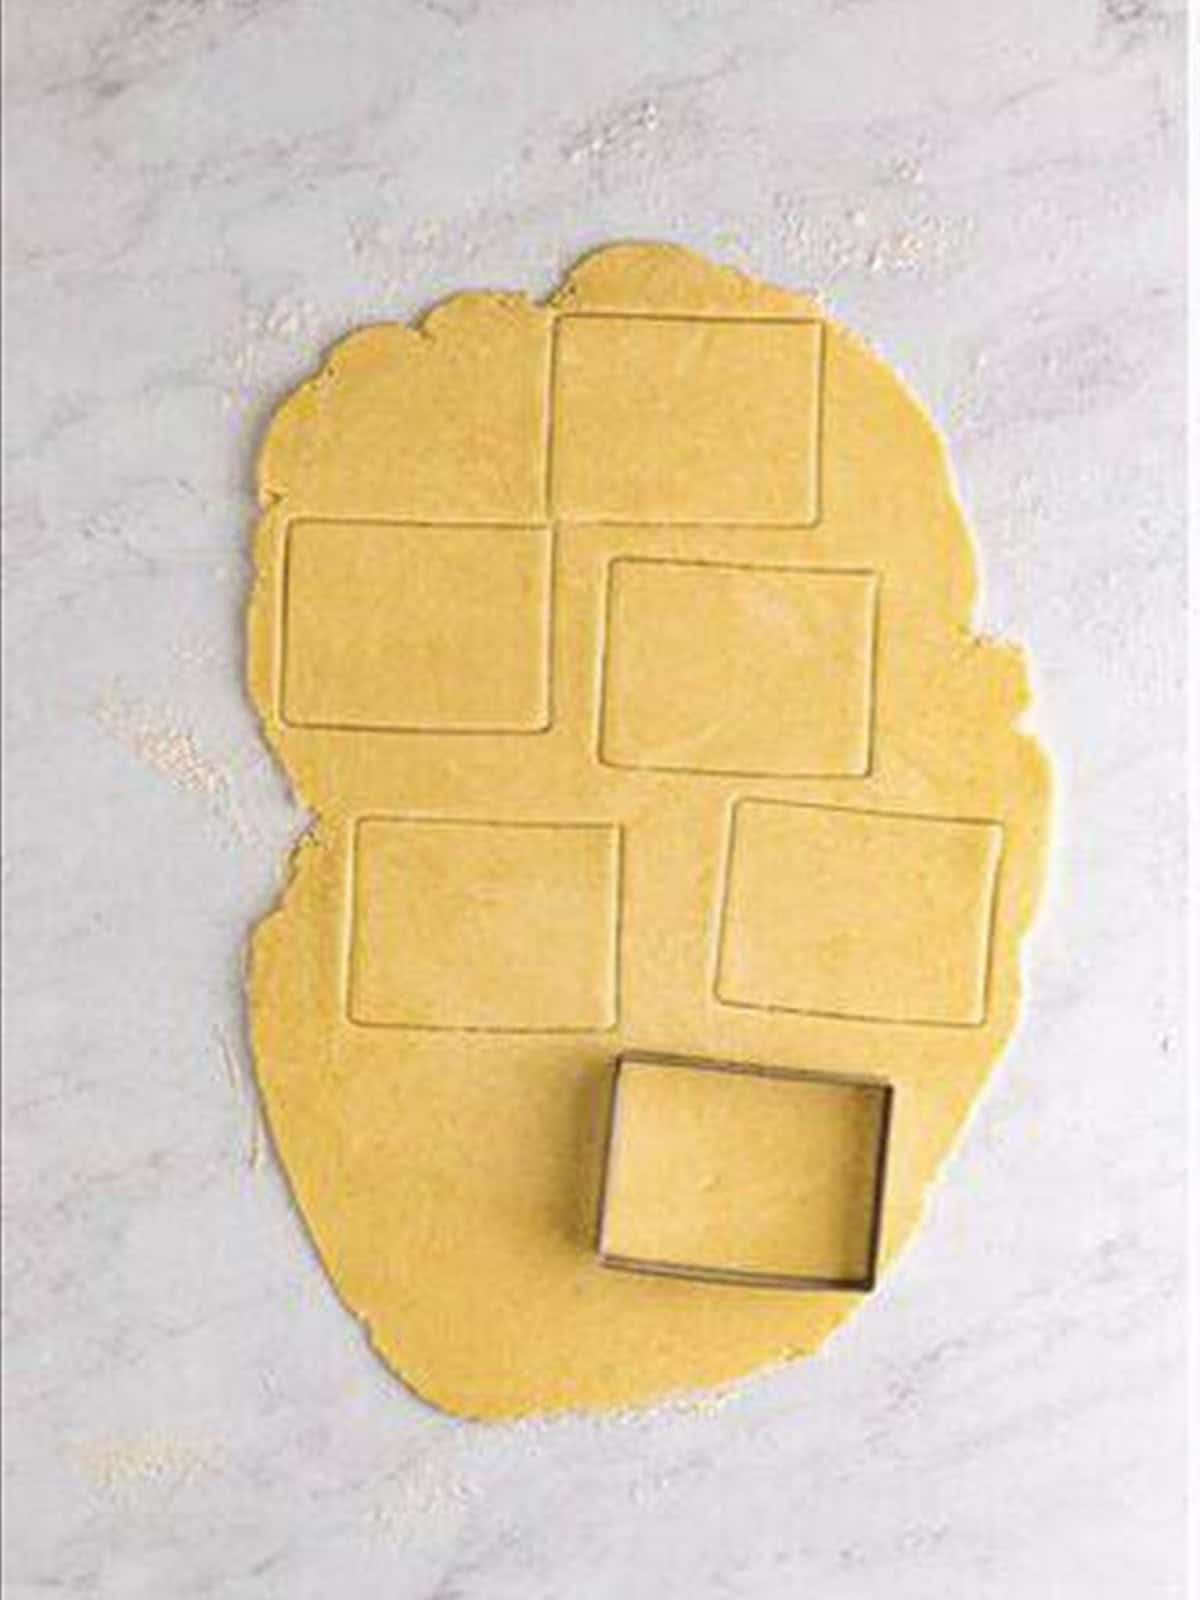
- On a lightly floured, clean work surface, roll out the dough into a 1/4th inch thick rough rectangle shape.
- Cut out rectangles from the dough using a 3×4 inch rectangle cookie cutter or something of similar size. You will need to roll out the scraps of dough again to cut more rectangles. We need 12 pieces.
- Place 6 of the crusts onto the prepared sheet tray, not touching.
- Place just under 2 tablespoons of the filling into the center of each crust with a ¼ inch border along the edges.
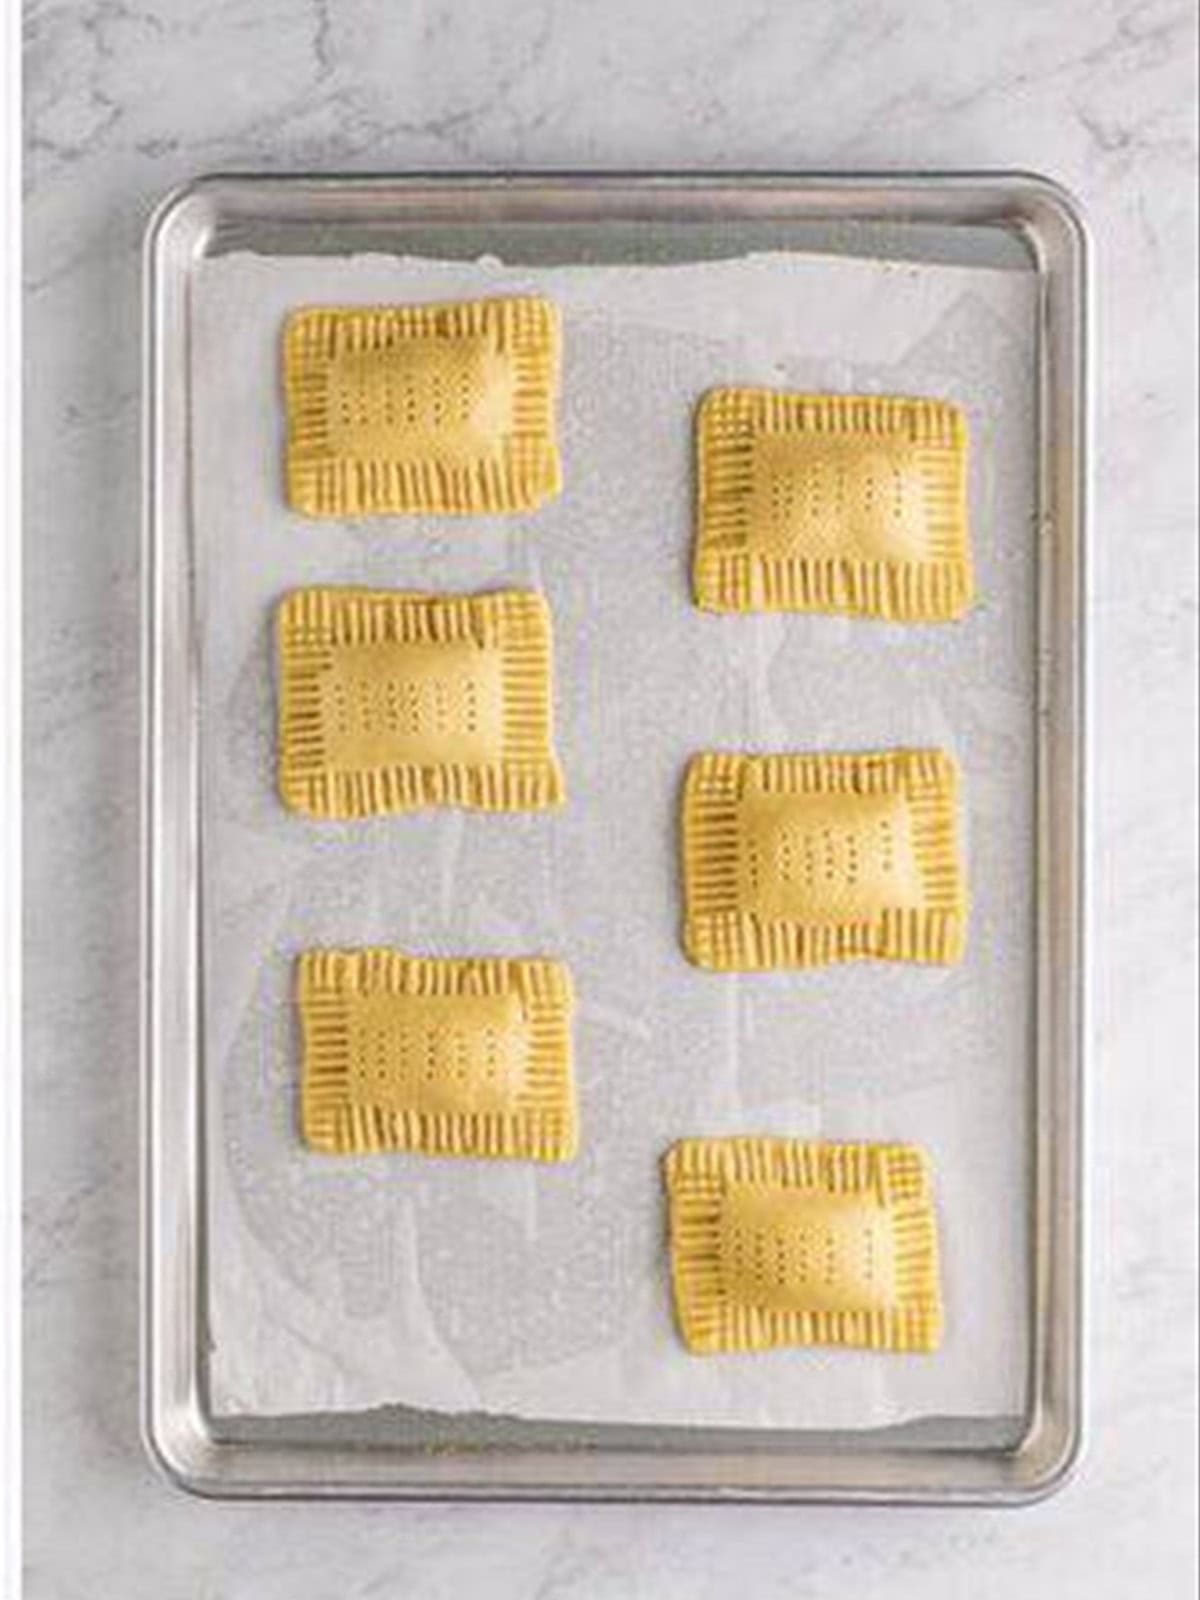
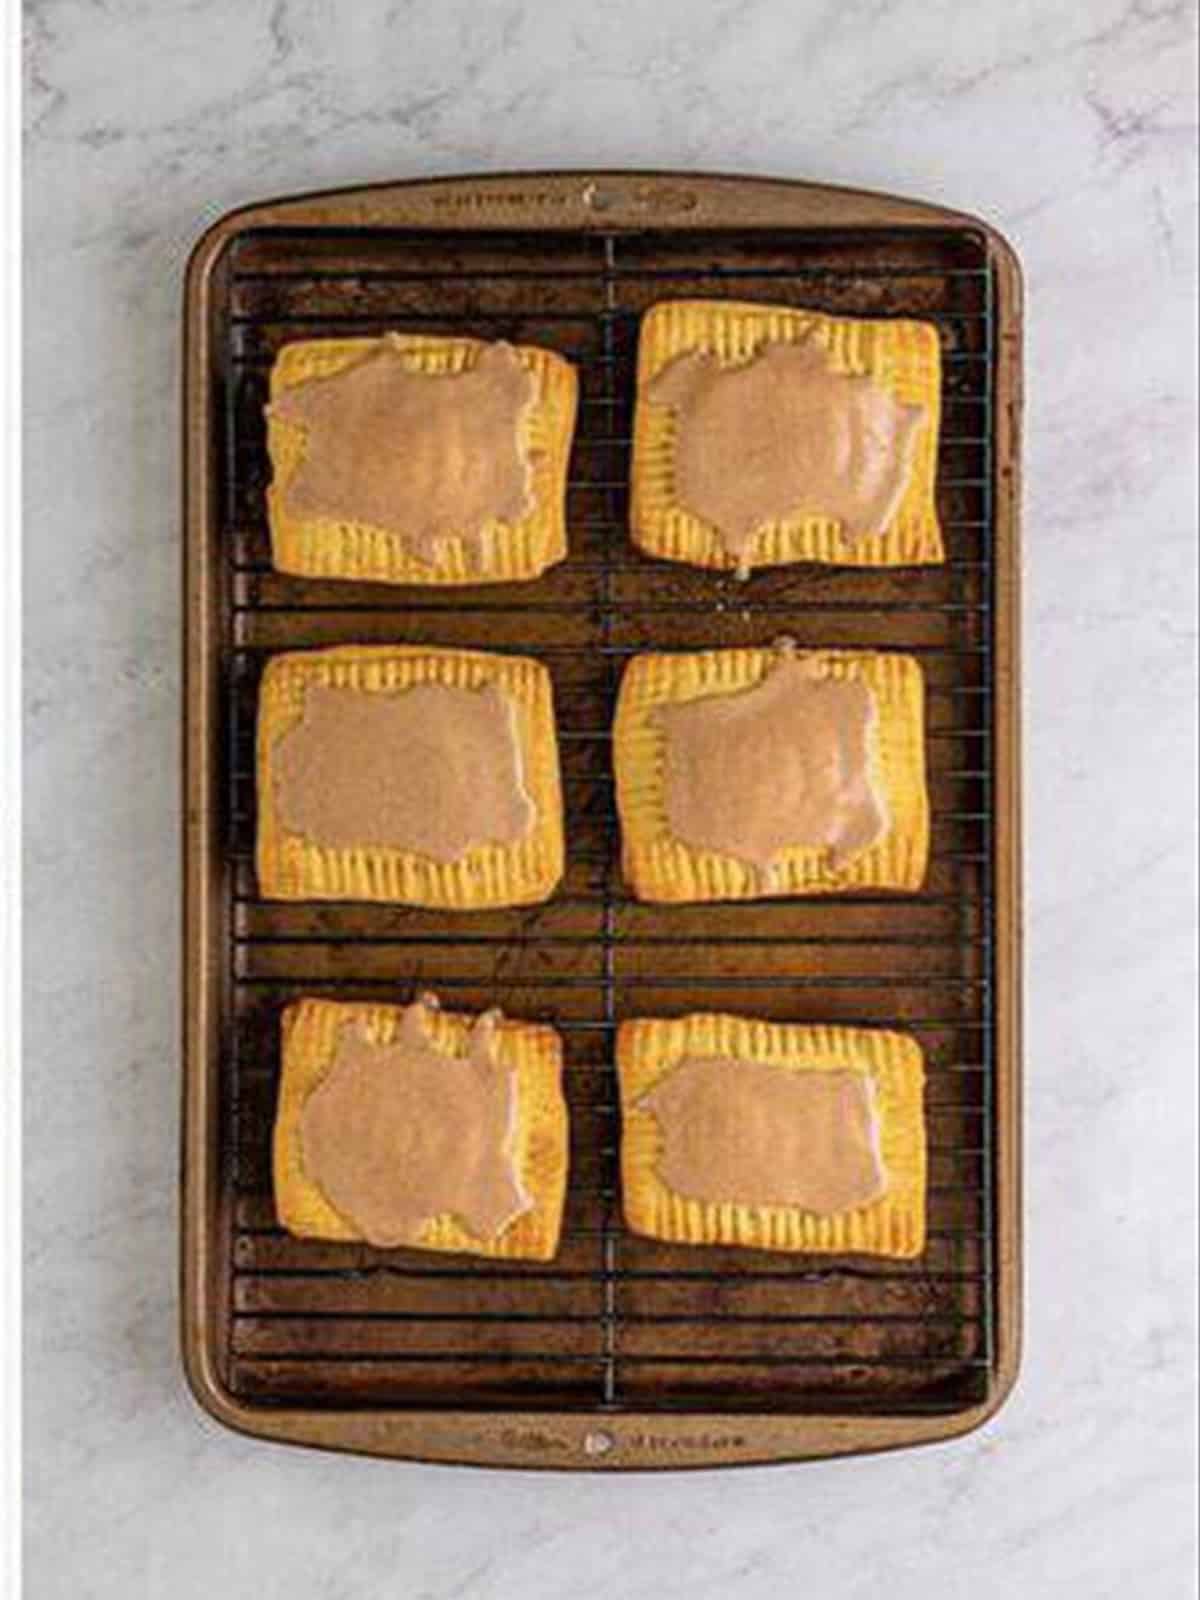
- Top with another crust and gently press down the edges. Take a fork and press the edges together to seal. Take the same fork and make 6 rows of ventilation holes over the center of the tarts.
- Bake for 15-18 minutes until golden brown. Let cool completely.
- Whisk together the powdered sugar, cinnamon, milk, and vanilla extract for the glaze. We want the glaze to be very thick but still pourable. Start with 1 tablespoon of the milk and add a little more at a time until the desired consistency.
- Place the tarts onto a wire rack over a sheet tray to catch any drips. Spoon the glaze on top of the tarts. Let the glaze set for 20 minutes.
Notes
- This makes 6 large pop-tarts, but you can easily double it to feed more.
- Other spices can be used, see above for how to do that.
- We love to enjoy these warm, pop them in the microwave for a few seconds. Do not toast them as they are glazed.
- Easily make the dough ahead of time for a quick treat.
- Use store-bought pie crusts in the box instead of making the dough.
- These can be frozen, see above on how to do that.
- Use this as a base recipe to make different flavors.
- Use dark brown sugar in place of light if that’s what you have on hand.
Nutrition
Love This Recipe?
Follow @ThisSillyGirlsKitchen on Instagram and @danadevolk on Pinterest for more!


Yes, you can do this by hand actually as you would a normal pie crust using either forks or a pastry cutter for the butter step.
I really want to make these! I don’t have a food processor though. Can I just use a hand mixer? Or a blender? Do you think either of these would work? Thank you.