This post may contain affiliate links.
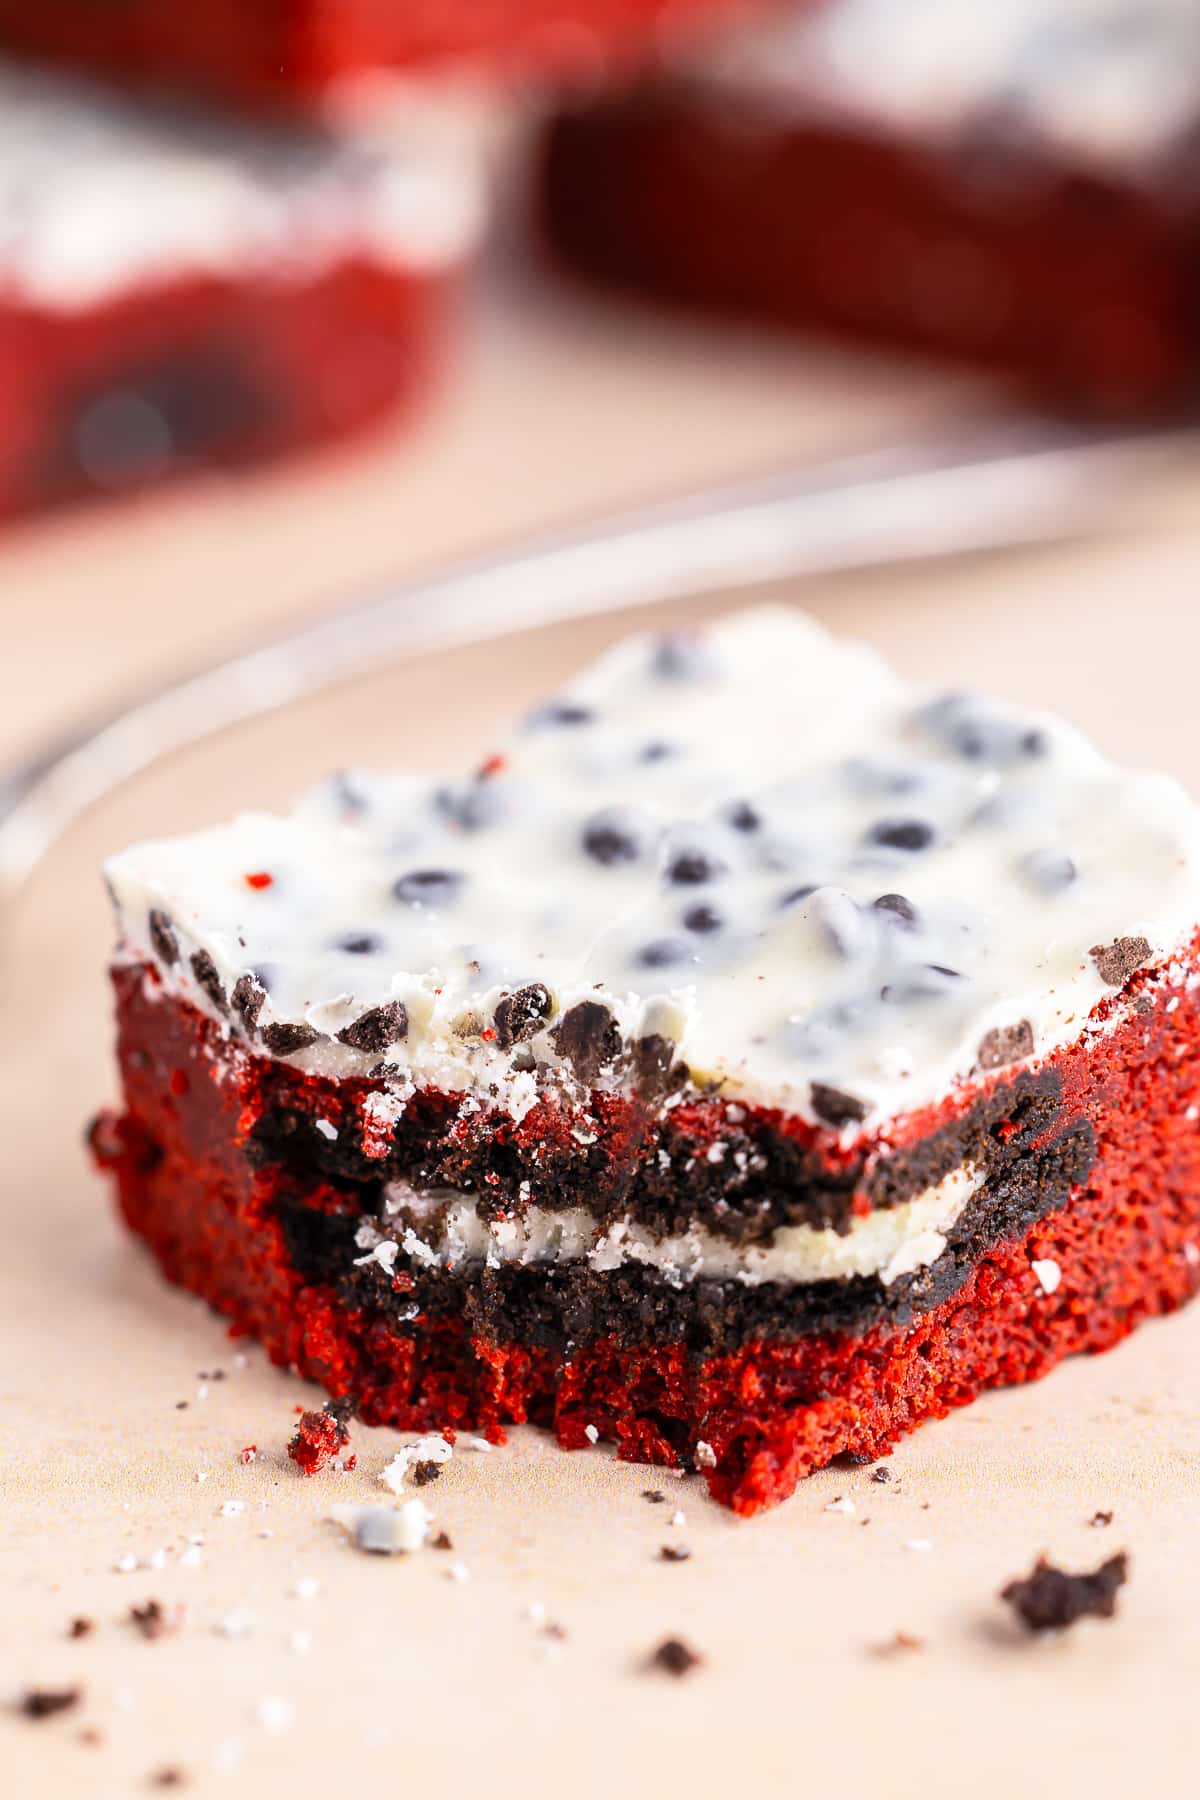
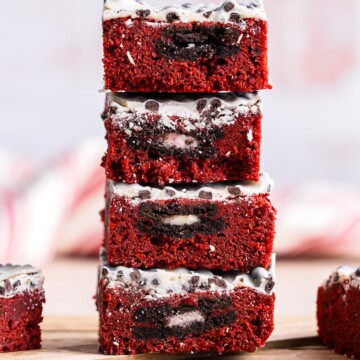
Red Velvet Brownies stuffed with Oreos and topped with a melty cookies and cream layer are the over-the-top dessert that stops people in their tracks. I made a pan for a Valentine’s weekend treat and Maddie and Lizzie fought over the corner pieces with the most topping. They are as fun and fudgy as our Fudgy Condensed Milk Brownies.
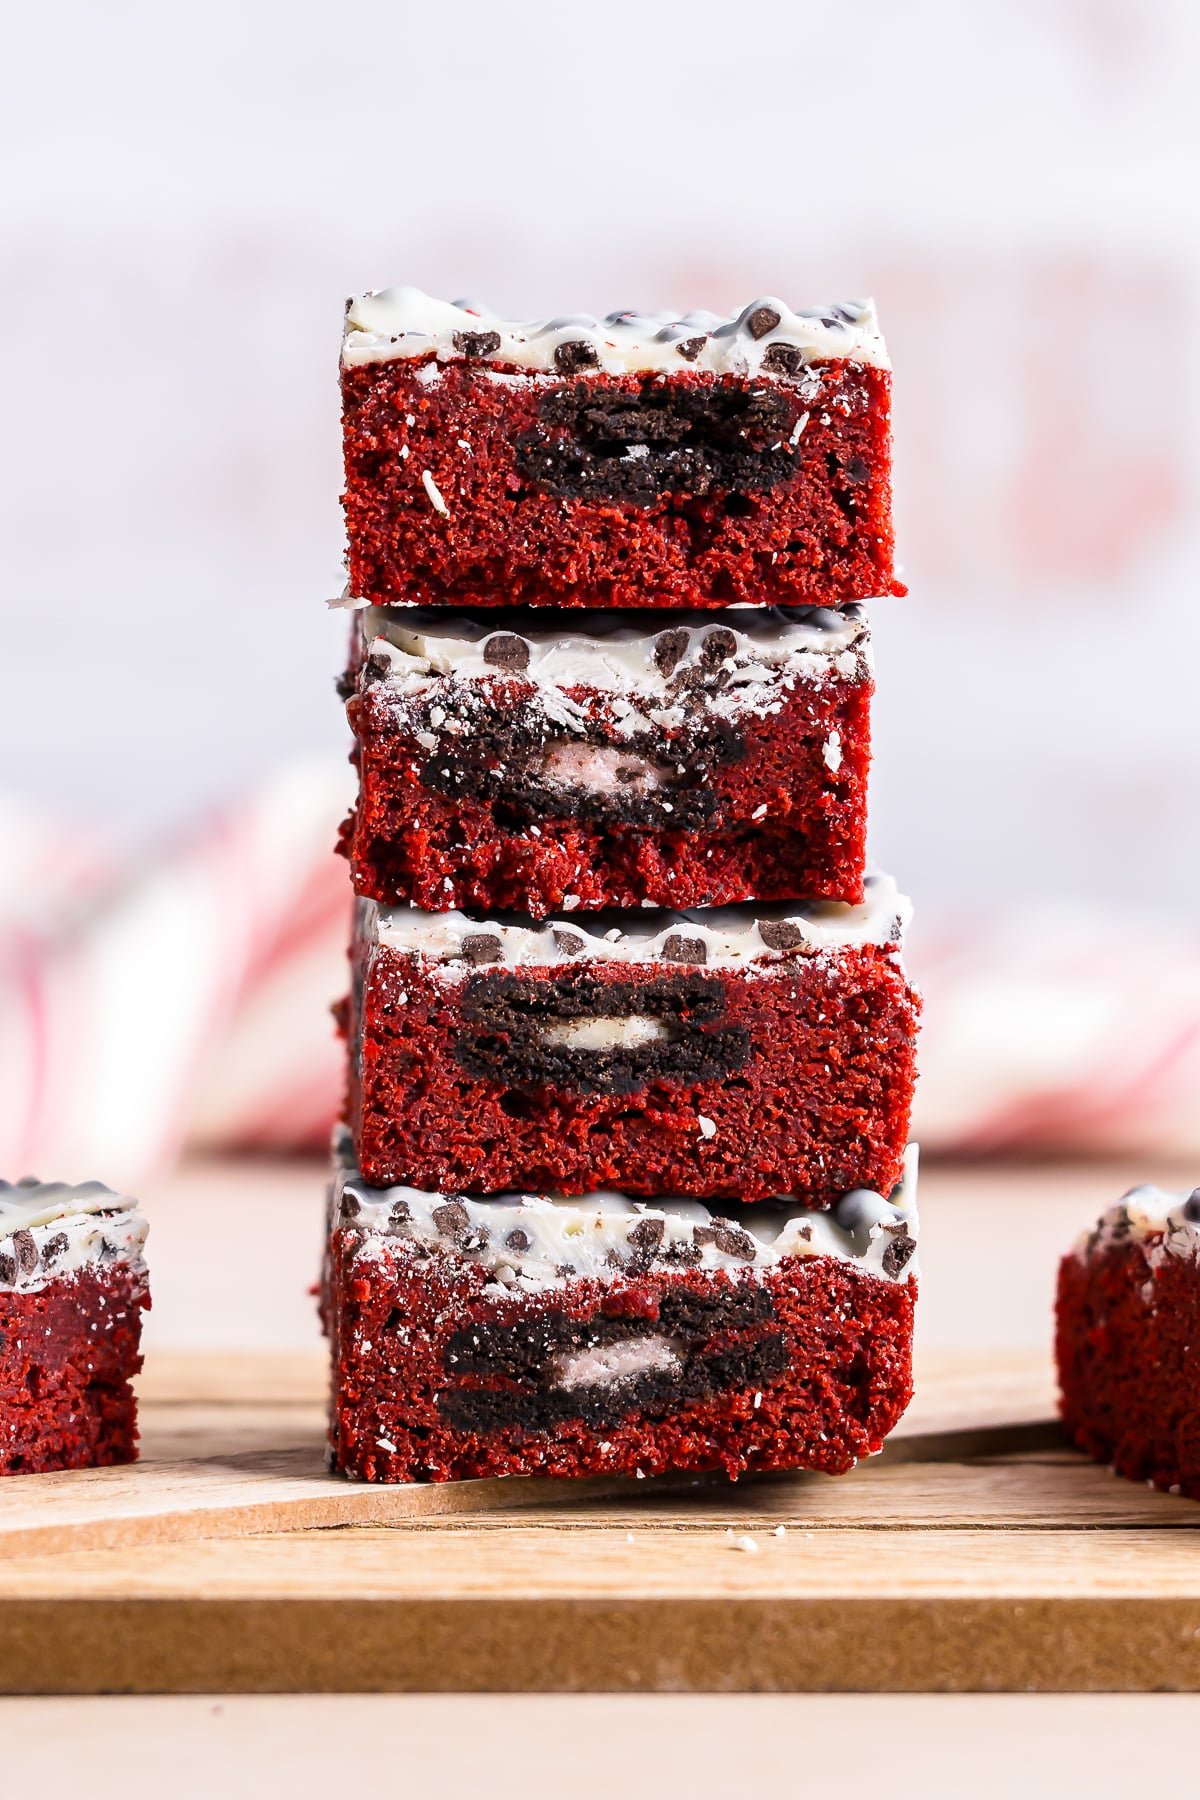
A rich red velvet brownie batter gets layered with a full row of Oreos, baked until fudgy, then topped with melted cookies and cream kisses for a triple-cookie dessert.
Red Velvet Brownies Quick Look
- 🕒 Prep Time: 10 minutes
- 🌡️ Cook Time: 20 minutes
- ⏳ Total Time: 50 minutes
- 🍽️ Serving: 16 brownies
- ⚡ Calories: 312kcal
- 🌶️ Flavor Profile: Fudgy red velvet with cookies and cream and Oreo crunch
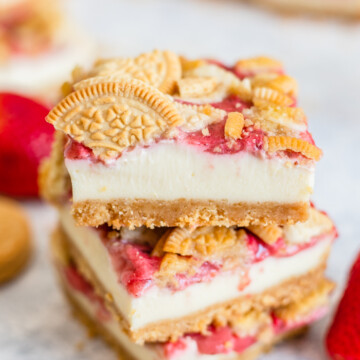
- ✋ Difficulty: Easy, about as simple as our Golden Oreo Cheesecake Bars
Quick Answer
Whisk flour, cocoa, and salt. Beat melted butter with brown sugar, then mix in eggs, vanilla, and red food coloring. Stir in the flour mixture. Spread half the batter in a pan, layer with Oreos, and top with the rest. Bake at 350 degrees F for 18 to 20 minutes, then press cookies and cream kisses on top, let them melt, and smooth into a creamy topping.
Jump to:
- Red Velvet Brownies Quick Look
- Quick Answer
- Why This Recipe Works
- Why You’ll Love This Recipe
- Key Ingredients
- Variations and Substitutions
- How to Make Red Velvet Brownies
- Recipe Tips & Tricks
- Serving Ideas and Suggestions
- Red Velvet Brownies FAQs
- Other Recommended Brownie and Bar Recipes
- Red Velvet Cookies and Cream Brownies Recipe
Why This Recipe Works
Click to see the technique science
- Melted butter makes them fudgy. Using melted butter instead of creamed gives these red velvet brownies a dense, fudgy texture instead of a cakey one.
- A hidden Oreo layer. A full row of Oreos baked into the middle adds crunch and a cookies and cream surprise in every bite.
- Melted kisses make an easy topping. Pressing cookies and cream kisses onto the warm brownies lets them melt into a smooth, no-fuss frosting layer.
- Cocoa plus red gel. A little cocoa powder and red gel coloring give that classic red velvet color and subtle chocolate flavor.
- Brown sugar adds chew. Packed brown sugar keeps the brownies moist and chewy with a hint of caramel depth.
- Chilling makes clean cuts. A quick chill sets the topping so the bars slice into clean, bakery-neat squares.
Why You’ll Love This Recipe
- A triple dose of cookies and cream with Oreos baked in and kisses melted on top.
- They are fudgy, fun, and festive, perfect for Valentine’s Day or any time you want a showstopper like our Strawberry Earthquake Cake.
- Everything comes together in one bowl and a single 9×9 pan.
- It has earned a permanent spot in our rotation, right up there with our red velvet sandwich cookies.
- It earns a spot in the rotation right next to our gooey butter cake squares.
Key Ingredients
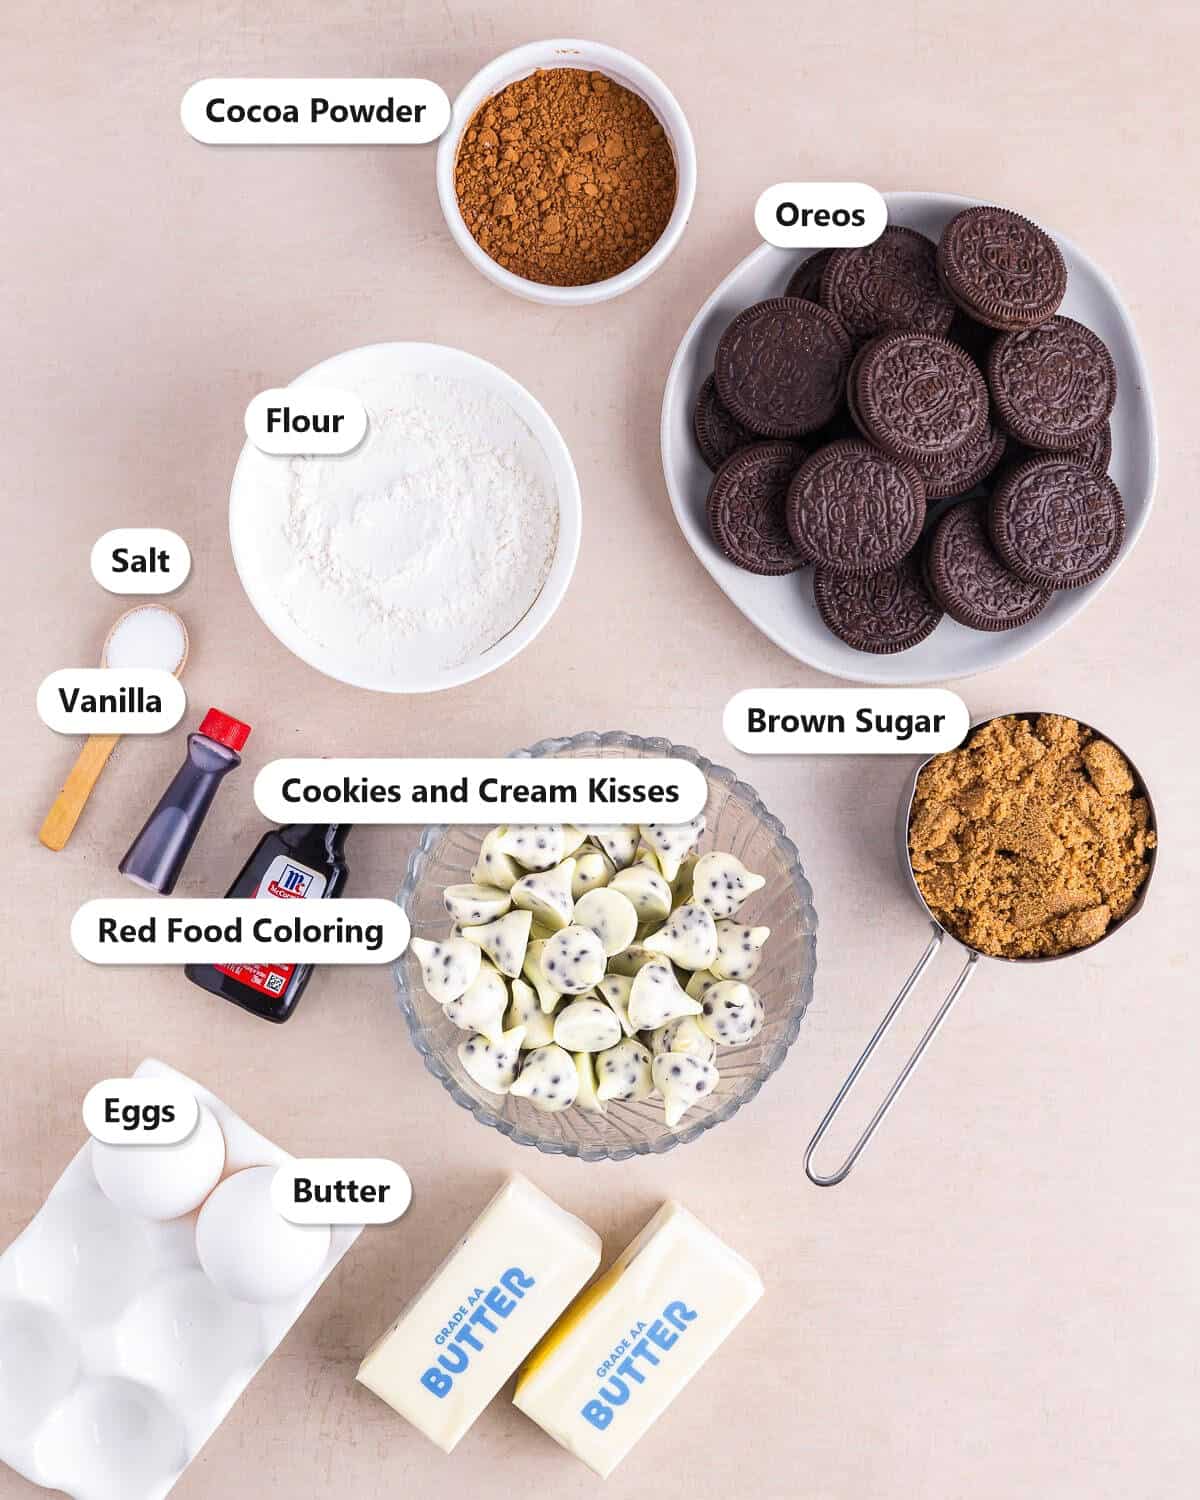
These Red Velvet Brownies use simple pantry staples plus Oreos and cookies and cream kisses for the fun layers.
- Cocoa Powder: Just a couple tablespoons gives the brownies a subtle chocolate flavor and classic red velvet base.
- Red Food Coloring Gel: Gel coloring gives the brightest red without thinning the batter.
- Oreos: A full layer of Oreos baked into the center adds the cookies and cream crunch.
- Cookies and Cream Kisses: Melted on top, they make an easy, creamy frosting layer.
- Brown Sugar: Keeps the brownies moist, chewy, and rich with a caramel note.
See recipe card for exact quantities.
Variations and Substitutions
These Red Velvet Brownies are easy to customize for any occasion.
- Use a boxed shortcut: Start with a red velvet cake or brownie mix if you are short on time.
- Swap the kisses: Use white chocolate chips or a white chocolate ganache for the topping.
- Change the cookies: Try Golden Oreos or mint Oreos for the middle layer.
- Add cream cheese: Swirl in a little sweetened cream cheese for a red velvet cheesecake brownie.
- Make them festive: Add holiday sprinkles on top before the kisses set.
- Craving a different flavor next time? Our red velvet blossom cookies delivers the same easy comfort with its own twist.
- In the mood for something different? Our black bean brownies scratches a similar itch.
How to Make Red Velvet Brownies
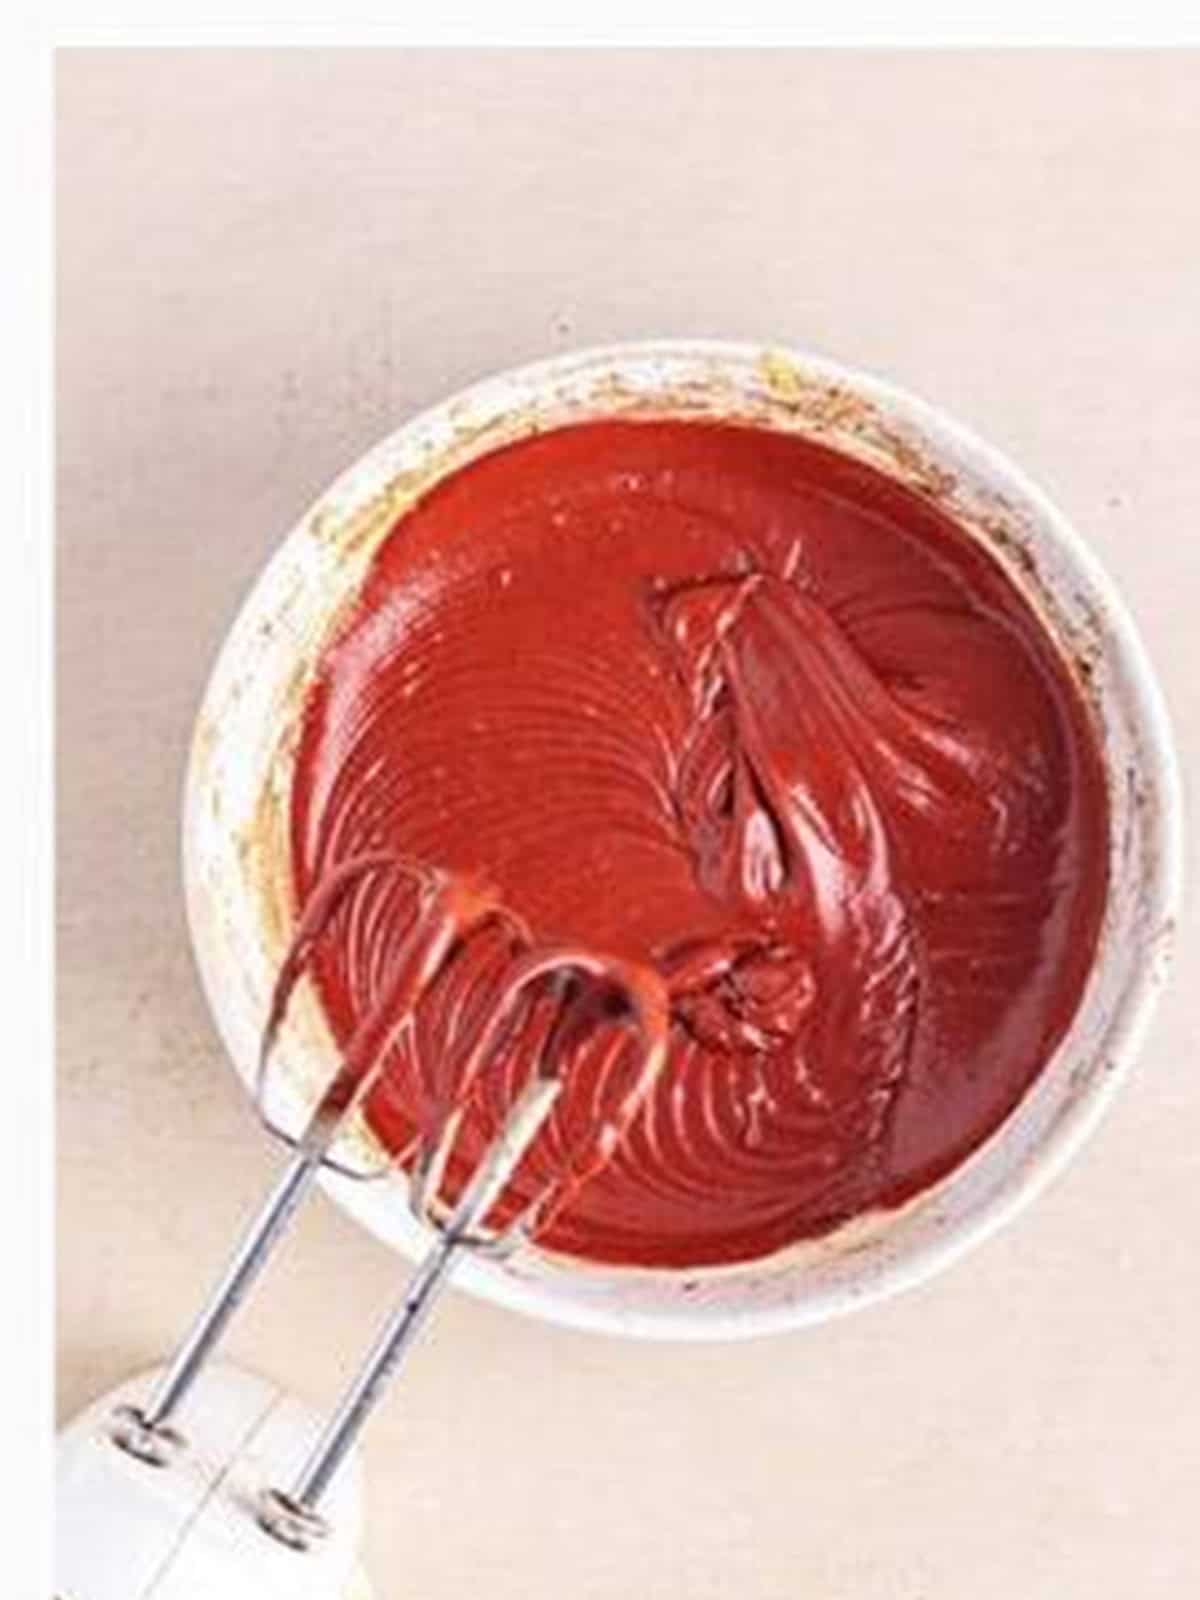
- Preheat the oven to 350 degrees F and line a 9×9 pan. Whisk the flour, cocoa, and salt. Separately beat the melted butter and brown sugar, add the eggs, vanilla, and red food coloring, then mix in the flour until you have a smooth batter.
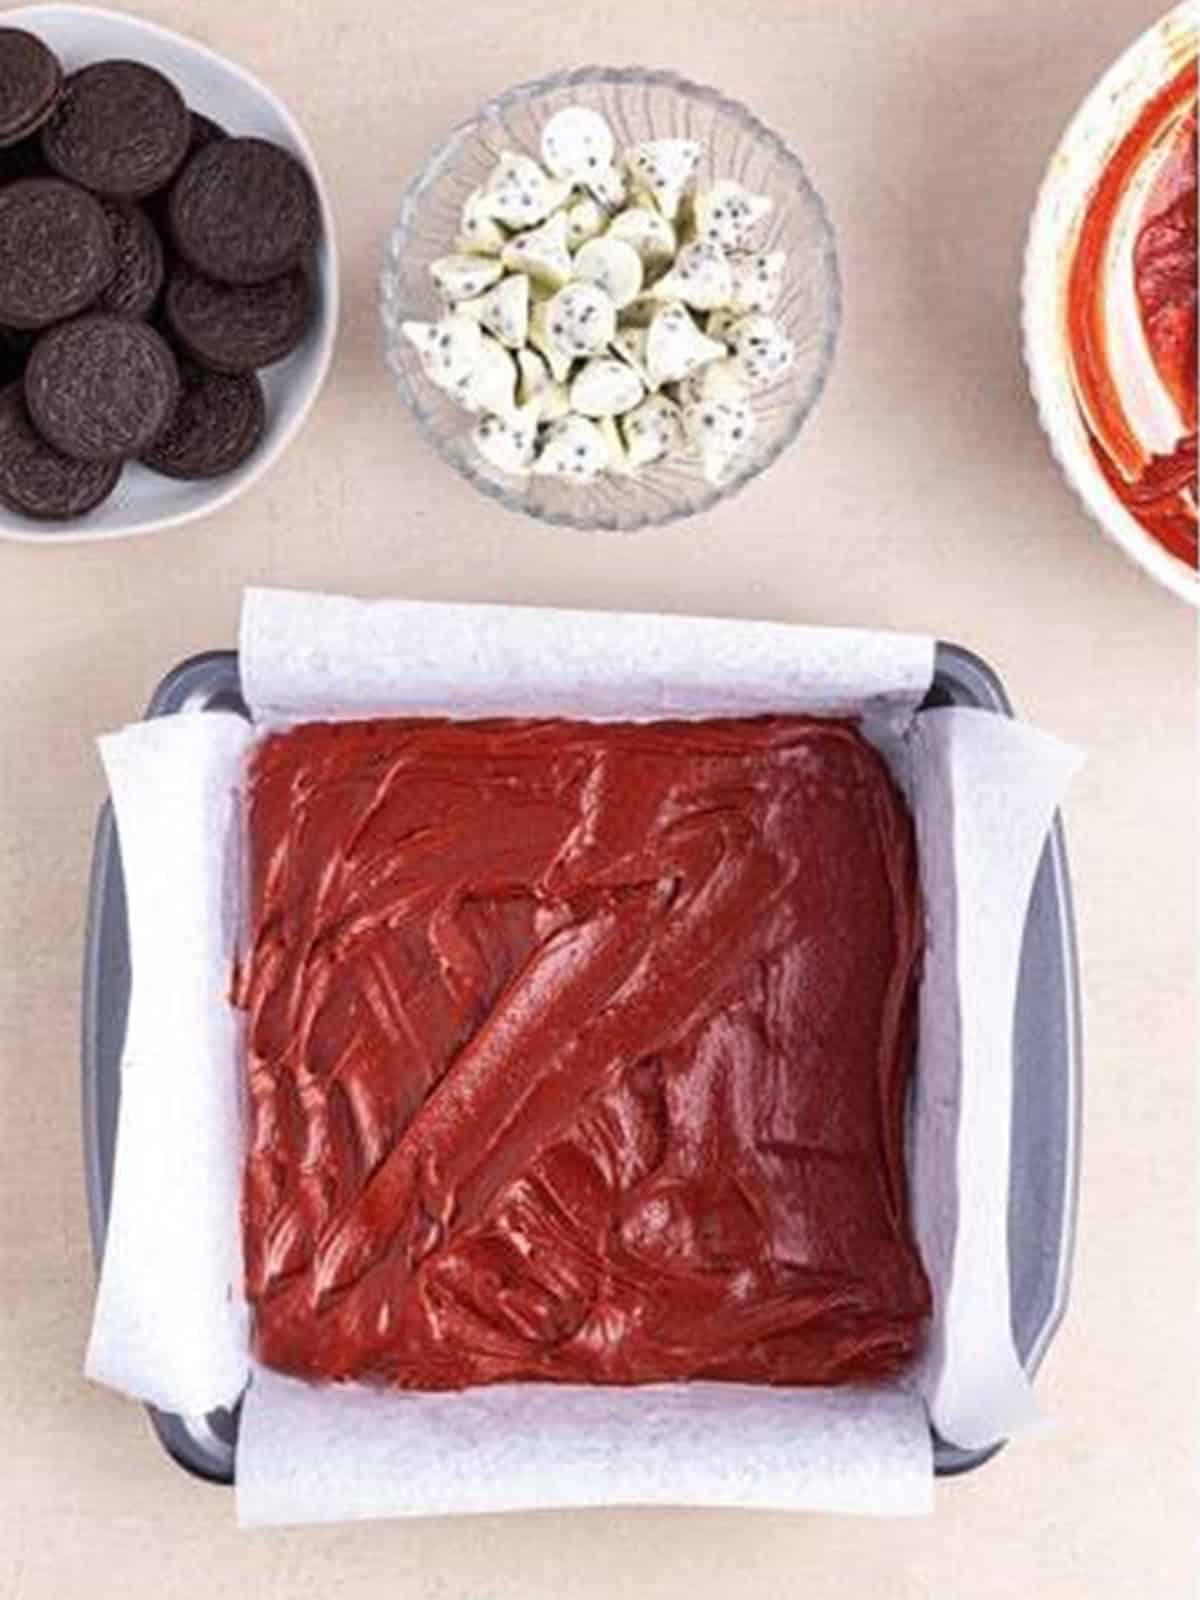
- Spread half of the brownie batter evenly into the bottom of the prepared pan.
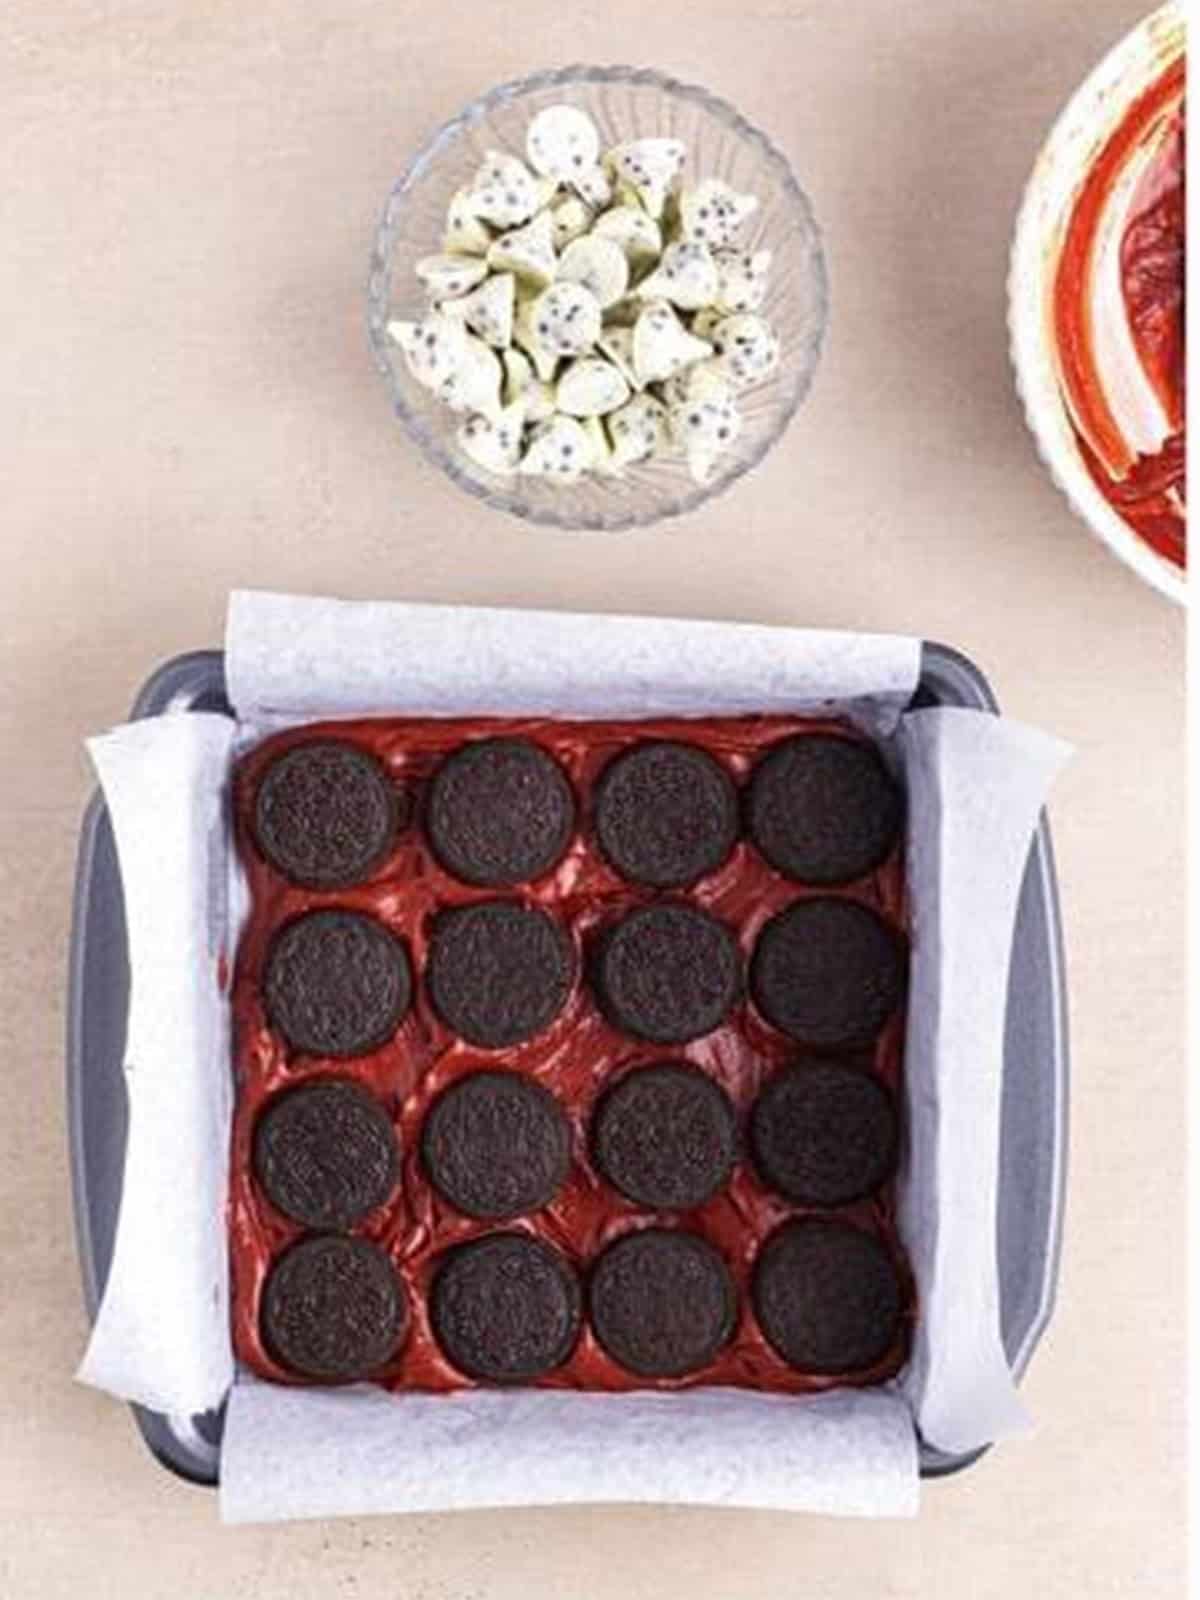
- Arrange a single layer of Oreos over the batter, covering as much of the surface as possible.
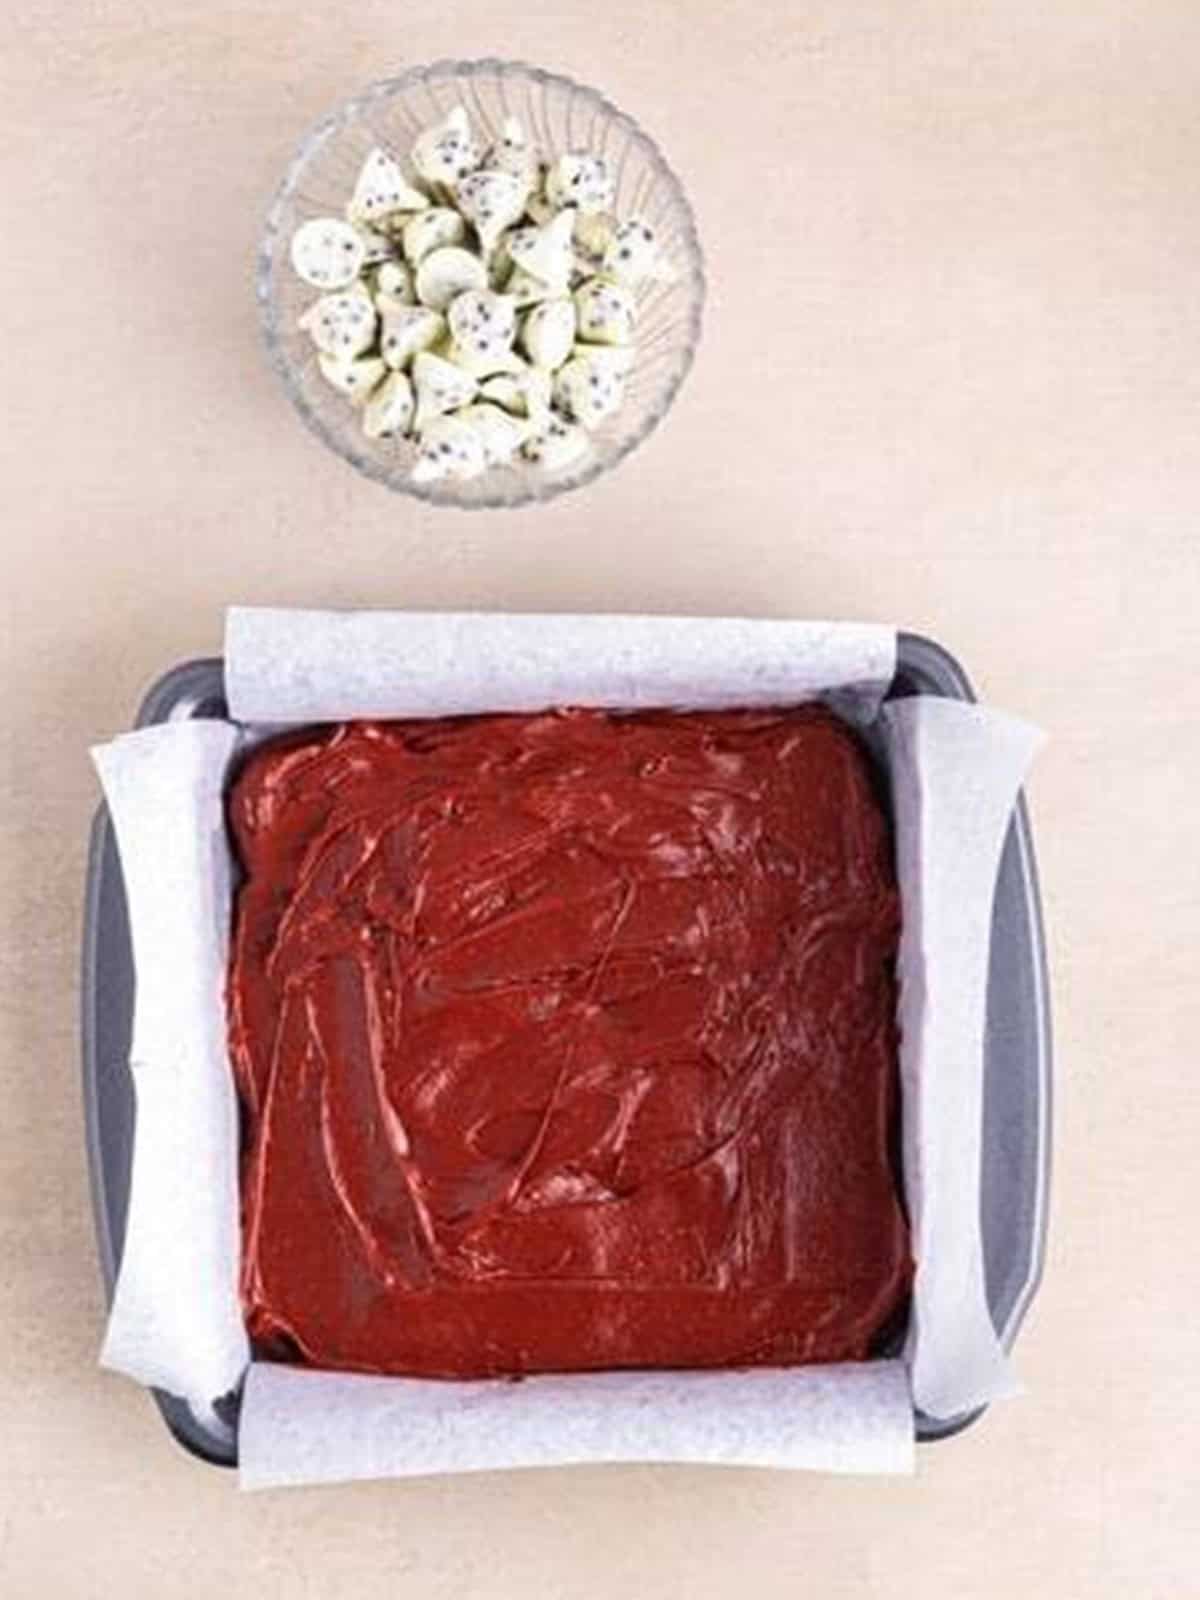
- Pour the remaining batter over the Oreos and smooth the top, then bake for 18 to 20 minutes until a toothpick comes out mostly clean.
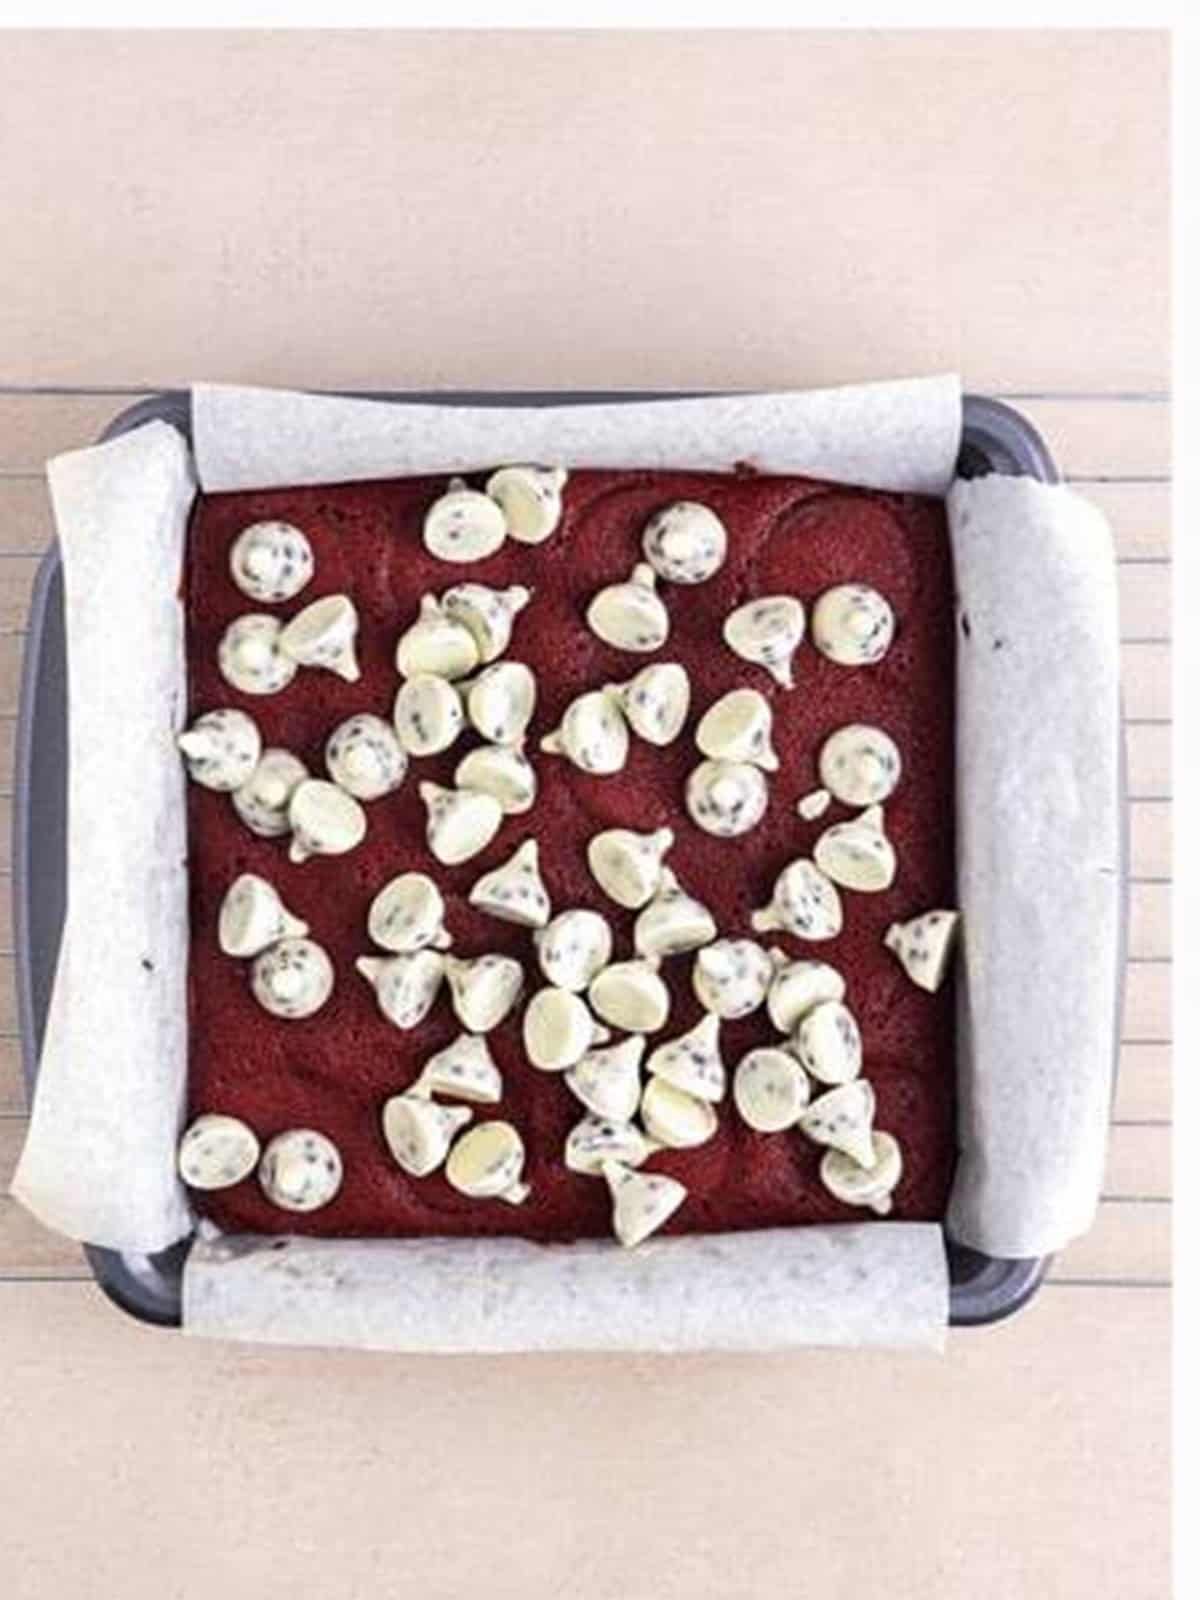
- Place the pan on a wire rack and immediately top the warm brownies with the cookies and cream kisses.
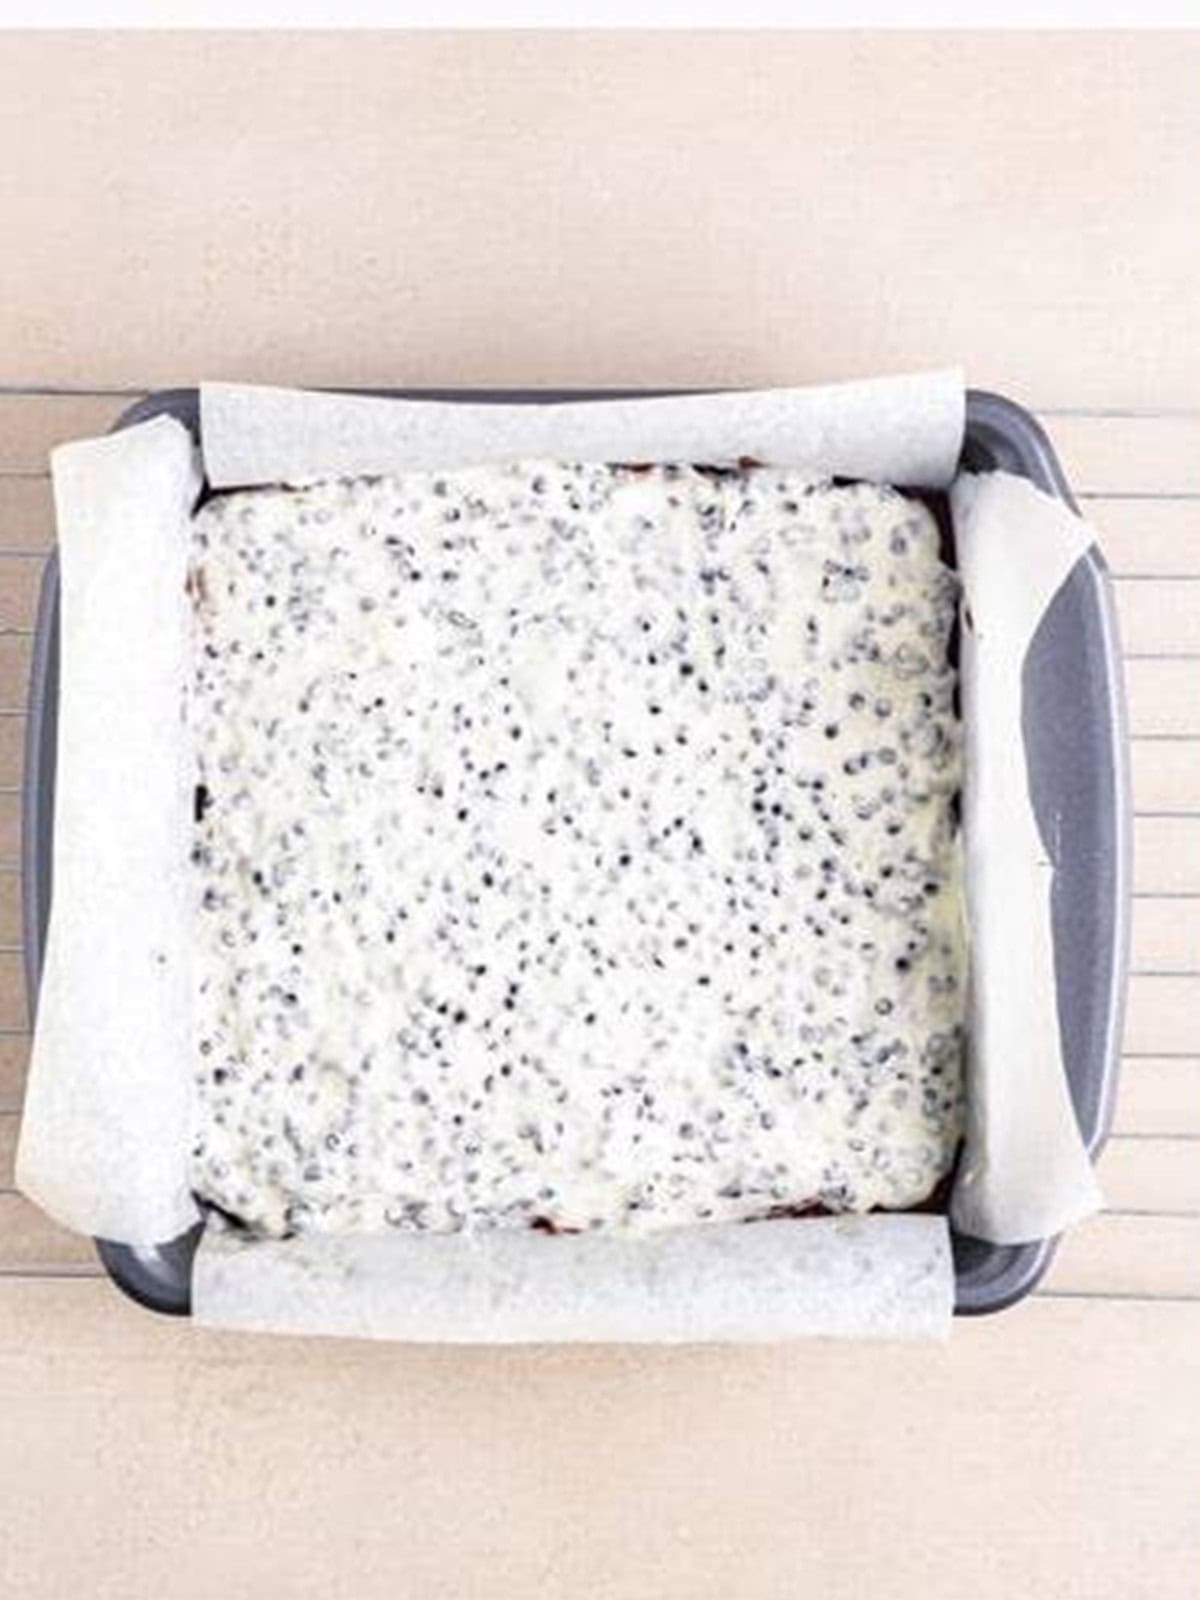
- Wait about 10 minutes for the kisses to soften, then smooth them into an even topping. Cool, chill to set, and cut into bars.
Recipe Tips & Tricks
- Use gel food coloring. Gel gives a vivid red without adding extra liquid that would thin the batter.
- Do not overbake. Pull the brownies when a toothpick comes out with a few moist crumbs for the fudgiest texture.
- Line the pan with parchment. An overhang lets you lift the whole slab out for clean, easy cutting.
- Let the kisses melt before smoothing. Give them about 10 minutes on the warm brownies so they spread easily.
- Chill before slicing. An hour in the fridge sets the topping so the bars cut into neat squares.
- Wipe the knife between cuts. A clean, warm knife gives the prettiest brownie edges.
- Make it a spread. When you are feeding a crowd, round out the table with our red velvet ice cream.
- Make it a full spread. Our Valentine rice krispie treats rounds out the table.
Serving Ideas and Suggestions
These Red Velvet Brownies are a showstopper on any dessert table. Serve them with a cold glass of milk or alongside our Golden Oreo Cheesecake Bars for a cookies and cream lover’s dream.
And readers who make this one tell us they also love our red velvet pancakes with cream cheese fluff, so consider that your next kitchen win.
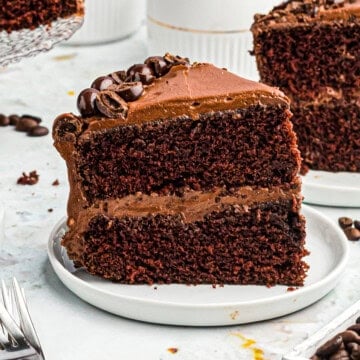
If you are building a whole menu around it, our red velvet bundt cake is a natural companion on the table.
They are perfect for Valentine’s Day, Christmas, and parties thanks to that bright red color. Pair them with other festive treats like our Strawberry Earthquake Cake and Italian Love Cake.
Add a dollop of our Chocolate Whipped Cream or a scoop of ice cream to take them over the top. For more easy chocolate treats, try our Fudgy Brownies next.
Red Velvet Brownies FAQs
They use a red velvet batter with a touch of cocoa and red gel coloring, plus a hidden layer of Oreos baked inside and a melted cookies and cream topping. The result is fudgier and more decadent than a plain brownie.
Yes. To save time, start with a red velvet cake mix or brownie mix for the batter, then add the Oreo layer and cookies and cream topping the same way for an easy semi-homemade version.
Keep them in an airtight container at room temperature for up to 3 days, or in the fridge for up to a week. The chilled bars hold their shape and the topping stays set.
Yes. Wrap cooled, cut brownies individually and freeze in an airtight container for up to 3 months. Thaw at room temperature before serving.
Cakey brownies usually come from overbaking or too much flour. Use melted (not creamed) butter, measure the flour carefully, and pull them when the center is just set with moist crumbs on the toothpick.
Gel food coloring gives the most vibrant red without thinning the batter. Liquid coloring works too, but you will need more of it to get the same deep red color.
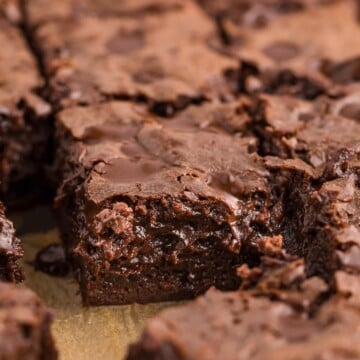
Craving more chocolate? Try our Fudgy Sweetened Condensed Milk Brownies next.
red velvet bundt cake
Still filling out the menu? Readers love pairing this one with our Brookies, chocolate rice pudding, Valentine heart cupcakes, and homemade hot fudge sauce.
And when you are planning next week’s dinners, our peanut butter brownies, chocolate whoopie pies, best fudgy brownies, and whipped cream cheese frosting keep the same easy comfort going.

Red Velvet Cookies and Cream Brownies Recipe
Ingredients
- 3/4 cup + 1 tablespoon all purpose flour
- 2 tablespoons cocoa powder
- 1/4 teaspoon salt
- 1 cup brown sugar packed
- 3/4 cup unsalted butter melted
- 2 large eggs
- 2 teaspoon vanilla extract
- 1 oz red food coloring gel
- 16 Oreos
- 54 cookies and cream kisses
Instructions
- Preheat the oven to 350°F. Line a 9×9 baking pan with parchment paper and set aside.
- In a medium-sized bowl, add the flour, salt, and cocoa powder. Whisk to combine and set aside.3/4 cup + 1 tablespoon all purpose flour, 2 tablespoons cocoa powder, 1/4 teaspoon salt
- In a large bowl, using an electric hand mixer, mix the melted butter and brown sugar until thoroughly combined.1 cup brown sugar, 3/4 cup unsalted butter
- Add in the eggs one at a time and mix; add in vanilla and food coloring and mix to combine.2 large eggs, 2 teaspoon vanilla extract, 1 oz red food coloring gel
- Mix in about 1/4 of the flour mixture at a time until everything is combined, scraping the sides of the bowl as necessary.
- Place half of the brownie mixture in the bottom of the prepared baking dish, spreading to coat evenly.
- Next, layer in the Oreos.16 Oreos
- Pour the remaining batter on top and smooth the top. Bake for 18-20 minutes until a toothpick inserted into the middle comes out mostly clean (a few moist crumbs are fine).
- Place on a wired rack and immediately top with the kisses. Wait 10 minutes for the kisses to melt. Smooth them out with a spatula.54 cookies and cream kisses
- Let cool completely, then place them in the fridge and let them set for an hour. (Or, if you prefer them warm, you can skip the fridge.) Cut into bars, serve, and enjoy!
Notes
- We make these homemade but if you want to make them using a boxed mix just mix with 1/3 cup oil and 2 eggs and you should get the same texture.
- If you cant find cookies and cream kisses, any kisses will do, even the almond ones, white chocolate chips, or just top with cream cheese or buttercream frosting.
- You can switch up your Oreos for fun festive colors, I know usually this time of year they have red Oreos out that you can use as well.
- These can be frozen, see my tips above on how you can do that.
- Easily double this recipe to make a 9″x 13″ pan.
Nutrition
Love This Recipe?
Follow @ThisSillyGirlsKitchen on Instagram and @danadevolk on Pinterest for more!


Tried this recipe- love the Oreos in the middle!!! Didn’t have any cookies and cream kisses, so I melted white chocolate and mixed in some crushed Oreos- it worked really well. The actually brownie seemed a lot more like a cake than I had expected- not moist like the brownies I’m used to. Perhaps more my fault than the recipe, but that’s the one thing I’d want to change in future. Anyhow, still tastes great (super sweet and rich- YUM), thanks for sharing the recipe!
I’m sorry I have never tried that, I am sure you can but I will not tell you for sure unless I have tried it before. Sorry!
Can you freeze these after making? If so, how long to leave out to come to room temperature?
I have not tried doubling it, sorry!
Have you tried doubling the recipe? I would like to make a big batch for a party. Thanks 🙂
YES! I actually just had to do that over Christmas, worked just the same! I would break them up though so it melts faster, thanks for asking! 🙂
These look amazing! Would this work with hersey cookies and cream chocolate bars too? Unfortunately they don’t sell hersey kisses where I live.
Oh my goodness, these are are simply gorgeous!! Thanks for linking up to Snickerdoodle Sunday- hope to see you again this Saturday at 5:00 ET with your latest makes!
Sarah (Sadie Seasongoods)
These look so beautiful and crazy amazing! I’m visiting from Frugal Crafty party, and would love for you to come and link up at Sunday Features! bit.ly/1JDD2md
wholly molly that is an awesome treat my friend. Thank you for sharing at the Thursday hop. watch for uour feature on Mondayxo