This post may contain affiliate links.
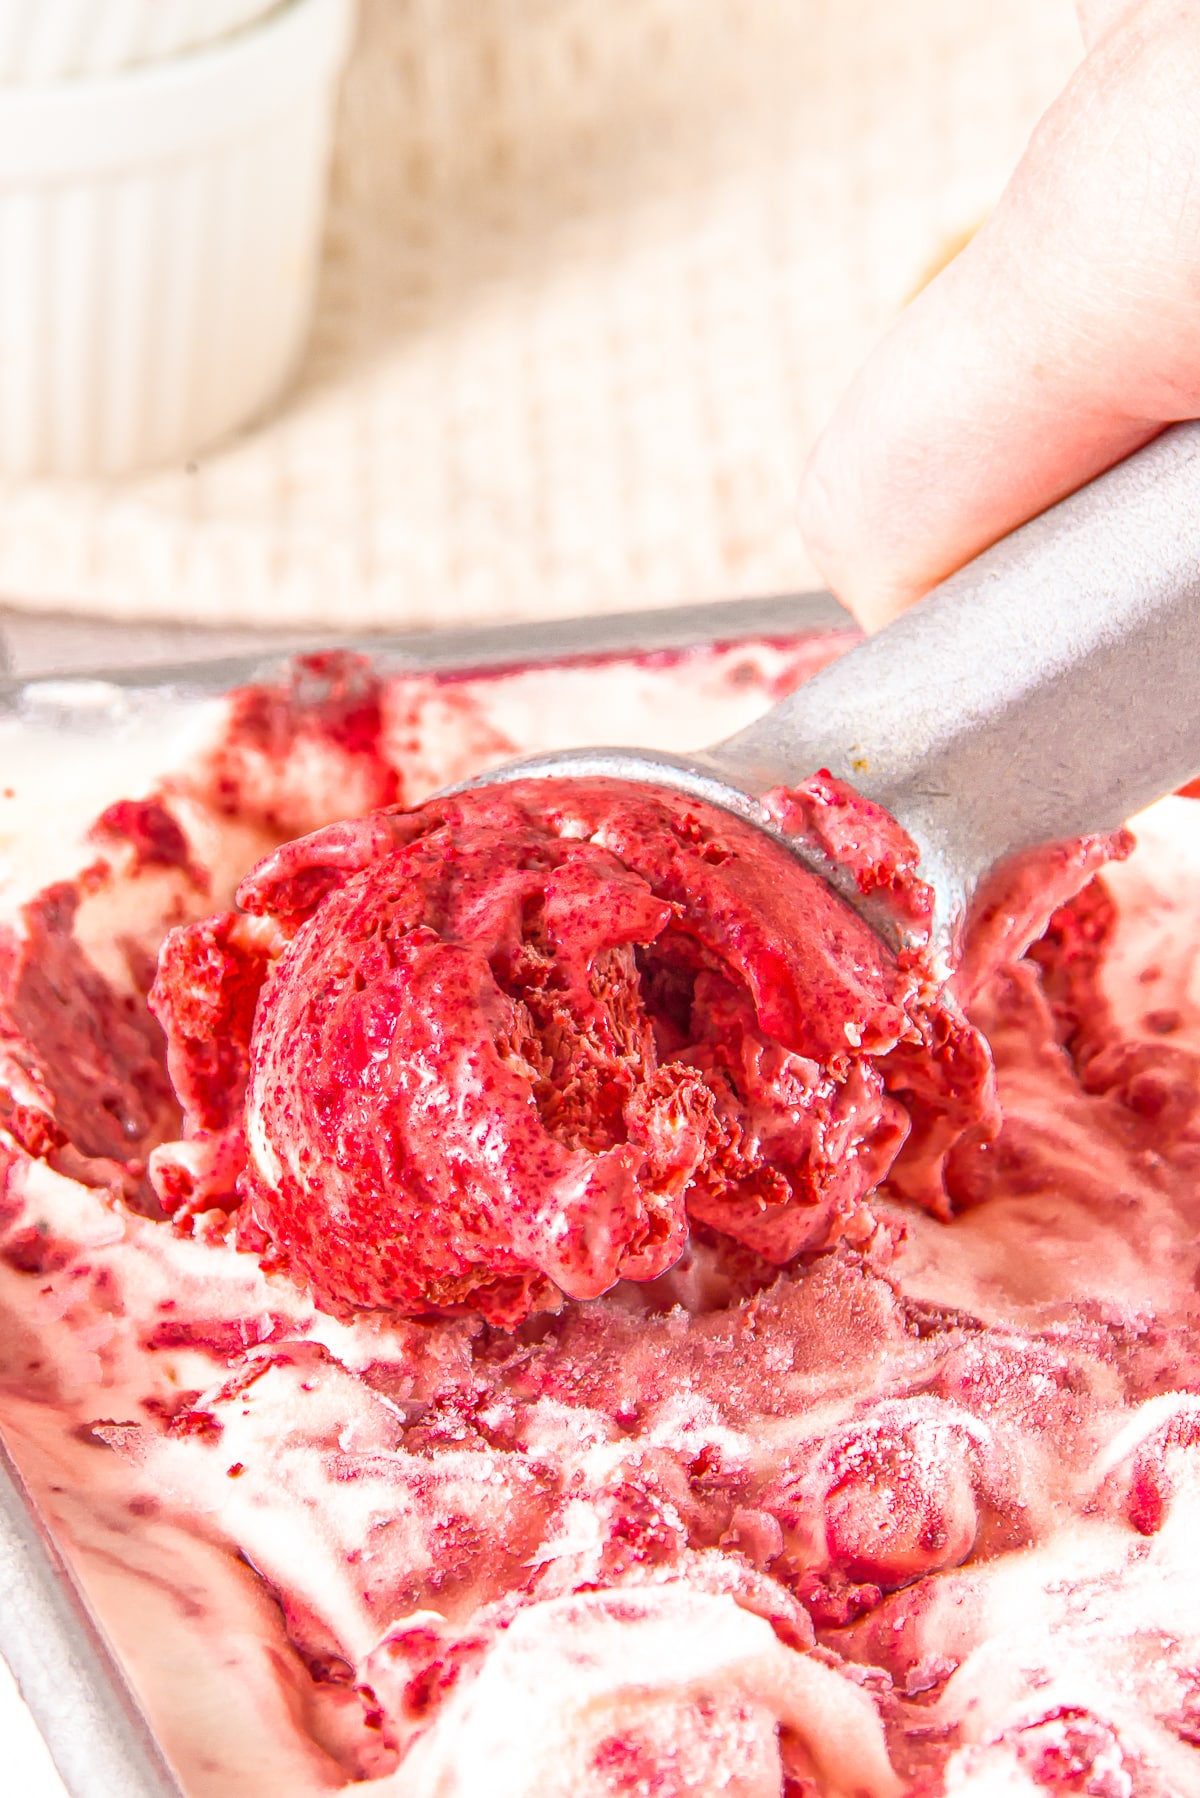
Red Velvet Ice Cream is the dreamy, no churn dessert that tastes like your favorite red velvet cake scooped into a cone, all cream cheese richness and pretty marbled swirls. I whipped up a batch last weekend and Maddie declared it better than the cake itself while Lizzie went straight for the cone. If you love an easy frozen treat, it is right up there with our chocolate cream cheese frosting for pure indulgence.
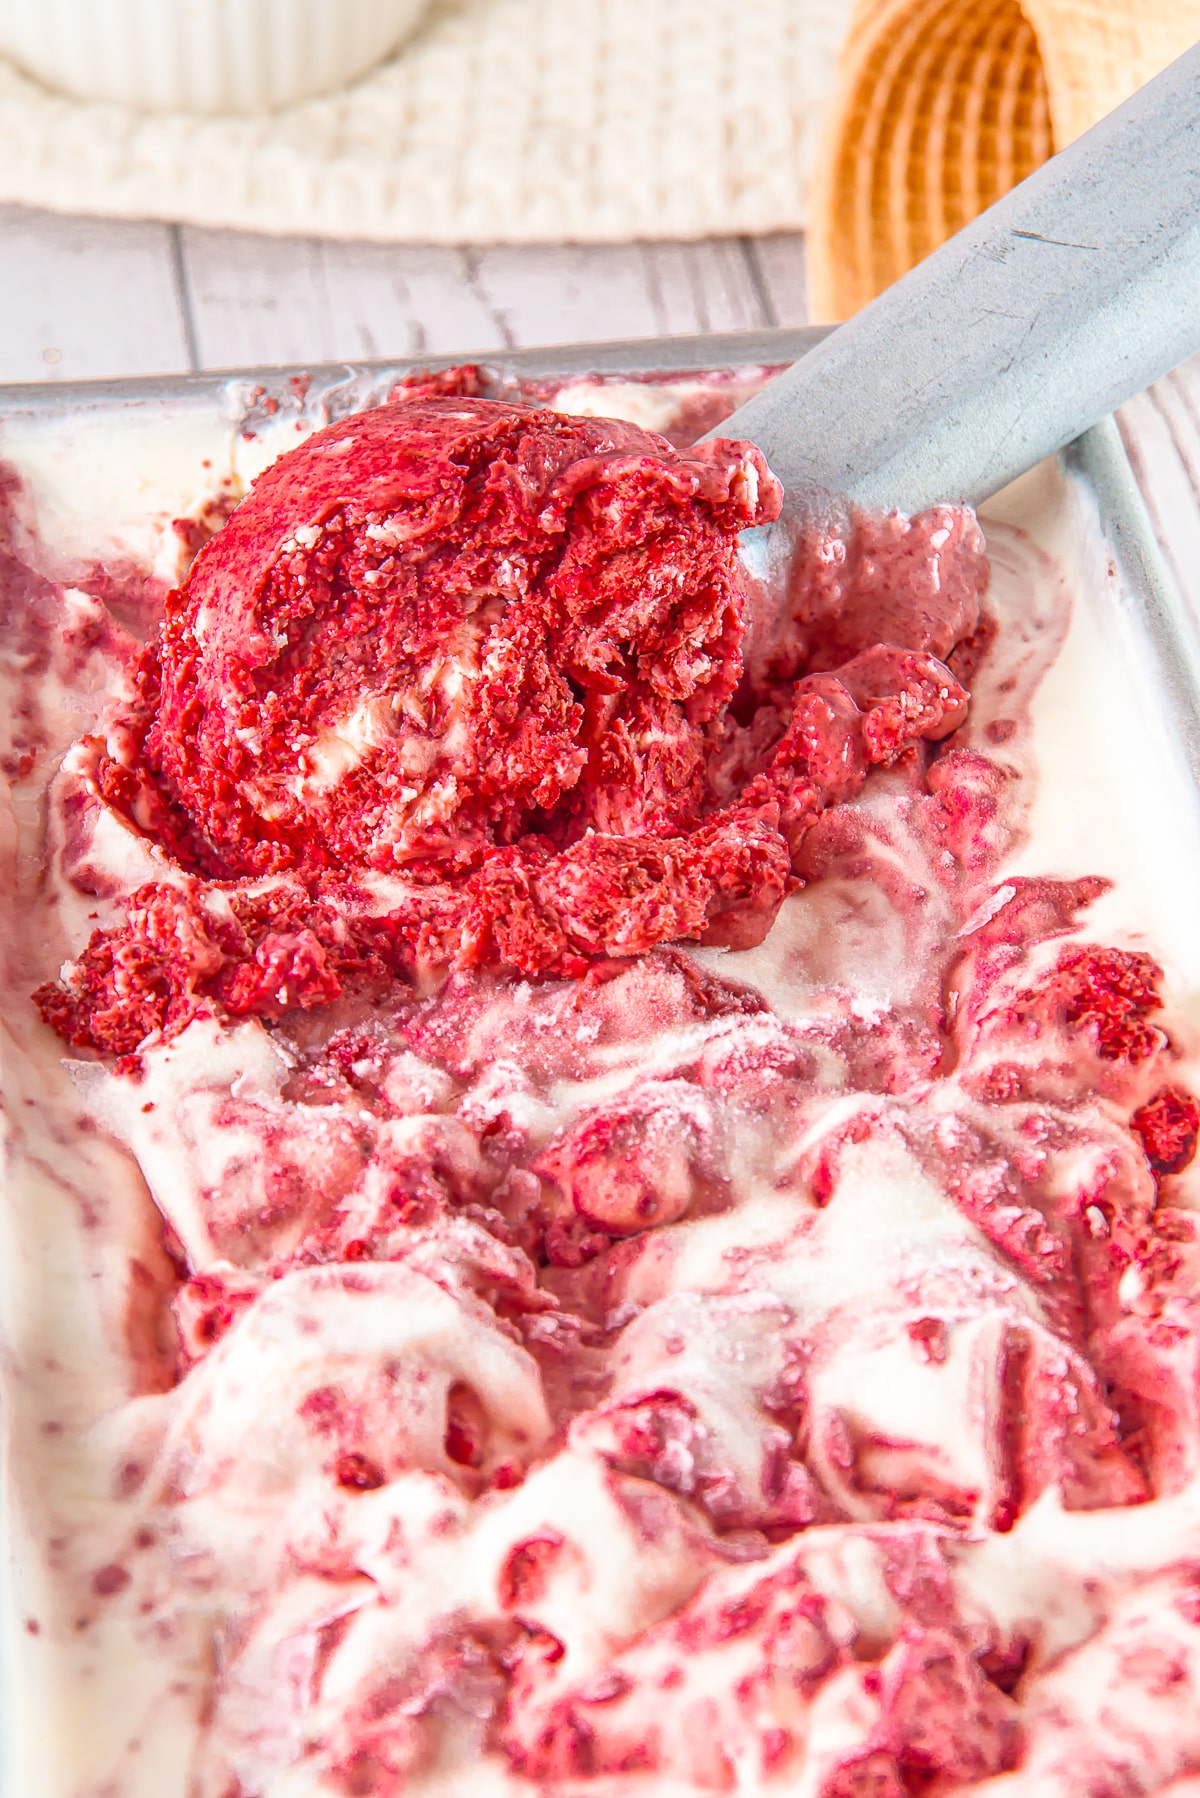
No ice cream machine and no cooking required, just whip, swirl, and freeze for the creamiest red velvet treat you have ever tasted.
Red Velvet Ice Cream Quick Look
- 🕒 Prep Time: 15 minutes
- 🌡️ Cook Time: 0 minutes
- ⏳ Total Time: 10 hours 15 minutes (includes freezing)
- 🍽️ Serving: 8 servings
- ⚡ Calories: 489kcal
- 🌶️ Flavor Profile: Rich, sweet, and tangy with classic red velvet flavor
- ✋ Difficulty: Easy, on par with our no bake cheesecake bites
Quick Answer
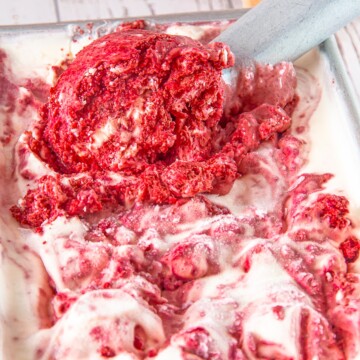
To make no churn Red Velvet Ice Cream, stir together softened cream cheese, milk, powdered sugar, vanilla, and a pinch of salt, then fold in whipped heavy cream. Whip a second batch of cream with cacao, powdered sugar, and red food coloring for the red velvet swirl. Layer both mixtures in a loaf pan with red velvet cake crumbs, swirl with a knife, and freeze for at least 8 to 10 hours until firm.
Jump to:
Why This Recipe Works
Click to see the technique science
- Cream cheese gives it true red velvet flavor. That signature tangy richness comes from a cream cheese base, the same flavor that makes red velvet cake so beloved.
- Whipped cream means no churning. Folding in stiffly whipped cream adds air, so the ice cream freezes soft and scoopable without any machine.
- The marbled swirl looks bakery worthy. Layering and swirling two mixtures with a knife creates that gorgeous red and white marble with almost no effort.
- Cake crumbs add texture and color. Folding in red velvet cake crumbs gives little pockets of cakey texture and reinforces that classic red velvet look.
- Powdered sugar keeps it smooth. Powdered sugar dissolves instantly and helps prevent the icy crystals that granulated sugar can leave behind.
- It is a make ahead dream. The whole thing comes together in 15 minutes of hands on time, then the freezer does the rest overnight.
Why You’ll Love This Recipe
- It captures everything you love about red velvet cake in a cool, creamy, scoopable treat.
- No ice cream maker and no cooking, just whip, layer, swirl, and freeze.
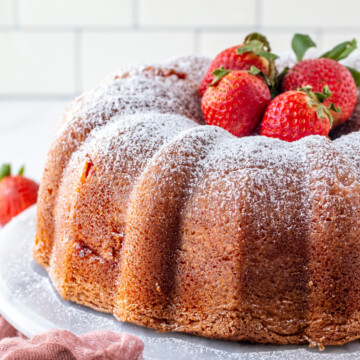
- It is a showstopper for parties and holidays, and pairs beautifully with our strawberry cheesecake bundt cake on a dessert table.
- It delivers that same everyone asks for seconds energy as our red velvet bundt cake.
- It delivers that same everyone asks for seconds energy as our oatmeal cream pie ice cream bars.
Key Ingredients
Here is what comes together to make this dreamy Red Velvet Ice Cream. Most of it is probably already in your kitchen.
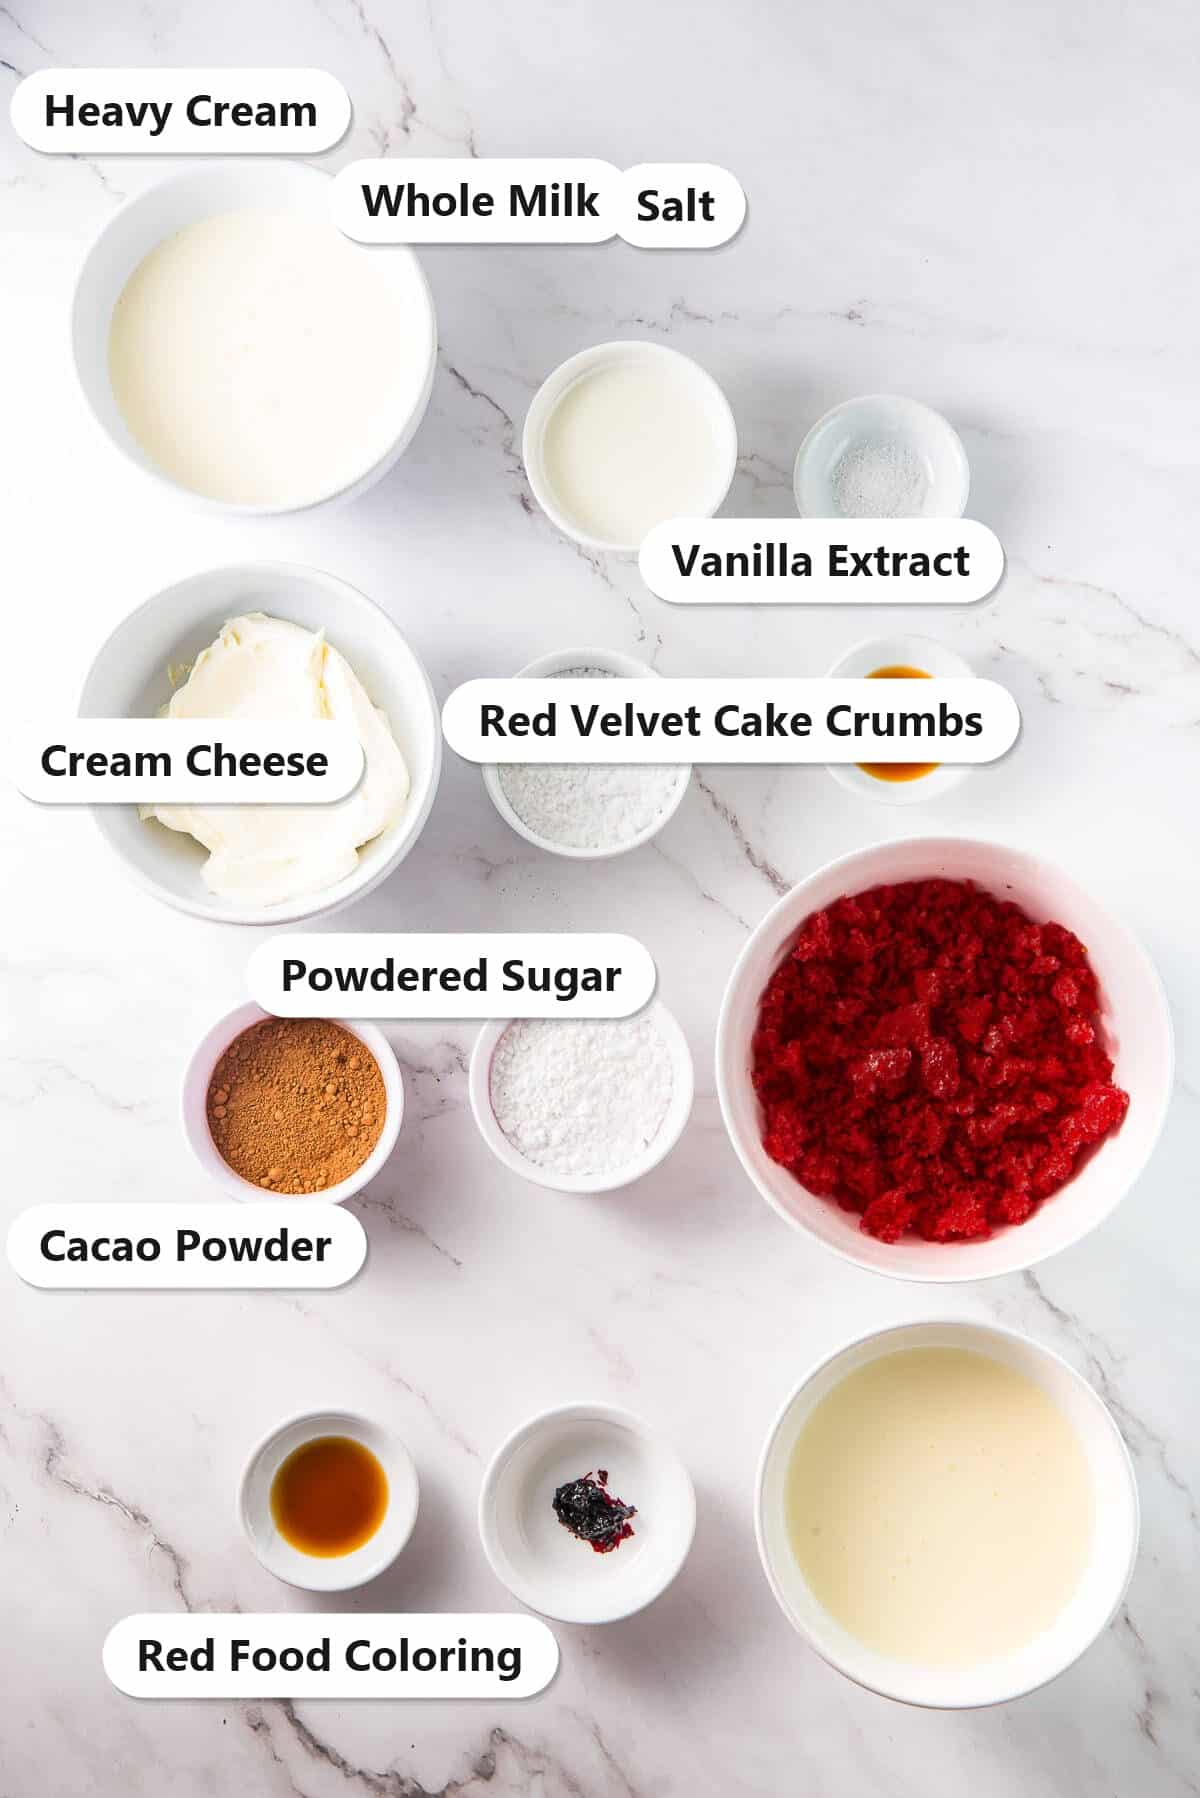
- Cream cheese: The heart of the recipe, lending that unmistakable tangy red velvet richness. Let it soften first for a lump free base.
- Heavy cream: Whipped to stiff peaks, it adds the air that keeps this no churn ice cream soft and scoopable.
- Cacao powder: Just a couple of tablespoons gives the red velvet swirl its subtle chocolate depth.
- Red velvet cake crumbs: Folded throughout for cakey texture and that signature deep red color. Use store bought or leftover homemade cake.
- Red food coloring gel: A pinch turns the swirl that classic vibrant red. Gel works better than liquid since it does not thin the cream.
See recipe card for exact quantities.
Variations and Substitutions
This Red Velvet Ice Cream is easy to customize for the occasion or whatever you have on hand.
- Add chocolate chips: Fold in mini chocolate chips or white chocolate chips for extra bites of sweetness.
- Make it boozy: A splash of vodka or bourbon keeps the texture extra soft and adds a grown up twist.
- Swap the crumbs: No red velvet cake? Use crushed chocolate sandwich cookies or brownie bits instead.
- Go cream cheese heavy: Add an extra ounce of cream cheese for an even tangier, cheesecake like flavor.
- Top it off: Serve with a dollop of our chocolate whipped cream and a sprinkle of cake crumbs.
- If you want to switch things up, our red velvet cookies and cream brownies plays on similar flavors in a whole new way.
- If you want to switch things up, our red velvet cheesecake cake plays on similar flavors in a whole new way.
How to Make Red Velvet Ice Cream
- Stir the cream cheese, whole milk, powdered sugar, vanilla extract, and a pinch of salt together in a mixing bowl until completely smooth.
- In a separate chilled bowl, whip the heavy cream to stiff peaks, then gently fold it into the cream cheese mixture so it stays light and airy.
- For the red velvet swirl, beat the second cup of heavy cream with powdered sugar, cacao powder, vanilla, a pinch of salt, and red food coloring gel until stiff peaks form. Adjust the color to your liking.
- Spoon both mixtures into a freezer safe loaf pan, alternating dollops, and scatter the red velvet cake crumbs throughout.
- Use the tip of a knife to gently swirl the two mixtures together, creating a marbled red and white effect. Do not overmix or you will lose the marble.
- Cover the pan and freeze until firm enough to scoop, at least 8 to 10 hours or overnight.
- Scoop the ice cream into bowls or cones, garnish with extra cake crumbs if you like, and serve.
Recipe Tips & Tricks
- Soften the cream cheese first. Room temperature cream cheese blends into a silky base with no stubborn lumps.
- Chill your bowl and beaters. Cold equipment helps the heavy cream whip faster and hold stiffer peaks.
- Use gel food coloring. Gel gives a vivid red without thinning the cream the way liquid coloring can.
- Do not over swirl. A few gentle passes with a knife keeps that pretty marble, too much stirring turns it pink.
- Freeze overnight for the best scoop. A full 8 to 10 hours gives you that firm yet creamy ice cream texture.
- Let it sit before scooping. A few minutes on the counter softens it just enough for easy, rounded scoops.
- Plan the whole menu. This pairs effortlessly with our red velvet pancakes with cream cheese fluff when company is coming.
- Plan the whole menu. This pairs effortlessly with our brownie ice cream sandwiches when company is coming.
Serving Ideas and Suggestions
This Red Velvet Ice Cream is gorgeous served simply in a chilled bowl or piled high in a crisp waffle cone. Add a drizzle of chocolate sauce, a few extra red velvet cake crumbs, or a swirl of whipped cream to make it feel like a real ice cream parlor sundae.
And if you are anything like our family, our cookies and cream ice cream will be on the menu soon after.
For a table that feels like a celebration, add our red velvet sandwich cookies to the lineup.
It is a natural fit for holidays and celebrations. Scoop it alongside slices of our strawberry cheesecake bundt cake for a red and white dessert spread, or serve tiny scoops next to our no bake cheesecake bites for a dessert board everyone will love.
For an over the top treat, sandwich a scoop between two cookies for an instant ice cream sandwich, or layer it into a sundae with brownie chunks and a generous dollop of our chocolate whipped cream. However you serve it, a little extra red velvet on top never hurts.

Red Velvet Ice Cream FAQs
No, this Red Velvet Ice Cream is completely no churn, so no machine is needed. The whipped heavy cream folds air into the cream cheese base, which is what keeps it soft and scoopable straight out of the freezer. All you need is a couple of mixing bowls, a hand or stand mixer, and a loaf pan.
Freeze your Red Velvet Ice Cream for at least 8 to 10 hours, or ideally overnight, until it is firm enough to scoop. Because there is no machine churning, it needs that longer freeze to set up properly. If you are in a hurry you can serve it softer after about 6 hours, but the texture is best after a full overnight freeze.
Yes, it is a fantastic make ahead dessert. Prepare and freeze the Red Velvet Ice Cream up to 2 weeks in advance. Keep it tightly covered to prevent ice crystals and freezer odors. When you are ready to serve, let it sit on the counter for a few minutes to soften slightly for easy scooping.
If you do not have red velvet cake on hand, crushed chocolate sandwich cookies, brownie pieces, or even chocolate cake crumbs work well in this Red Velvet Ice Cream. You will lose a little of the signature red color, but the texture and flavor stay delicious. A few extra drops of red food coloring in the base can restore the color.
Icy texture usually means the heavy cream was not whipped to stiff enough peaks, or the ice cream was not covered well in the freezer. For the creamiest Red Velvet Ice Cream, whip the cream until it holds firm peaks, fold gently to keep the air in, and press plastic wrap directly on the surface before freezing.
Store leftover Red Velvet Ice Cream tightly covered in the freezer for up to 2 weeks. Pressing a piece of plastic wrap directly onto the surface helps prevent ice crystals and keeps it tasting fresh. A lidded freezer safe container works best for keeping the texture smooth and scoopable.
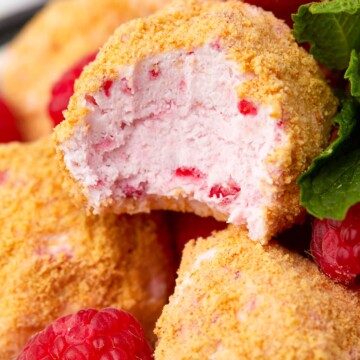
Craving more cool, creamy desserts? Try our no bake raspberry cheesecake bites next, another easy treat that comes together with almost no effort.
Serve a scoop alongside a square of our fudgy chocolate poke cake.

Red Velvet Ice Cream
Ingredients
Cream Cheese Ice Cream:
- 8 ounces cream cheese softened
- ½ cup whole milk
- ½ cup powdered sugar
- 1 tsp vanilla extract
- Pinch of salt
- 1 cup heavy cream cold
Red Velvet Ice Cream:
- 1 cup heavy cream cold
- ¼ cup powdered sugar
- 2 tablespoons cacao powder
- 1 tsp vanilla extract
- Pinch of salt
- Pinch of red food coloring gel
- 2 cups red velvet cake crumbs
Instructions
Cream Cheese Ice Cream:
- Place the cream cheese, milk, powdered sugar, vanilla extract, and salt in a mixing bowl. Stir until well combined.8 ounces cream cheese, ½ cup whole milk, ½ cup powdered sugar, 1 tsp vanilla extract, Pinch of salt
- In a different bowl, whip the heavy cream until stiff peaks form. It’s crucial to refrigerate the cream beforehand, as cold cream whips up more easily. You can also place the bowl and beaters in the freezer for a few minutes to ensure they are chilled.1 cup heavy cream
- Gently fold the whipped cream into the cream cheese ice cream mixture. Use a spatula or a whisk to combine the two components carefully. This step ensures a light and airy texture in the final ice cream. Once mixed, refrigerate the ice cream base while you prepare the red velvet mixture.
Red Velvet Ice Cream:
- To make the red velvet cream, mix heavy cream with powdered sugar, cacao powder, vanilla extract, salt, and a pinch of red food coloring.1 cup heavy cream, ¼ cup powdered sugar, 2 tablespoons cacao powder, 1 tsp vanilla extract, Pinch of salt, Pinch of red food coloring gel
- Beat with an electric mixer until stiff peaks form. Adjust the red food coloring to achieve the desired shade of red, and add some texture by gently folding in red velvet cake crumbs with a spatula. Be cautious not to overmix, as you want to maintain the whipped cream’s structure.2 cups red velvet cake crumbs
Assembly:
- Choose a medium-sized loaf pan or a similar freezer-safe container to assemble the ice cream. Alternate adding scoops of the cream cheese ice cream mixture and the red velvet cream mixture.
- Using the tip of a knife, gently swirl the two mixtures together to create a marbled effect. This step adds visual appeal and combines the flavors beautifully.
- Cover the container and freeze until firm enough to serve, at least 8 to 10 hours or overnight.
- Serve the ice cream in individual bowls or ice cream cones.
Notes
- Ensure the cream cheese is at room temperature for a smoother ice cream texture.
- Gently fold in the red velvet cake crumbs to preserve their texture.
- Allow the ice cream to sit at room temperature for a few minutes before scooping.
- For a deeper red color, adjust the amount of red food coloring.
- Freeze the ice cream overnight for a firmer consistency.
- You can crumble red velvet cupcakes, buy them from a bakery, or even use a store-bought red velvet cake mix and bake it yourself.
Nutrition
Love This Recipe?
Follow @ThisSillyGirlsKitchen on Instagram and @danadevolk on Pinterest for more!


