This post may contain affiliate links.
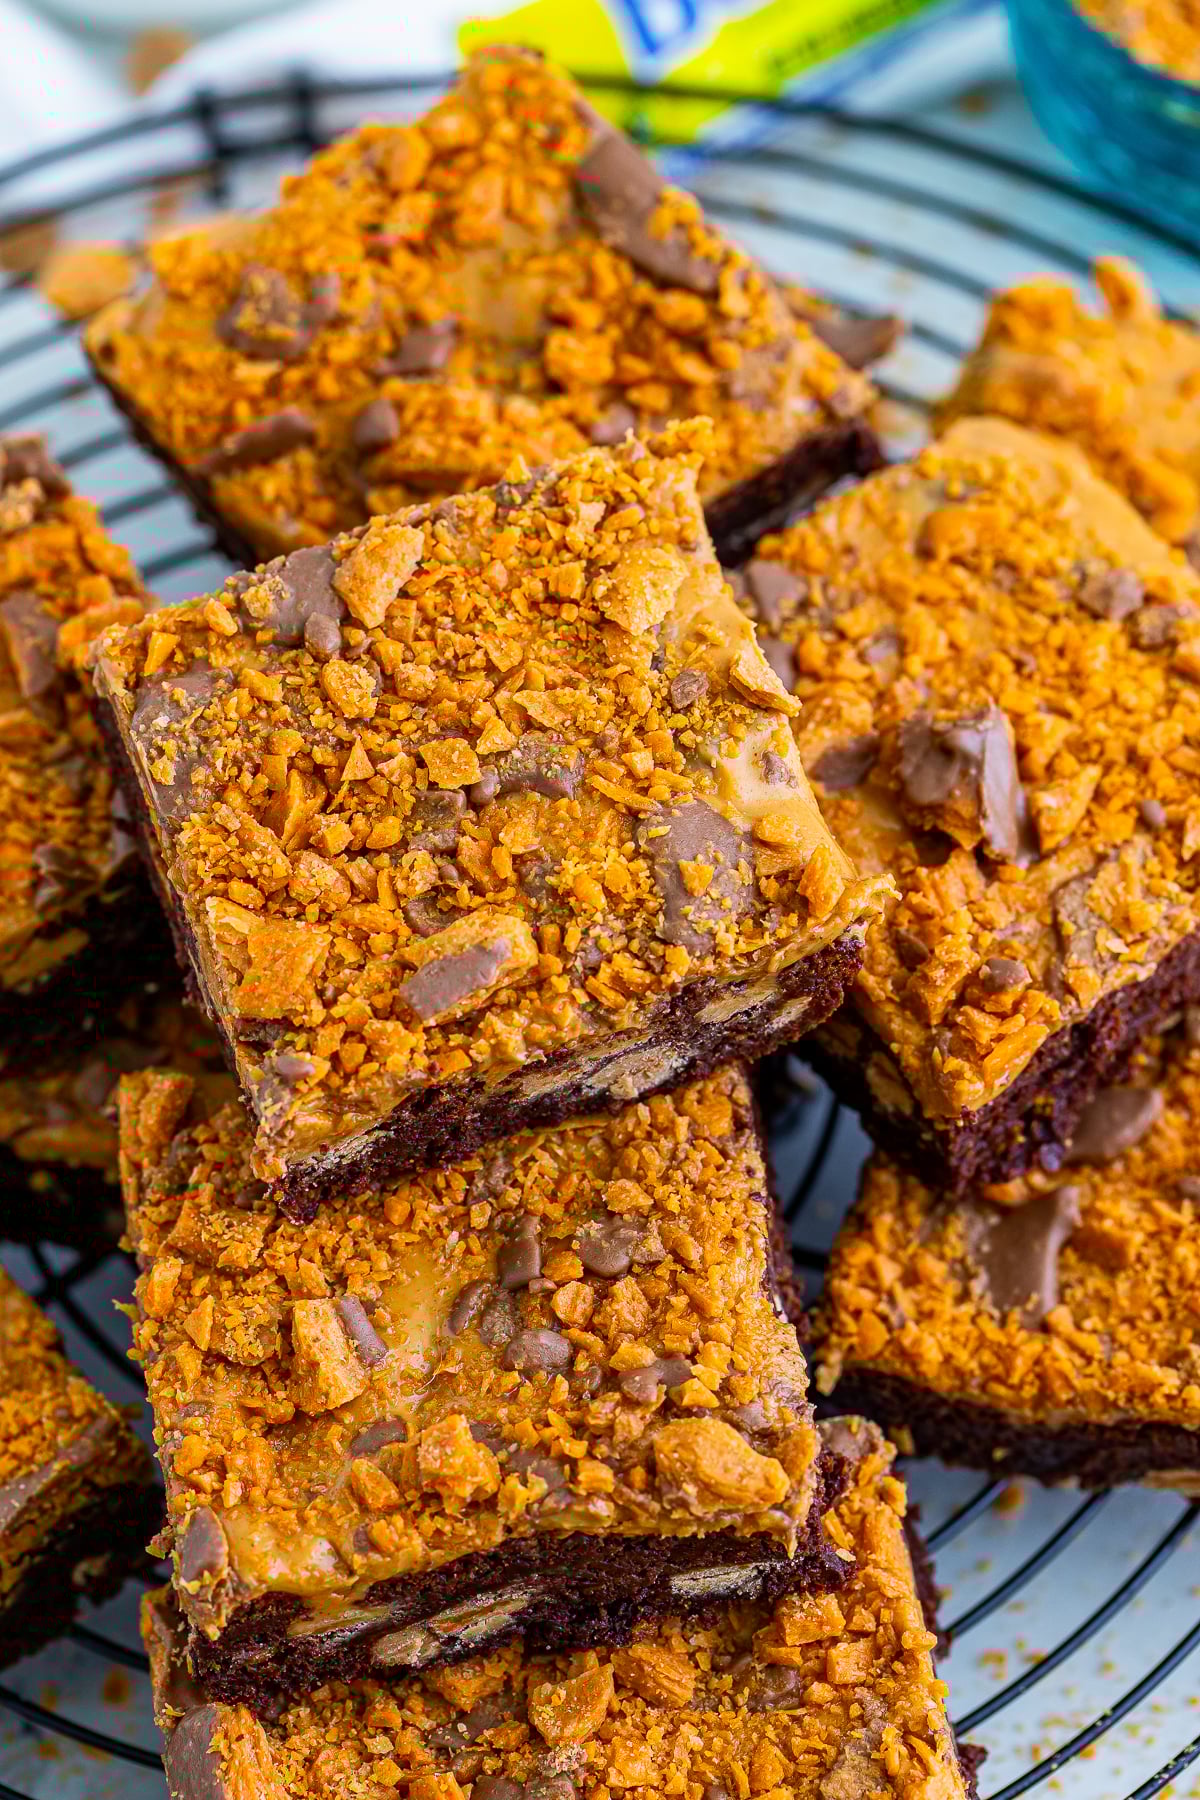
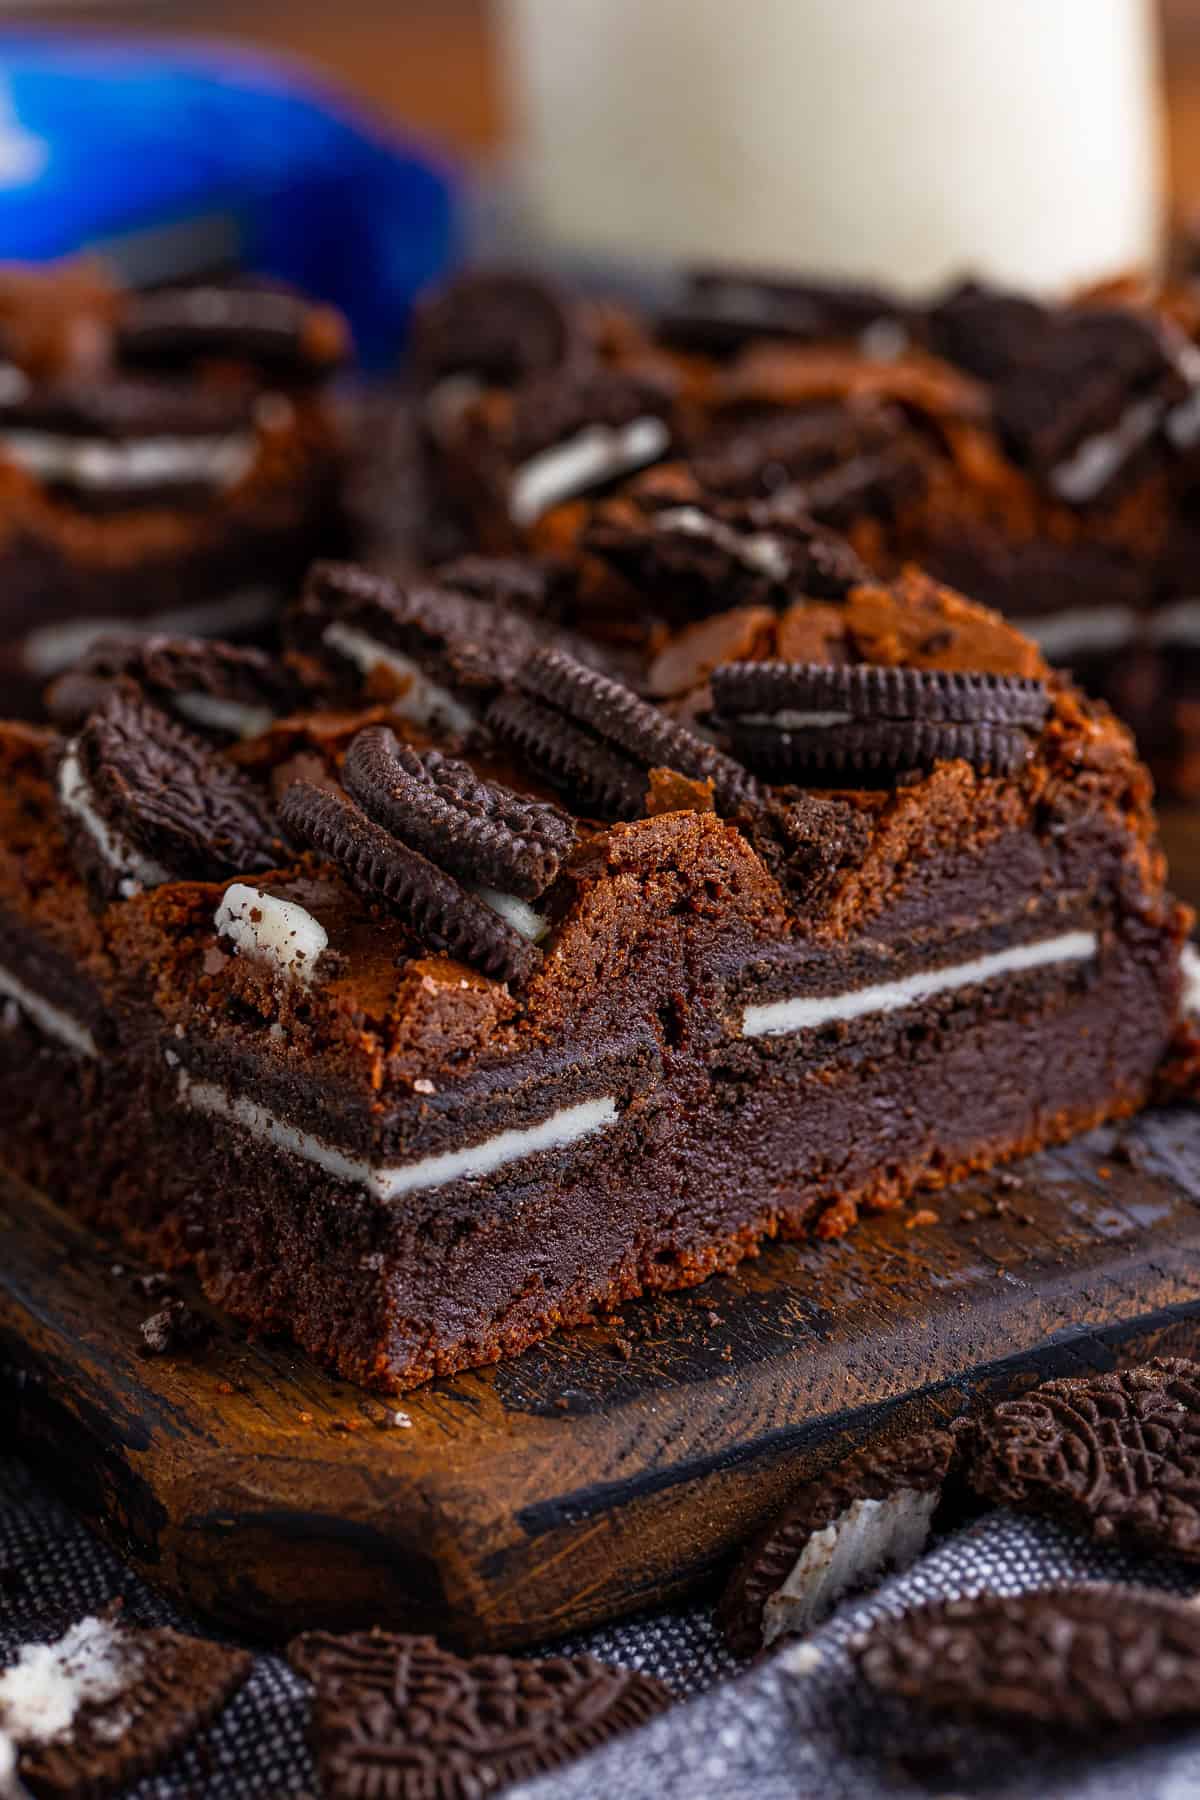
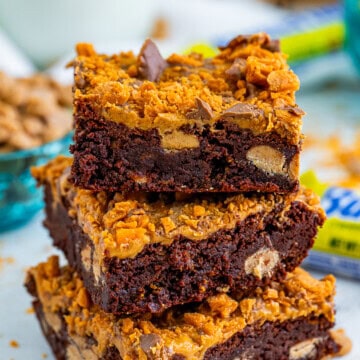
Butterfinger Brownies take a rich, fudgy chocolate brownie and load it with peanut butter chips and crushed candy bars, then finish it with a melted peanut butter layer and even more crunchy Butterfinger on top. These disappear fast whenever I bring them to a potluck or bake sale. If you love a stuffed brownie, our homemade Oreo brownies are another one worth trying.
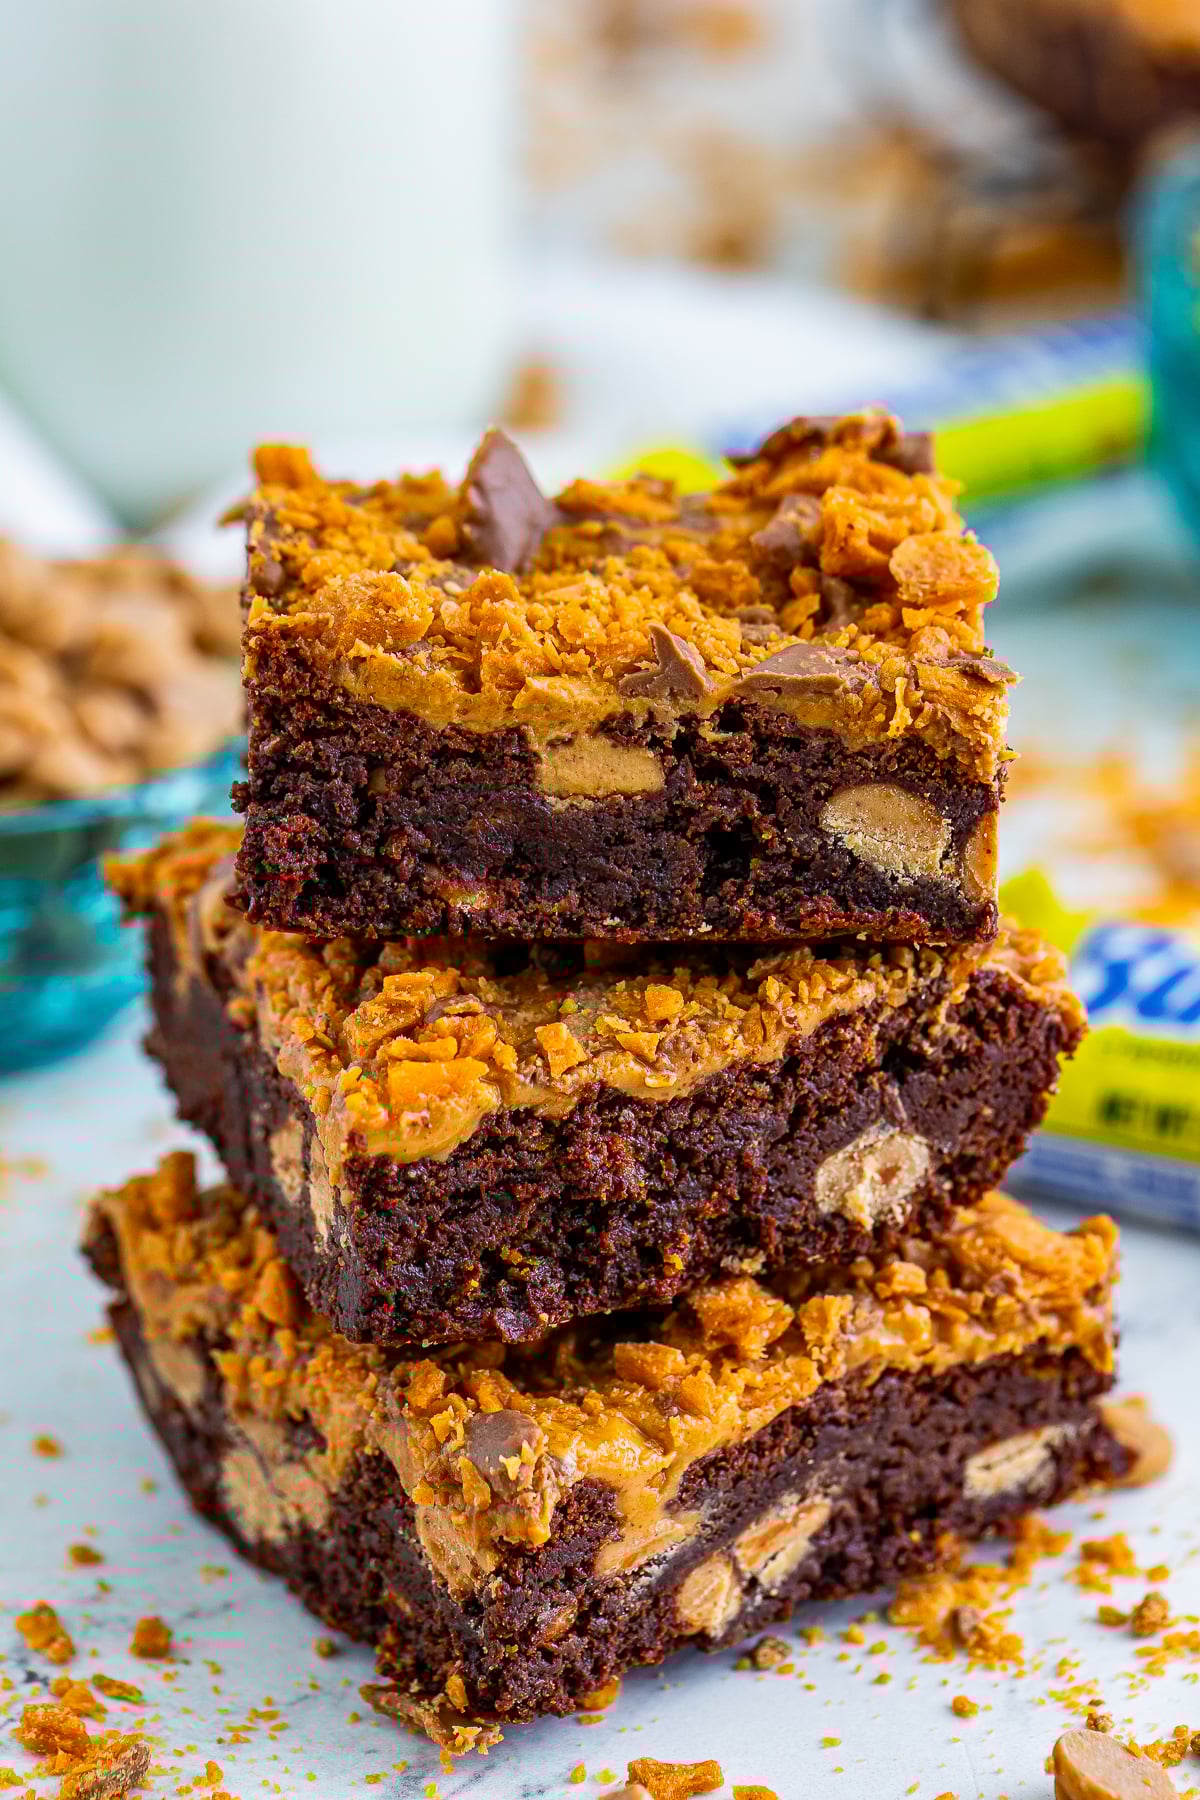
A simple one bowl brownie batter gets studded with peanut butter chips and crushed candy, then topped with a peanut butter layer once baked.
Butterfinger Brownies Quick Look
- 🕒 Prep Time: 15 minutes
- 🌡️ Cook Time: 45 minutes
- ⏳ Total Time: 1 hour
- 🍽️ Serving: 15 servings
- ⚡ Calories: 378kcal
- 🌶️ Flavor Profile: Rich, fudgy chocolate with crunchy peanut butter candy in every bite
- ✋ Difficulty: Easy, about as simple as our best fudgy brownies
Quick Answer
Whisk together cocoa powder, flour, and baking powder. In a separate bowl, mix sugar, melted butter, oil, and vanilla, then beat in the eggs. Combine the wet and dry ingredients, then stir in peanut butter chips and crushed Butterfinger bars. Spread the batter into a 9×13 baking dish and bake at 325 degrees for 40 to 45 minutes. Once cooled slightly, spread melted peanut butter over the top and sprinkle with more chopped Butterfinger bars.
Jump to:
- Butterfinger Brownies Quick Look
- Quick Answer
- Why This Recipe Works
- Why You’ll Love This Recipe
- Key Ingredients
- Variations and Substitutions
- How to Make Butterfinger Brownies
- Recipe Tips & Tricks
- Serving Ideas and Suggestions
- Butterfinger Brownies FAQs
- Other Recommended Brownies and Bars Recipes
- Thick and Chewy Butterfinger Brownies
Why This Recipe Works
Click to see the technique science
- A one bowl brownie base. Melted butter and oil keep this brownie batter simple to whisk together by hand with no mixer required, and it bakes up thick and fudgy every time.
- Peanut butter chips inside and out. Folding peanut butter chips into the batter builds peanut butter flavor throughout, not just on top.
- Crushed candy bars in the batter. Stirring crushed Butterfinger directly into the batter means every square gets crunchy candy baked right in, not just scattered on top.
- A melted peanut butter topping. Spreading warm melted peanut butter over the just baked brownies lets it soak in slightly for a fudgy, peanut buttery top layer.
- Topping timing matters. Waiting for the brownies to cool slightly before adding the peanut butter keeps the layer from melting away completely into the brownie.
- Extra crushed candy for crunch. A final sprinkle of chopped Butterfinger over the peanut butter layer adds one more layer of crunchy, candy coated texture to every bite.
Why You’ll Love This Recipe
- They taste like a candy bar and a bakery brownie had the best possible collaboration.
- The batter comes together in two bowls with no mixer needed.
- The peanut butter topping is just as dreamy as our peanut butter chocolate chip cookie bars.
- It is the kind of no fuss win that pairs beautifully with our thick and chewy animal cracker cookies on a busy week.
- It earns a spot in the rotation right next to our baileys brownies.
Key Ingredients
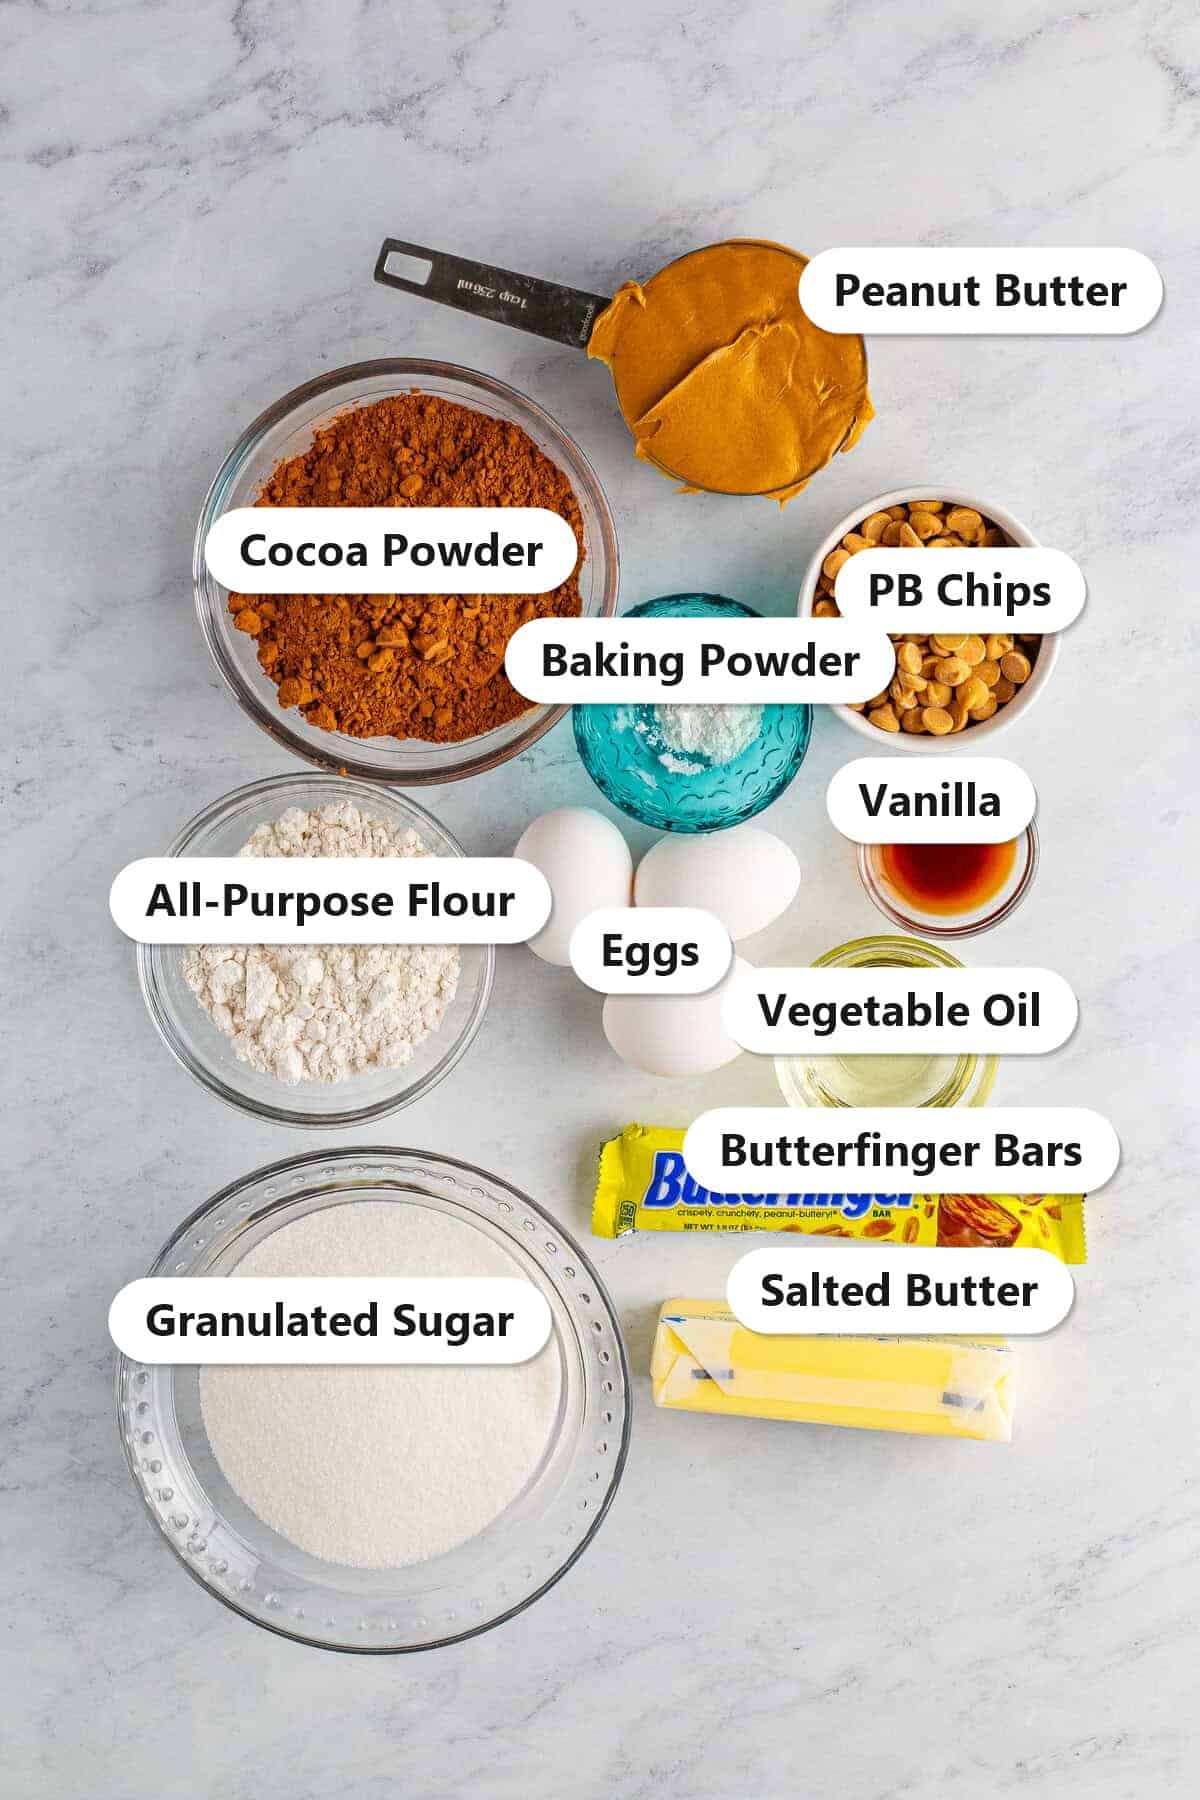
Simple pantry baking staples plus peanut butter and Butterfinger candy bars make these brownies extra special.
- Cocoa powder: Unsweetened cocoa gives these brownies their deep, rich chocolate flavor.
- Salted butter and vegetable oil: The combination keeps the brownies moist, dense, and fudgy.
- Peanut butter chips: Folded into the batter for peanut butter flavor in every bite.
- Butterfinger candy bars: Crushed into the batter and chopped on top for crunchy, candy coated texture.
- Creamy peanut butter: Melted and spread over the baked brownies for a rich, fudgy topping layer.
See recipe card for exact quantities.
Variations and Substitutions
These Butterfinger brownies are a fun base recipe, so make them your own.
- Swap the peanut butter chips for chocolate chips or white chocolate chips if you prefer.
- Use a different candy bar, like Reese’s or Snickers, in place of the Butterfinger pieces.
- Drizzle melted chocolate over the peanut butter topping for an extra rich finish.
- Serve alongside our chocolate covered peanut butter pretzels for a fun peanut butter dessert spread.
- For another spin on this idea, try our thick and chewy double chocolate chip cookies next time.
- In the mood for something different? Our cookies and cream fudge sauce scratches a similar itch.
How to Make Butterfinger Brownies
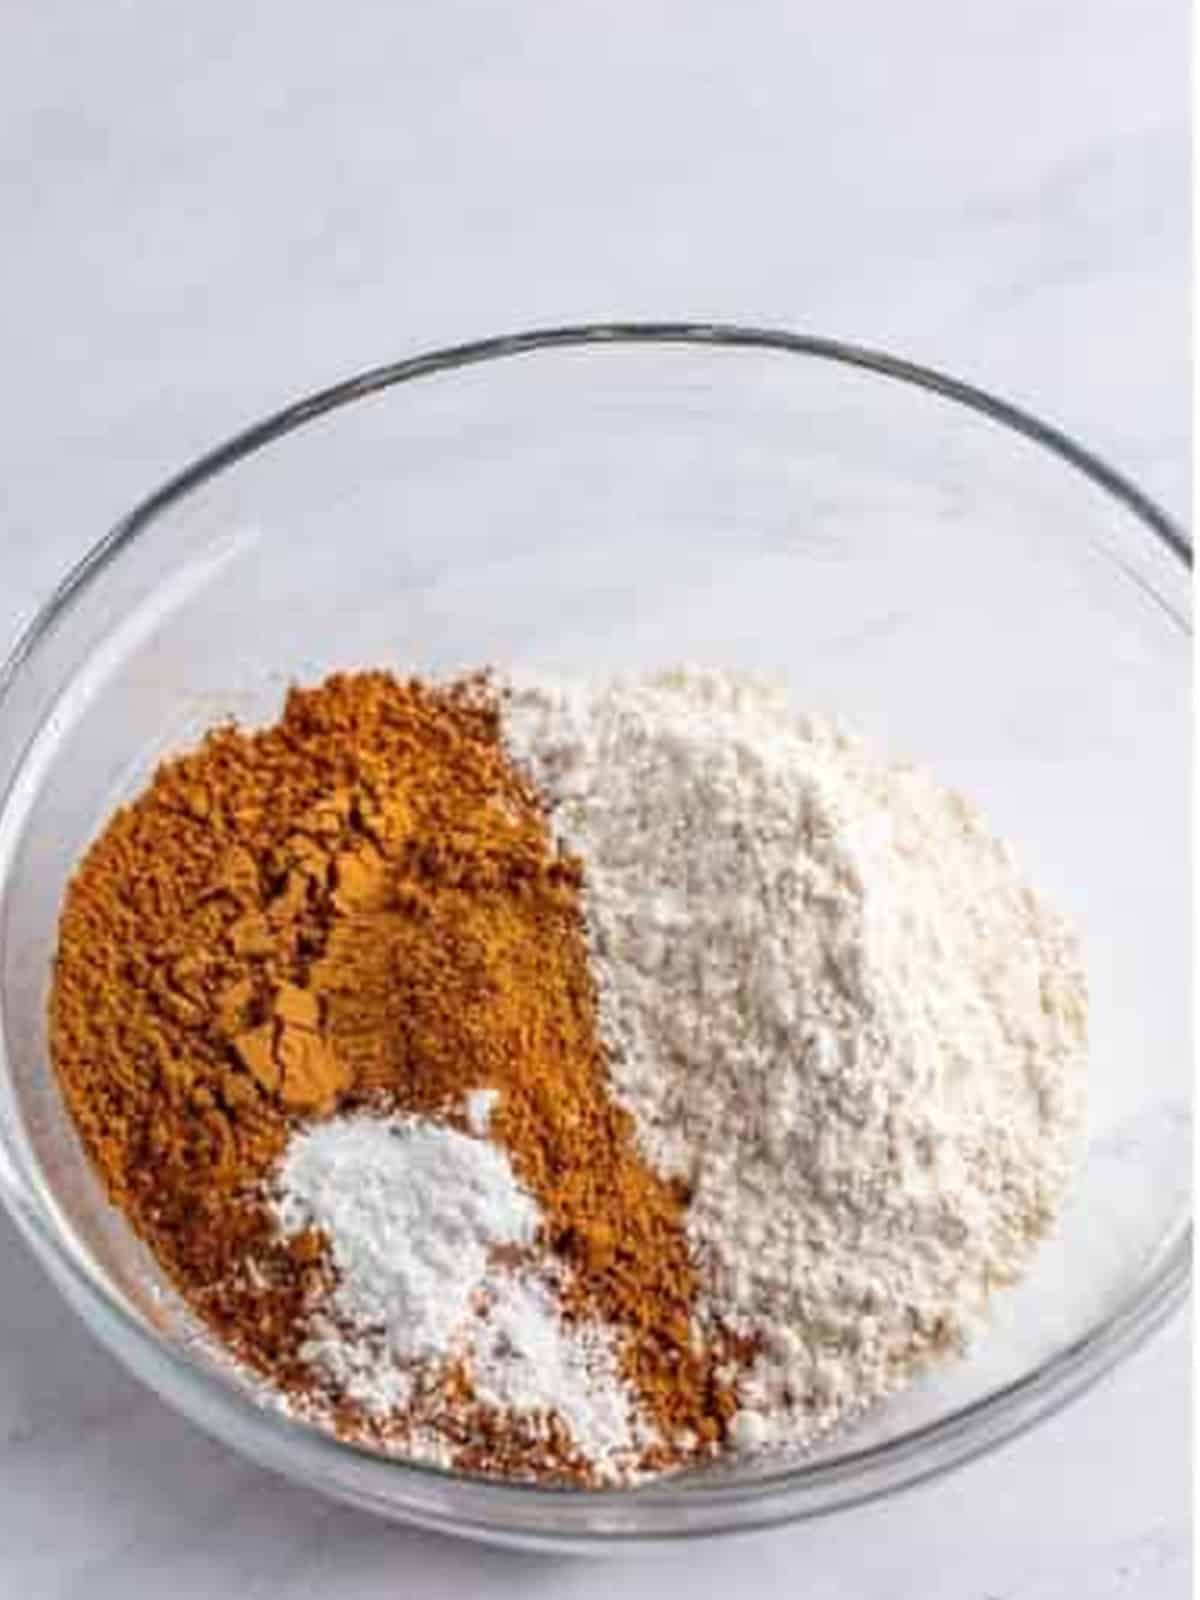
- Preheat the oven to 325 degrees Fahrenheit and spray a 9×13 baking dish with cooking spray. In a medium bowl, stir together the cocoa powder, flour, and baking powder, and set aside.
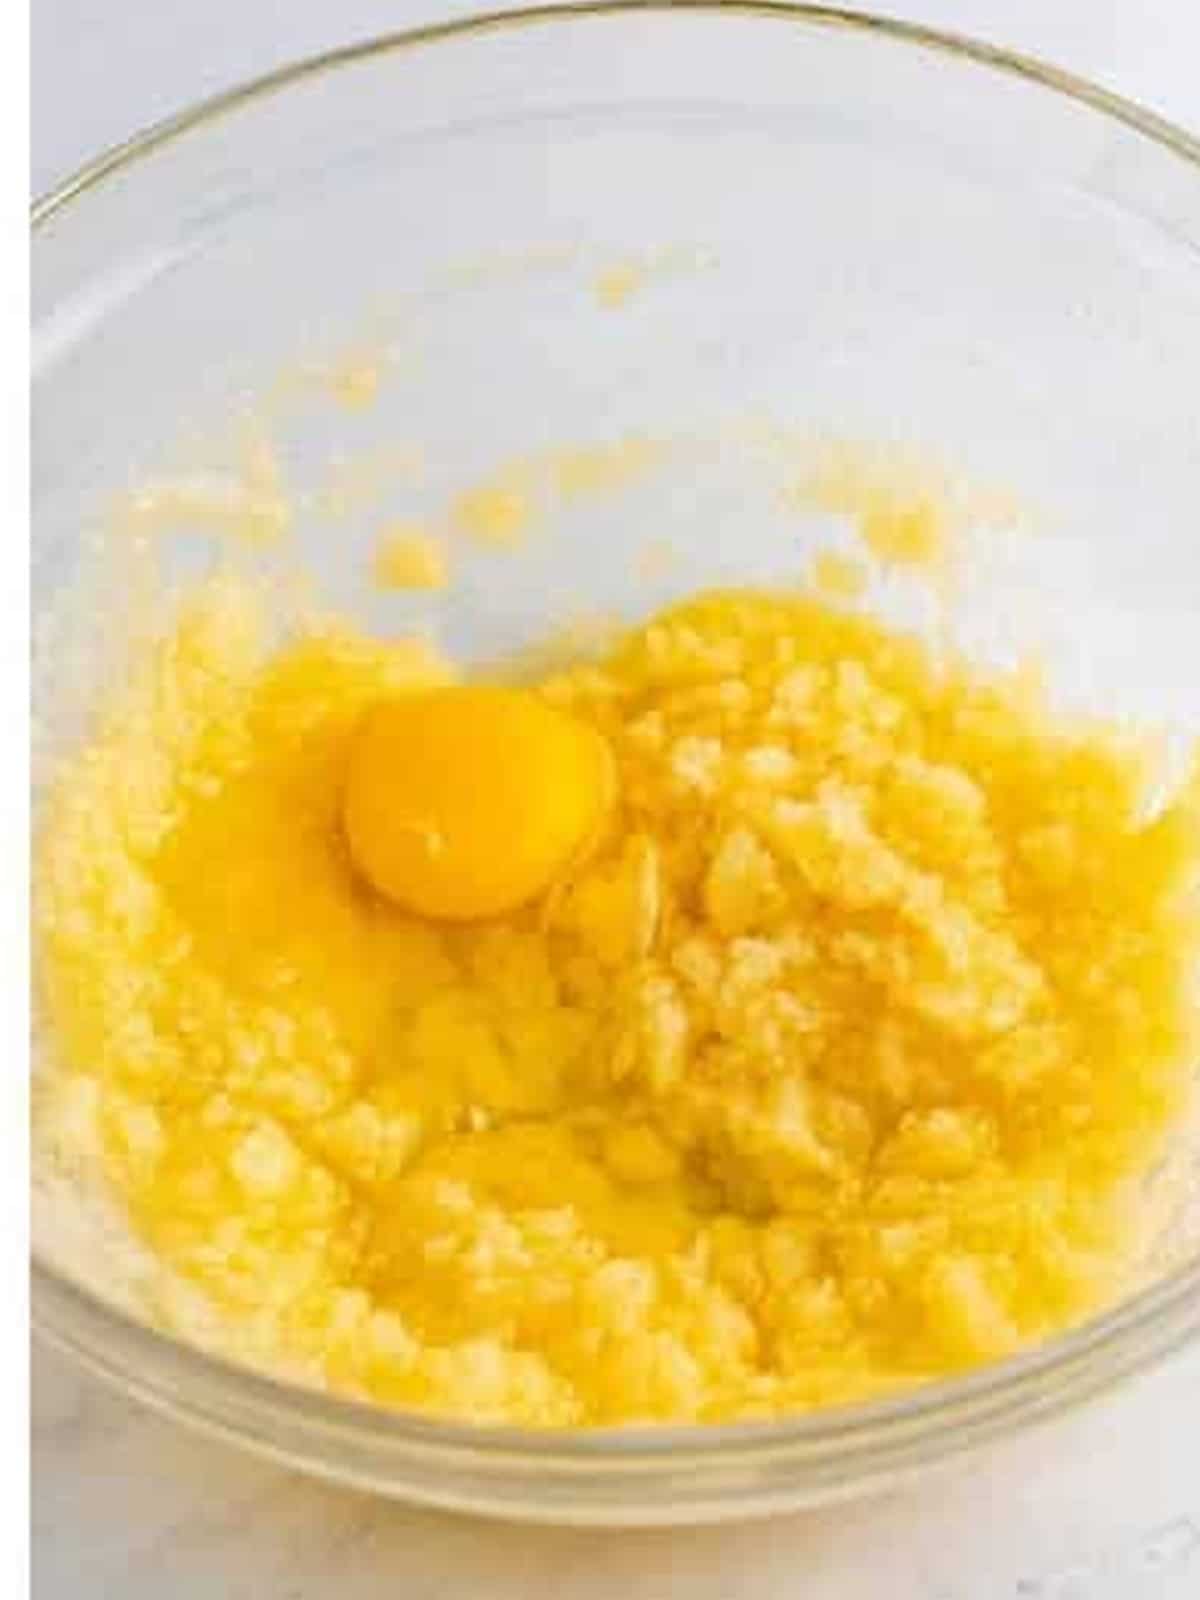
- In a large bowl, stir together the sugar, melted butter, oil, and vanilla, then add the eggs one at a time, whisking until well combined.
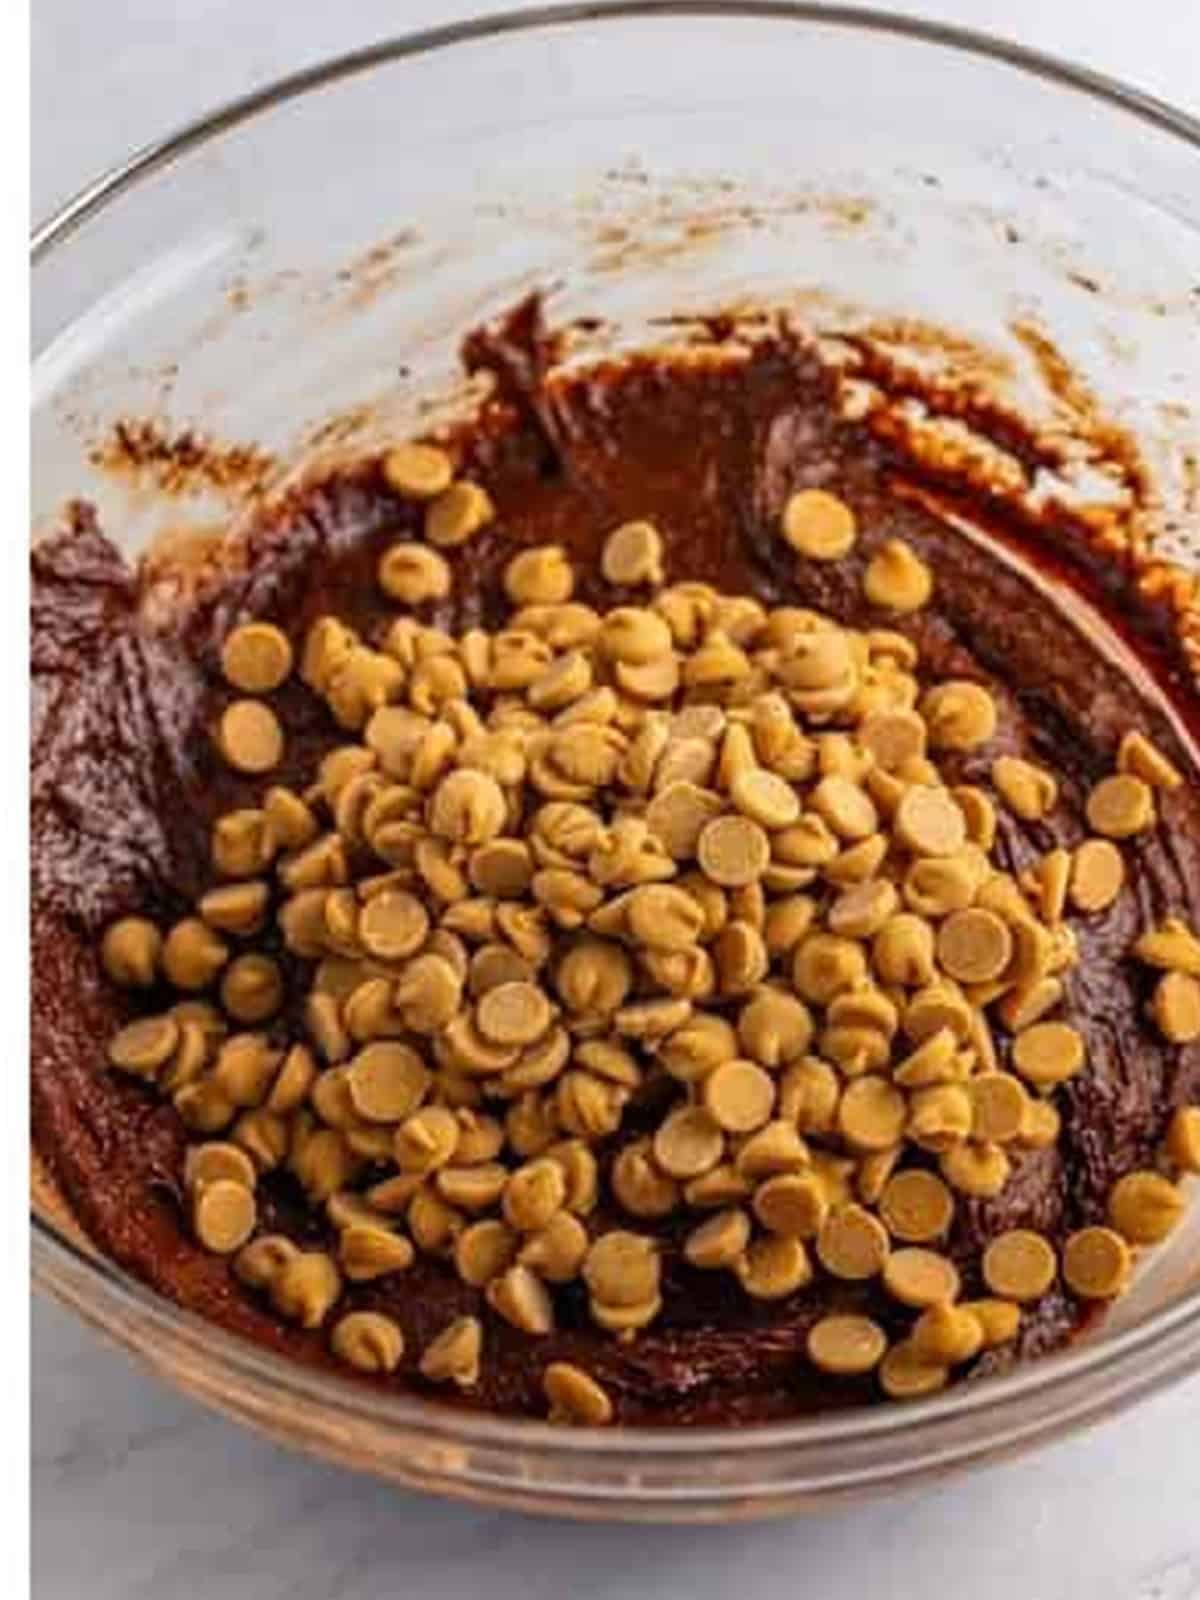
- Add the dry ingredients to the wet ingredients and stir until no dry patches remain, then fold in the peanut butter chips and crushed Butterfinger bars.
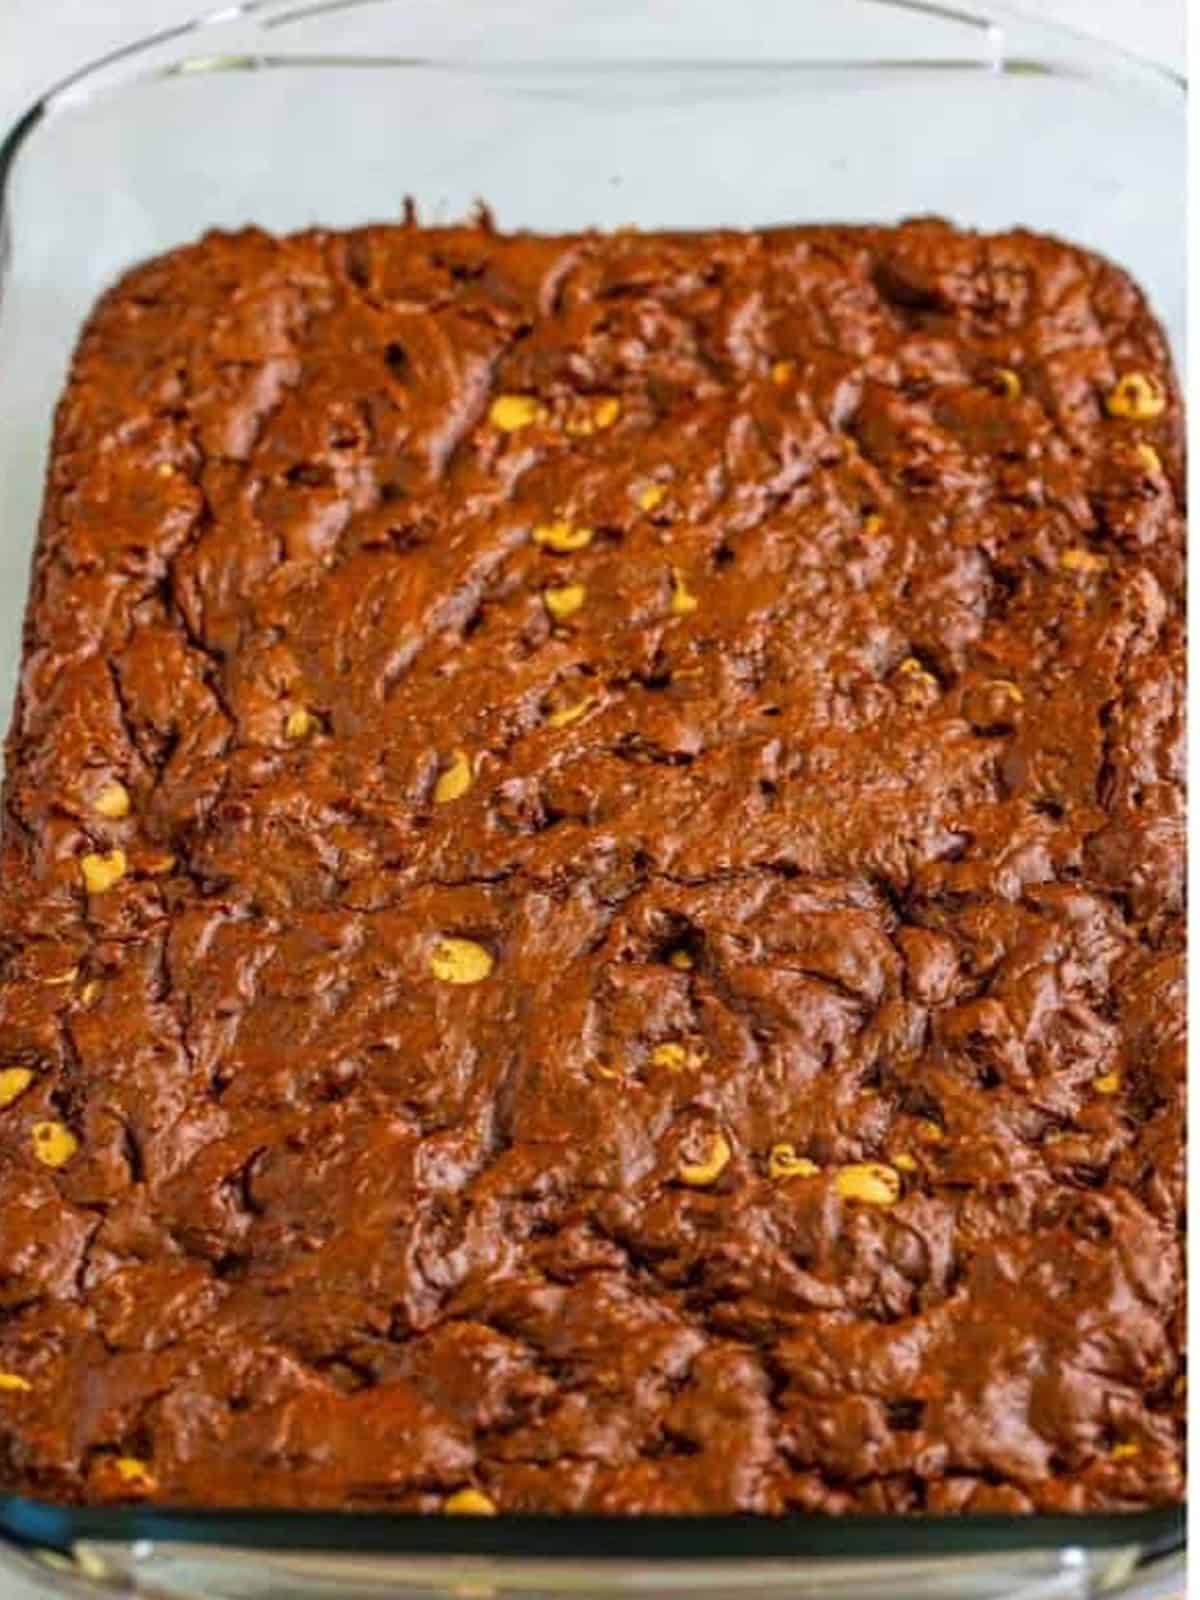
- Press the batter into the prepared baking dish and bake for 40 to 45 minutes, until a toothpick comes out with just a little moist batter clinging to it. Let cool for 5 minutes.
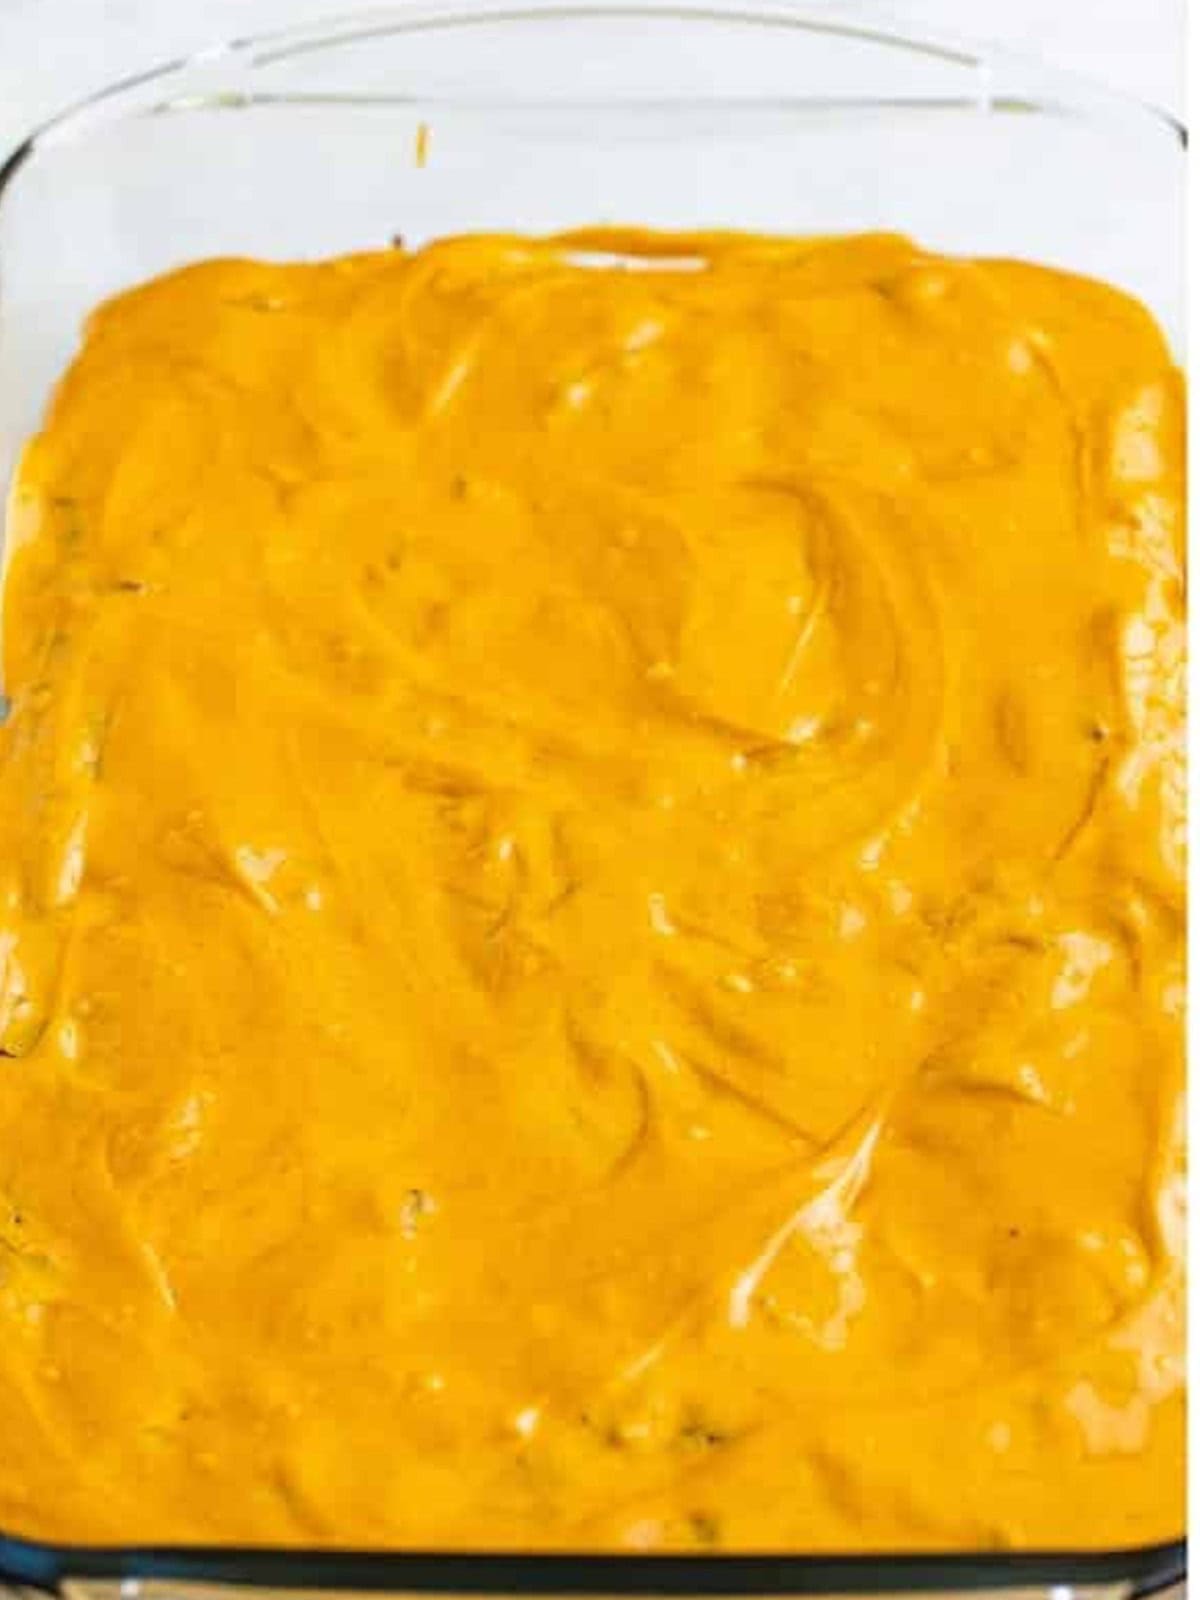
- While the brownies cool slightly, melt the peanut butter in the microwave in 15 second intervals, stirring between each, until smooth. Pour it over the warm brownies and spread evenly.
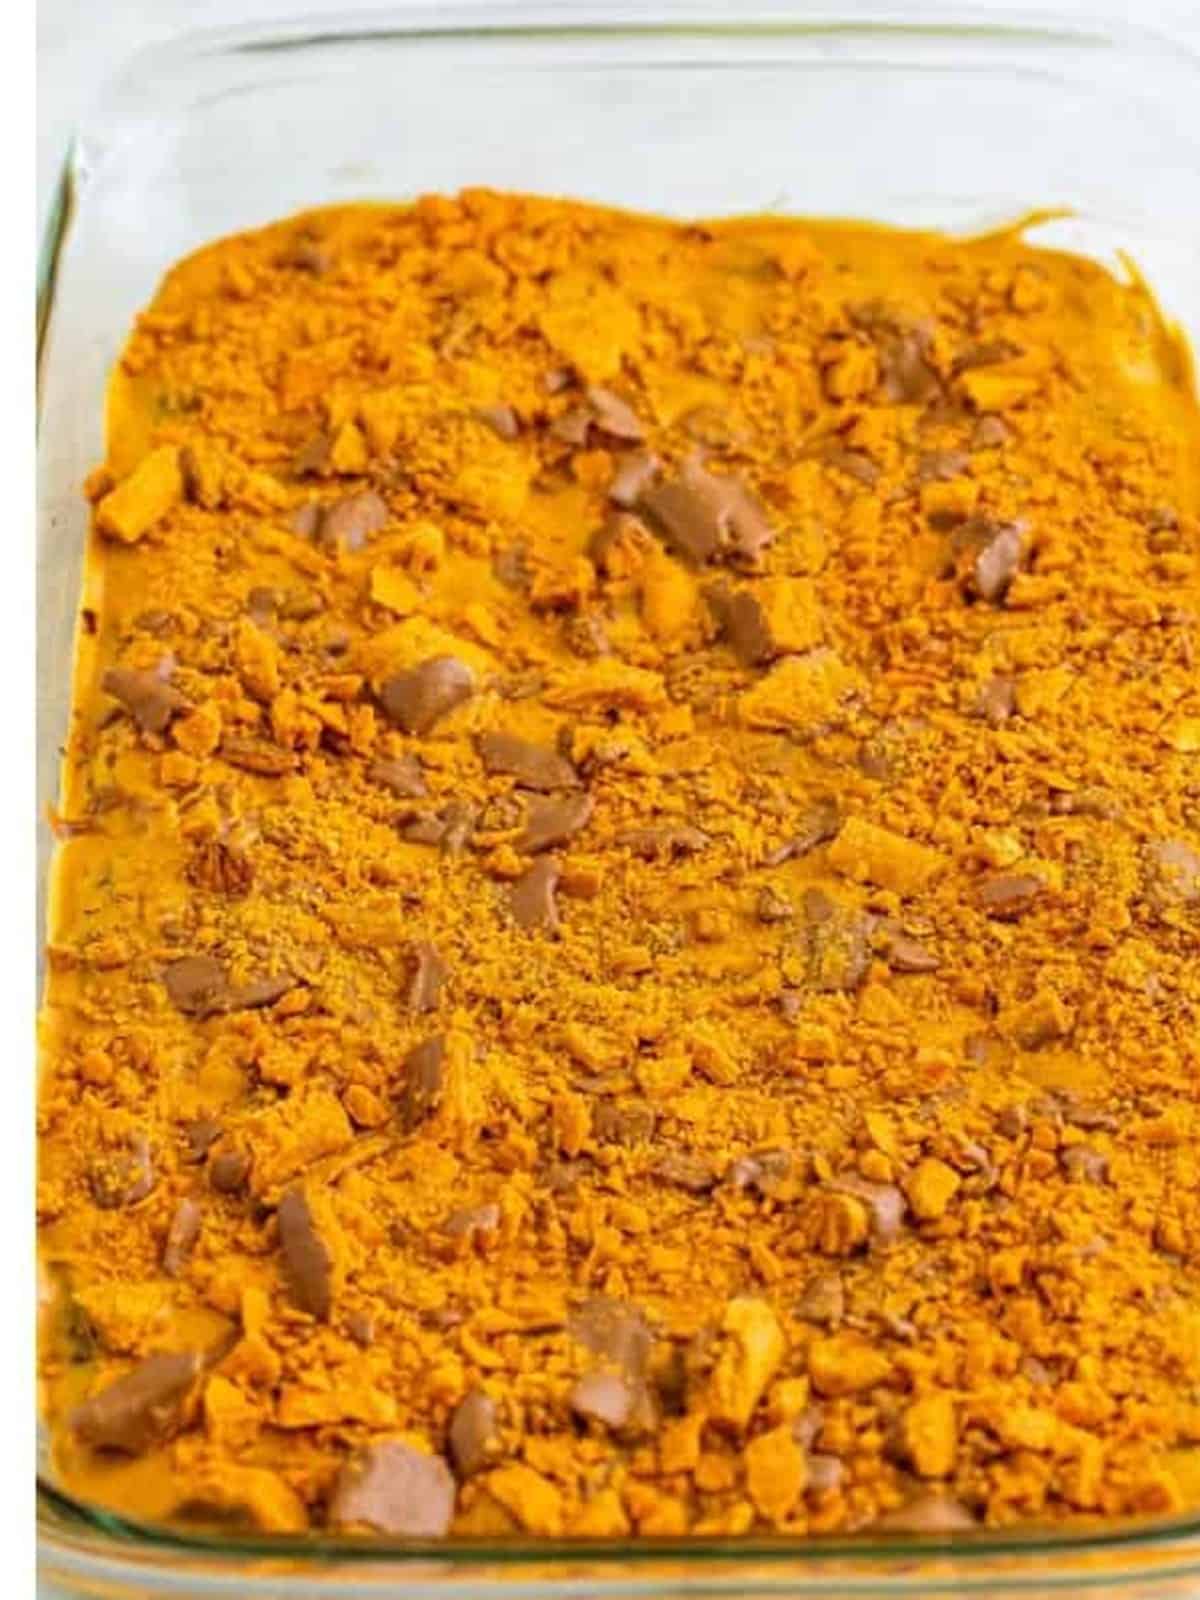
- Let cool for 15 more minutes, then sprinkle the chopped Butterfinger bars on top, gently pressing them into the peanut butter layer. Cool completely before slicing.
Recipe Tips & Tricks
- Do not overbake since these brownies keep cooking as they cool; a few moist crumbs on the toothpick is exactly right.
- Let the brownies cool slightly before adding the peanut butter topping so it spreads in a smooth layer instead of soaking in completely.
- Crush the Butterfinger bars in a bag with a rolling pin for easy, mess free cleanup.
- Use room temperature eggs so they blend smoothly into the batter.
- Let the brownies cool completely before slicing for the cleanest cuts.
- Store in a single layer if possible so the crunchy topping stays crisp.
- Make it a full spread. Our mudslide chocolate cookies rounds out the table.
Serving Ideas and Suggestions
These Butterfinger brownies are rich enough to serve on their own, but a scoop of vanilla ice cream on top turns them into an over the top sundae worthy dessert.
Pair them with a glass of cold milk, or set them out on a dessert table next to our red velvet cookies and cream brownies for a fun brownie flight.
They travel well for potlucks and bake sales, and they hold up just as nicely as our double fudge double mint brownies for make ahead treats.
For a party, cut them into smaller bite sized squares so guests can sample a few different treats, and keep extra crushed Butterfinger on hand for anyone who wants a second sprinkle on top.
Butterfinger Brownies FAQs
Yes. Any chopped candy bar works in place of the Butterfinger, like Reeses, Snickers, or Twix, depending on what flavor combination you are craving.
Letting the brownies cool for a few minutes first keeps the melted peanut butter from soaking in completely, so you get a distinct, fudgy topping layer instead of it disappearing into the brownie.
Yes, you can leave them out or swap in chocolate chips if you prefer a plain chocolate brownie base under the peanut butter topping.
Store them in an airtight container at room temperature for up to 4 days, or in the fridge for up to a week if your kitchen runs warm.
Yes. Freeze the sliced brownies in a single layer, then transfer to a freezer bag for up to 2 months. Thaw at room temperature before serving.
Be sure to measure the flour correctly and avoid overbaking. Pulling the brownies out when a toothpick still has a little moist batter on it keeps them thick and fudgy instead of dry.
Tried these thick and chewy Butterfinger brownies? I would love to hear how they turned out, leave a comment and a star rating below!
Still filling out the menu? Readers love pairing this one with our mocha brownies, no bake cookies, brownie cookies, and Halloween bat macarons.
And when you are planning next week’s dinners, our frosted brownies and Butterfinger brownies keep the same easy comfort going.

Thick and Chewy Butterfinger Brownies
Ingredients
- 1 cup unsweetened cocoa powder
- 1/2 cup all-purpose flour
- 1 teaspoon baking powder
- 1 & 1/2 cups granulated sugar
- 1/2 cup salted butter melted
- 2 tablespoons vegetable oil
- 2 teaspoons vanilla extract
- 3 large eggs
- 1 cup peanut butter chips
- 3 1.9 ounce butterfingers crushed
For the topping
- 1 cup creamy peanut butter
- 3 1.9 ounce butterfingers roughly chopped
Instructions
- Preheat the oven to 325°F. Spray a 9×13 baking dish with cooking spray and set aside.
- In a medium bowl, stir together the cocoa powder, flour, and baking powder, and set aside.1 cup unsweetened cocoa powder, 1/2 cup all-purpose flour, 1 teaspoon baking powder
- In a large bowl, stir together the sugar, butter, oil, and vanilla.1 & 1/2 cups granulated sugar, 1/2 cup salted butter, 2 tablespoons vegetable oil, 2 teaspoons vanilla extract
- Add the eggs one at a time and whisk until well combined.3 large eggs
- Add the dry ingredients to the wet and slowly stir together until there are no dry patches. Be careful with this step so the dry mixture doesn’t fly all over the place.
- Stir in the peanut butter chips, followed by the crushed butterfingers.1 cup peanut butter chips, 3 1.9 ounce butterfingers
- Press the mixture into the bottom of the prepared baking dish. Bake for 40-45 minutes until a toothpick inserted into the center comes out mostly clean, there should be a little moist batter left on the toothpick.
- Allow to cool for 5 minutes.
- While the brownies are cooling slighly, melted the peanut butter in the microwave in a microwave safe bowl in 15 second intervals, stirring in between until melted.
- Pour the peanut butter on top of the hot brownies and spread it evenly over the top.1 cup creamy peanut butter
- Cool for 15 more minutes and then sprinkle the roughly chopped butterfingers on top, gently pressing them in.3 1.9 ounce butterfingers
- Allow to cool completely before slicing.
Notes
- Line with Aluminum Foil: If you’re not into parchment, foil works too—just spray it with nonstick cooking spray to avoid sticking.
- Don’t Overmix: Stir the dry ingredients into the wet until just combined. Overmixing can make brownies tough instead of chewy.
- Mind the Oven: Every oven’s a bit different. If the center of the brownies looks raw at 40 minutes, give it a few more. If the edges pull away too soon, reduce the time next time.
- Check With a Toothpick: You want it to come out with a little bit of batter or crumbs, not totally wet or completely dry. That’s how you get those chewy brownies.
- Crush Butterfingers: A simple way is to put them in a zip-top bag and use a rolling pin or can to crush them—less mess, more control.
- Don’t Skimp on the Topping: The peanut butter layer is pure gold. Warm the PB until pourable so it glides right over the top of the brownies.
Nutrition
Love This Recipe?
Follow @ThisSillyGirlsKitchen on Instagram and @danadevolk on Pinterest for more!


