
This post may contain affiliate links.
Mint Fudge is a creamy, no bake candy that folds crushed Oreos and Andes mints into a green tinted white chocolate cream cheese base, no candy thermometer or corn syrup anywhere in sight. I made a pan on a cozy December Sunday and the girls declared it mint chip ice cream in fudge form. If your family are fudge people like mine, my classic chocolate fudge is the old fashioned cousin of this minty pan.
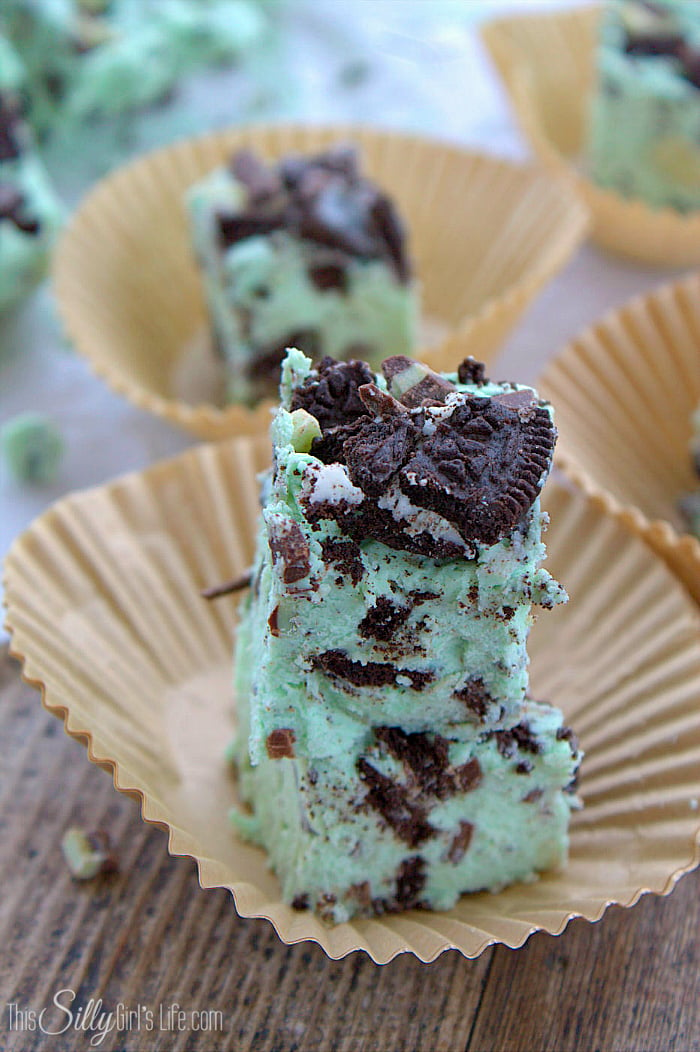
Cream cheese keeps this fudge impossibly smooth while the Oreos and Andes add crunch in every square.
Mint Fudge Quick Look
- 🕒 Prep Time: 15 minutes
- 🌡️ Cook Time: 0 minutes
- ⏳ Total Time: 4 hours 15 minutes
- 🍽️ Serving: 20 servings
- ⚡ Calories: 351kcal
- 🌶️ Flavor Profile: Cool mint and white chocolate with crunchy Oreo and Andes pieces
- ✋ Difficulty: Very easy, no candy thermometer at all, simpler than my chocolate fudge
Quick Answer
Cream softened cream cheese and powdered sugar in a stand mixer, then mix in the vanilla. Melt white chocolate chips over a double boiler, add them to the cream cheese mixture, and mix thoroughly, then tint the base green with gel food coloring. Stir in three quarters of the crushed Oreos and Andes baking chips, press the mixture into a parchment lined 9×9 pan, and gently press the remaining cookies and mints into the top. Chill for 4 hours until set, then cut into small squares and serve.
Jump to:
Why This Recipe Works
Click to see the technique science
- Cream cheese replaces the candy thermometer. Traditional fudge needs a precise soft ball stage, but this base sets in the fridge with zero sugar cooking, so it is genuinely foolproof.
- White chocolate does the setting. Once the melted chips cool, they firm the cream cheese base into a sliceable fudge texture that still melts on your tongue.
- Andes chips carry the mint. The mint flavor comes entirely from the baking chips, so it lands as a smooth chocolate mint, never toothpaste sharp.
- Powdered sugar keeps it silky. It dissolves completely into the cream cheese, sweetening the fudge without a hint of graininess.
- Saving a quarter for the top pays off. Pressing the reserved Oreos and mints into the surface makes every square look bakery finished and adds fresh crunch.
- Gel coloring keeps the texture tight. A few drops of gel tint the whole pan festive green without loosening the fudge the way liquid coloring would.
Why You’ll Love This Recipe
- No candy thermometer, no boiling sugar, the mixer and fridge do all the work.
- Crushed Oreos and Andes mints in every bite make it taste like mint chip ice cream.
- It scratches the same mint chip itch as my shamrock shake in a make ahead square.
- It has earned a permanent spot in our rotation, right up there with our chocolate covered ritz crackers.
- It has earned a permanent spot in our rotation, right up there with our no churn mint chocolate chip ice cream.
- It earns a spot in the rotation right next to our Christmas trail mix.
Key Ingredients
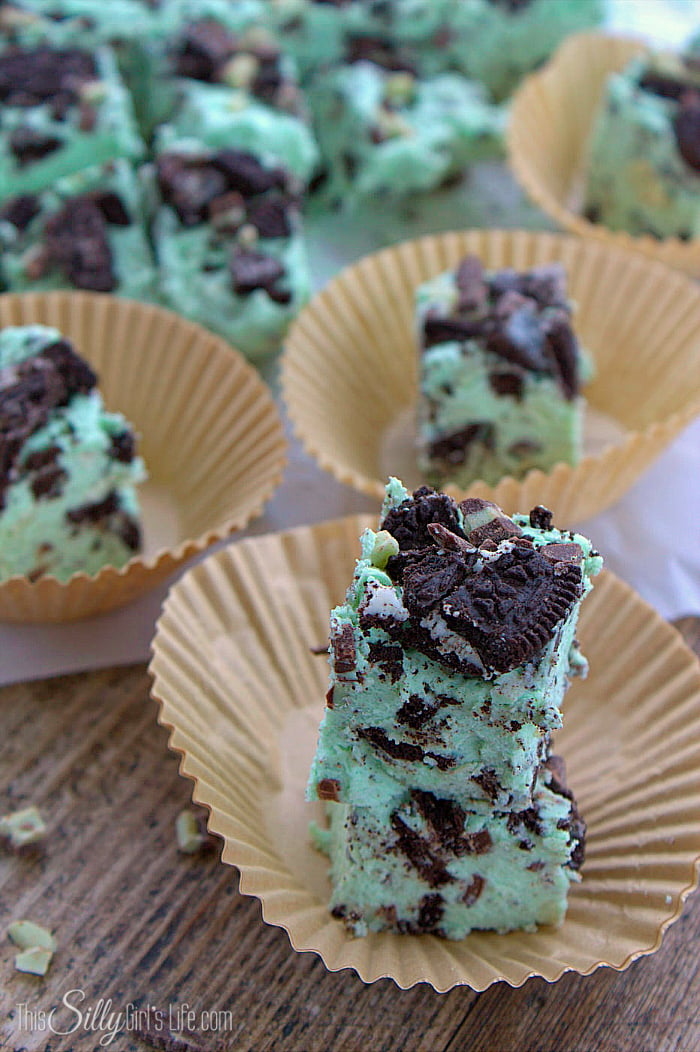
Seven simple ingredients, and the mixer does the heavy lifting.
- Cream Cheese: The secret base. It makes the fudge unbelievably creamy and completely skips the candy making step.
- White Chocolate Chips: The setter. Melted and mixed in, they firm the fudge as it chills.
- Andes Baking Chips: The mint. Smooth chocolate mint flavor without any extract harshness.
- Oreo Cookies: The crunch. Crushed and folded through, plus extra pressed on top.
- Green Gel Food Coloring: The festive touch. Gel tints boldly without thinning the fudge.
See recipe card for exact quantities.
Variations and Substitutions
One creamy base, a whole calendar of color swaps.
- Peppermint version: Swap the Andes for crushed candy canes and a drop of peppermint extract for Christmas.
- Mint Oreo double down: Use Mint Oreos instead of regular for mint inside and out.
- No coloring needed: Skip the green entirely, the fudge is just as delicious in its natural cream color.
- Dark chocolate drizzle: A zigzag of melted semi sweet chocolate over the top dresses it up for gifting.
- Nut lovers version: Skip the mints and make my fudge with nuts for the classic walnut studded pan.
- Craving a different flavor next time? Our oreo brownies delivers the same easy comfort with its own twist.
- Craving a different flavor next time? Our chocolate hot fudge sauce delivers the same easy comfort with its own twist.
- In the mood for something different? Our edible chocolate cookie dough with oreos scratches a similar itch.
How to Make Mint Fudge
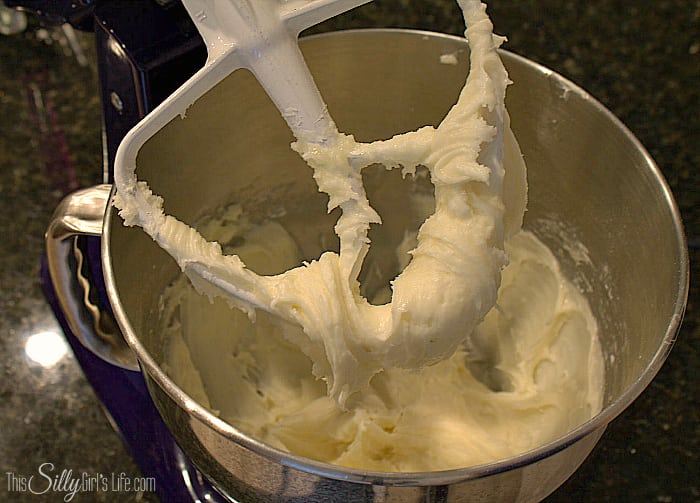
- Place the softened cream cheese and powdered sugar in a stand mixer fitted with the paddle attachment. Cream them together until smooth, then add the vanilla and mix.
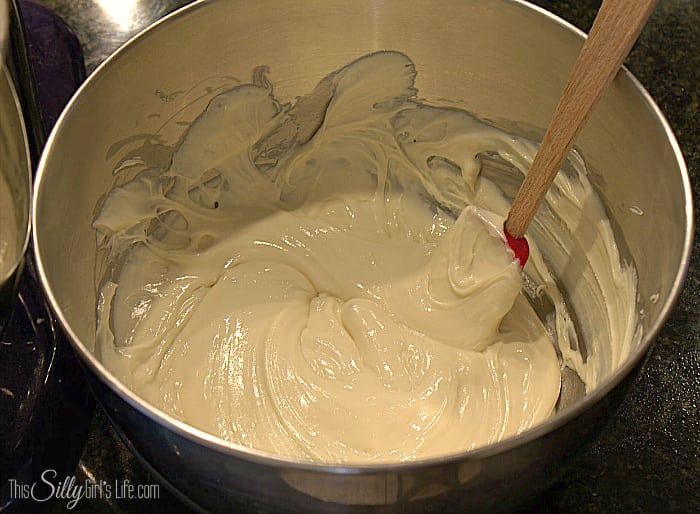
- Melt the white chocolate chips over a double boiler, stirring until smooth. Add the melted chocolate to the cream cheese mixture and mix thoroughly.
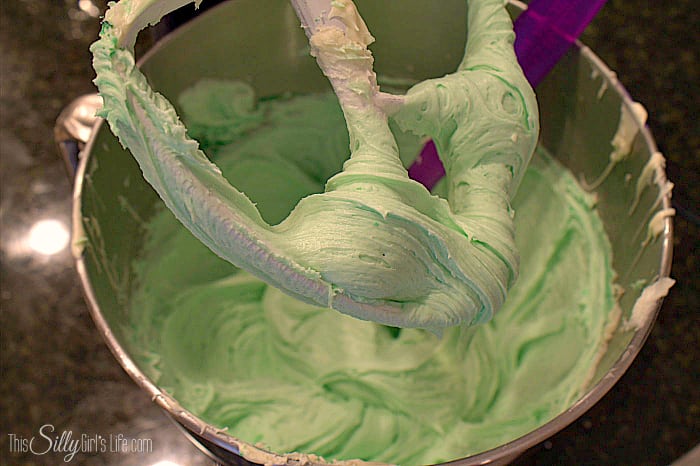
- Add green gel food coloring a little at a time, mixing until the fudge base reaches the shade of green you like.
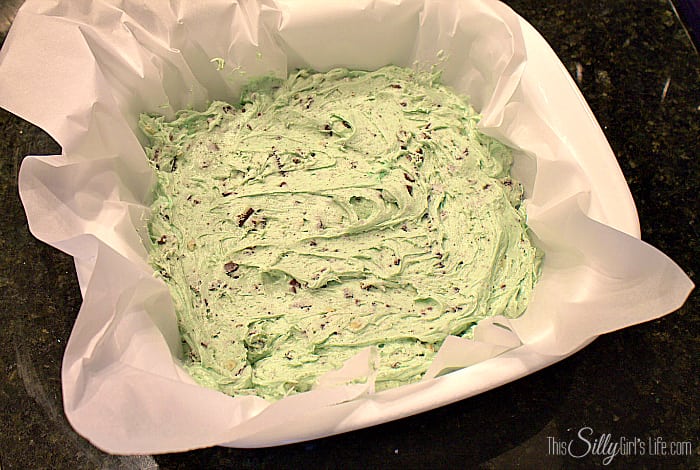
- Stir in three quarters of the crushed Oreo cookies and three quarters of the Andes baking chips until evenly combined.
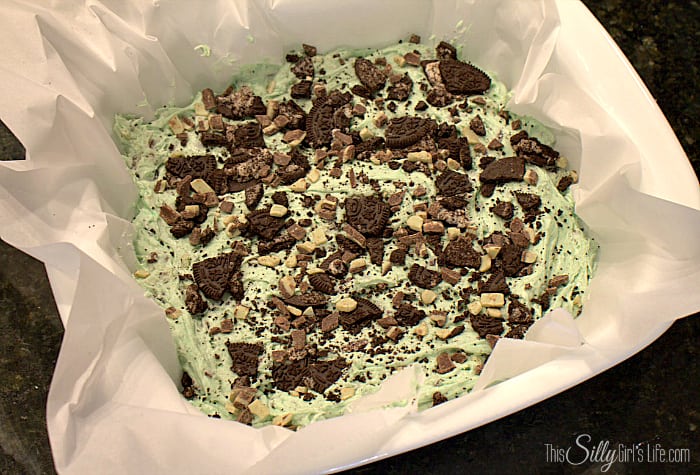
- Press the mixture into a 9×9 inch baking pan lined with parchment paper, then scatter the remaining cookies and mints over the top and gently press them in.
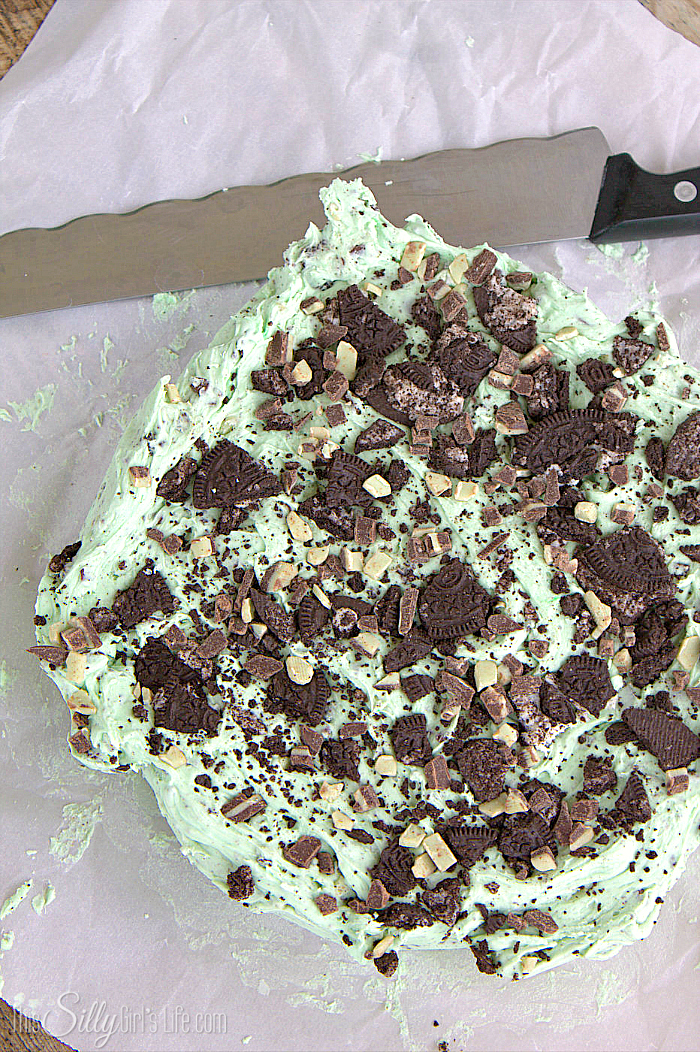
- Refrigerate for 4 hours until fully set. Lift the fudge out with the parchment, cut into small squares, and serve.
Recipe Tips & Tricks
- Soften the cream cheese fully. Cold cream cheese leaves lumps that never smooth out once the chocolate goes in.
- Melt the chocolate gently. A double boiler keeps white chocolate from seizing, it scorches faster than dark chocolate.
- Crush the Oreos coarse. Big cookie pieces give the best texture, fine crumbs disappear into the base.
- Use gel coloring, not liquid. Liquid coloring can loosen the fudge, gel gives bold color from just a few drops.
- Chill the full 4 hours. The white chocolate needs the time to set the base firm enough for clean squares.
- Cut small. This fudge is rich, and little squares stretch one pan across a whole party tray.
- Make it a spread. When you are feeding a crowd, round out the table with our chocolate covered oreos.
- Make it a full spread. Our no bake mint chocolate cheesecake rounds out the table.
Serving Ideas and Suggestions
This mint fudge is a holiday tray hero, the green squares light up Christmas cookie tins and double for St. Patricks Day in March. Add a few squares to a holiday tin with my Christmas shortbread cookies and watch it disappear first.
Still filling out the menu? Readers love pairing this one with our Christmas punch and our Oreo balls.

Mint Fudge FAQs
Give mint fudge at least 4 hours in the refrigerator, though overnight is even better. The white chocolate needs that time to fully firm the cream cheese base so the squares cut clean instead of smearing. Rushing it in the freezer works in about 90 minutes in a pinch, but the texture is creamiest when it sets slowly in the fridge.
Because of the cream cheese base, mint fudge lives in the refrigerator, in an airtight container for up to a week. Layer parchment between the squares so the Oreo topping stays put. Let the squares sit at room temperature for 5 to 10 minutes before serving for the creamiest bite, and always send leftovers home with guests, it is dangerous to keep around.
Yes, mint fudge freezes really well. Set the pan fully in the fridge first, cut the fudge into squares, and freeze them in a single layer before packing into a freezer container with parchment between layers for up to 2 months. Thaw the squares overnight in the refrigerator, never on the counter, so the cream cheese base stays smooth and safe.
Soft mint fudge usually means it needs more chill time or the white chocolate was under melted. Give it a few more hours in the coldest part of the fridge first. Next time, make sure the chips are fully melted and smooth before mixing, and measure the powdered sugar generously, it provides structure. Liquid food coloring instead of gel can also thin the base, so stick with gel.
Andes baking chips are little pieces of the classic chocolate mint candy, sold near the chocolate chips in most baking aisles. If you cannot find them, chop up whole Andes mints, use mint chocolate chips, or swap in crushed Thin Mints or Grasshopper cookies. Each option keeps that smooth chocolate mint flavor that makes this fudge taste like mint chip ice cream.
They are close cousins. Grasshopper fudge is typically made with marshmallow creme and creme de menthe flavoring, while this mint fudge uses a cream cheese and white chocolate base with Oreos and Andes mints folded in. The result is creamier and chunkier, more like a cookies and cream candy with a cool mint finish, and it needs zero cooking beyond melting the chips.


Made this mint fudge? Leave a comment and a star rating below, and tell me if it made it past day one at your house!
On the same candy plate, my sprinkle dipped cake truffles bring the birthday color.
Hazelnut fans need my no bake Nutella truffles on the same holiday tray.

Mint Fudge
Ingredients
- 8 oz cream cheese softened
- 4 cups powdered sugar
- 15 oz white chocolate chips
- 1 1/2 tsp vanilla extract
- 15 Oreo cookies crushed
- 1 cup Andes baking chips
- green gel food coloring
Instructions
- Place cream cheese and powdered sugar in a stand mixer with paddle attachment. Cream together then add in the vanilla and mix.
- Over a double boiler, melt the white chocolate. Add to the stand mixer with the cream cheese and mix thoroughly. Color with food coloring to the green you like.
- Add in 3/4 of the Oreo cookies and 3/4 of the Andes baking chips. Mix again until combined.
- Press mixture into a 9×9 inch baking pan lined with parchment paper. Add the additional cookies and mints to the top and gently press in.
- Place in fridge for 4 hours to set. Cut into small squares, serve and enjoy!
Notes
- Recipe adapted from Buns in My Oven.
- Swap out your regular Oreos for mint flavor.
- For more mint you can add mint extract alongside the vanilla.
- This can be doubled in a 9×13-inch baking pan.
- This needs time to set up so make sure that you give it at least 4 hours.
Nutrition
Love This Recipe?
Follow @ThisSillyGirlsKitchen on Instagram and @ThisSillyGirlsKitchen on Pinterest for more!














Oh yum!! This fudge looks glorious… I love all things mint chocolate and have made a mint chocolate Oreo ice cream that looks similar to this fudge… And would be PERFECT for sprinkling this fudge over. Would that be wrong?? I don’t even care!
This looks so amazing! I always buy mint chocolate fudge at candy shops, now I can make it at home! 🙂
Looks delicious!!!
I know I’m in love with this fudge and I haven’t even tasted it yet! Looks absolutely delicious!! 🙂 Can’t wait to try it!
Oh my gosh this looks soooo addictive!
wow, those look to die for!
thanks for sharing.
dropping by via sits to say hi!
Oh wow, this looks amazing. That green would be great for St.Paddy’s day.