
This post may contain affiliate links.
Artisan Bread with a crackly golden crust and a soft, airy inside sounds fancy, but this no-knead version takes about five minutes of hands-on work and four ingredients you already have. The first time I pulled a crusty loaf out of the oven on a *cold winter morning*, the whole house smelled like a bakery and Maddie could not believe we made it. It is the perfect partner for our corn chowder.
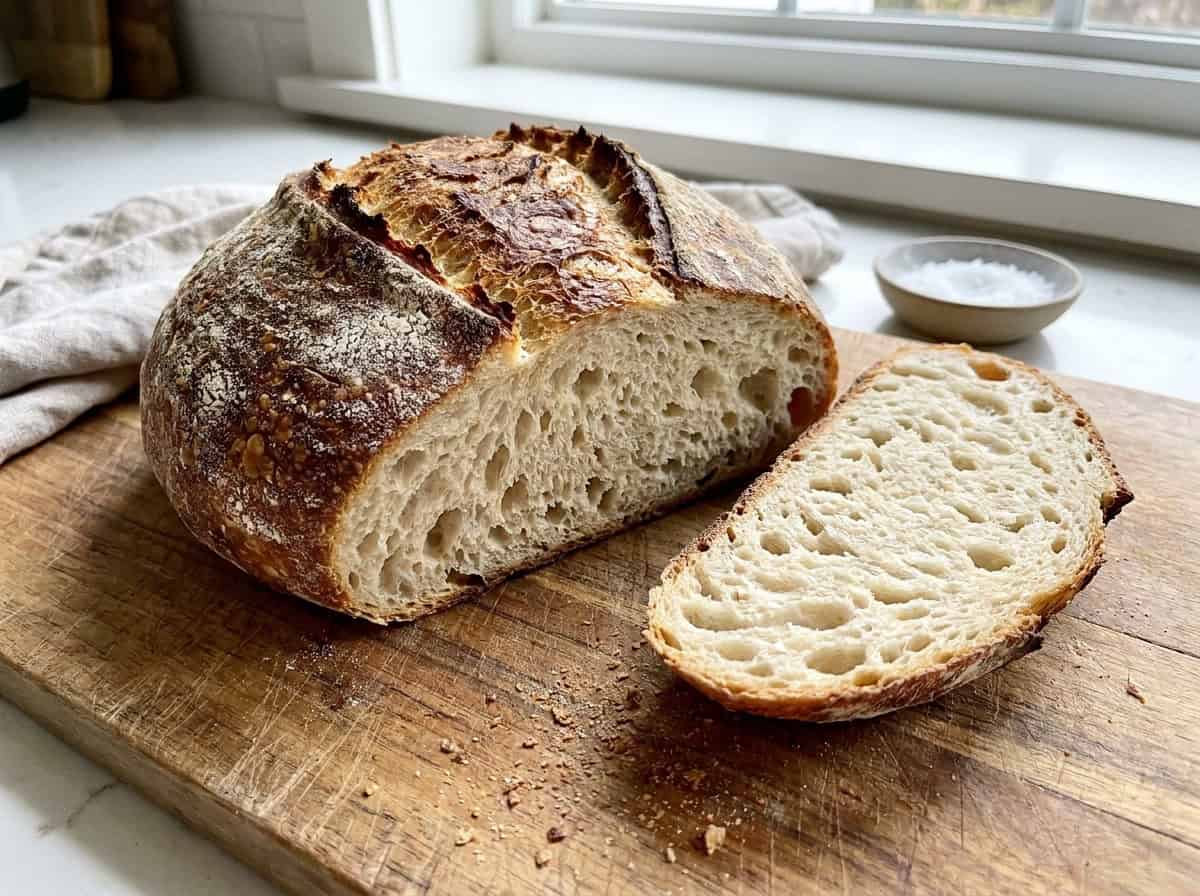
No kneading, no fancy equipment, just stir, rest, and bake your way to bakery-style bread at home.
Artisan Bread Quick Look
- 🕒 Prep Time: 5 minutes
- 🌡️ Cook Time: 30 minutes
- ⏳ Total Time: about 3 hours (mostly hands-off)
- 🍽️ Serving: 15 servings
- ⚡ Calories: 200kcal
- 🌶️ Flavor Profile: Crusty, chewy, and mild with a soft open crumb
- ✋ Difficulty: Easy, no kneading required, simpler than our Dutch oven sourdough bread
Quick Answer
To make no-knead Artisan Bread, stir granulated yeast and salt into lukewarm water, then mix in the flour until you have a wet, shaggy dough, no kneading needed. Cover loosely and let it rise at room temperature for about 2 hours, then bake right away or refrigerate the dough for up to two weeks. When ready, shape a piece into a ball, let it rest, then bake in a hot oven with a pan of water for steam until the crust is deep golden and crackly, about 30 minutes.
Jump to:
Why This Recipe Works
Click to see the technique science
- No kneading at all. A wetter dough develops gluten on its own as it rests, so you skip the kneading entirely and just stir it together.
- Four simple ingredients. Flour, water, yeast, and salt are all it takes to make a real crusty artisan loaf.
- The dough keeps for weeks. Store the dough in the fridge for up to two weeks and bake fresh loaves whenever you want them.
- Steam makes the crust. A pan of water in the oven creates steam, which gives you that signature crackly, deep-golden bakery crust.
- It tastes better as it ages. Like sourdough, the refrigerated dough develops more flavor over a few days.
- One batch, many loaves. A single batch of dough makes several loaves, so you can bake one fresh today and pull off more dough to bake warm bread later in the week with zero extra effort.
Why You’ll Love This Recipe
- It takes about five minutes of hands-on work for bakery-quality bread at home.
- There is no kneading and no special equipment required.
- It is the ultimate companion to a bowl of soup, like our chicken noodle soup.
- It is the kind of no fuss win that pairs beautifully with our copycat cheesecake factory brown bread on a busy week.
- It is the kind of no fuss win that pairs beautifully with our banana nut bread on a busy week.
- It earns a spot in the rotation right next to our lemon bread.
- It is the kind of no fuss win that pairs beautifully with our ham and cheese savory bread pudding on a busy week.
Key Ingredients
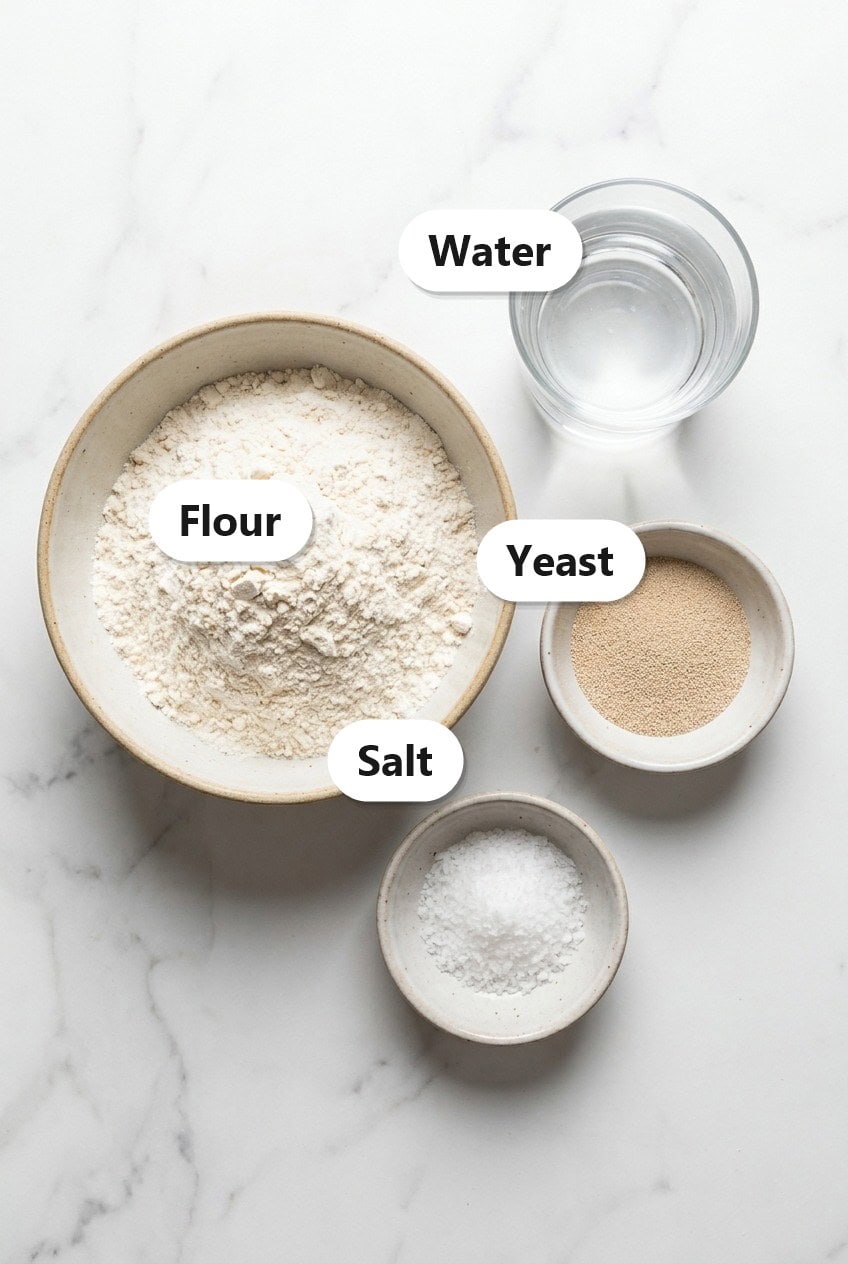
Just four pantry staples make this crusty no-knead loaf.
- All-purpose flour: the base of the dough, no need for special bread flour.
- Granulated yeast: gives the bread its rise and that classic yeasty flavor.
- Lukewarm water: activates the yeast. Avoid hot water, which can kill it.
- Kosher salt: essential for flavor and to keep the yeast in check.
See recipe card for exact quantities.
Variations and Substitutions
This Artisan Bread is a perfect base to build on.
- Stir in fresh rosemary, garlic, or shredded cheese for a savory loaf.
- Add a handful of dried cranberries and walnuts for a sweet-savory version.
- Use part whole wheat flour for a heartier, nuttier loaf.
- Shape the dough into rolls instead of one large loaf, reducing the bake time.
- Once you master this, try the tangy depth of our Dutch oven sourdough bread.
- For another spin on this idea, try our panko bread crumbs recipe next time.
- For another spin on this idea, try our copycat panera broccoli cheddar soup next time.
- In the mood for something different? Our fireball apple bread pudding scratches a similar itch.
- For another spin on this idea, try our chocolate chip banana bread next time.
How to Make Artisan Bread
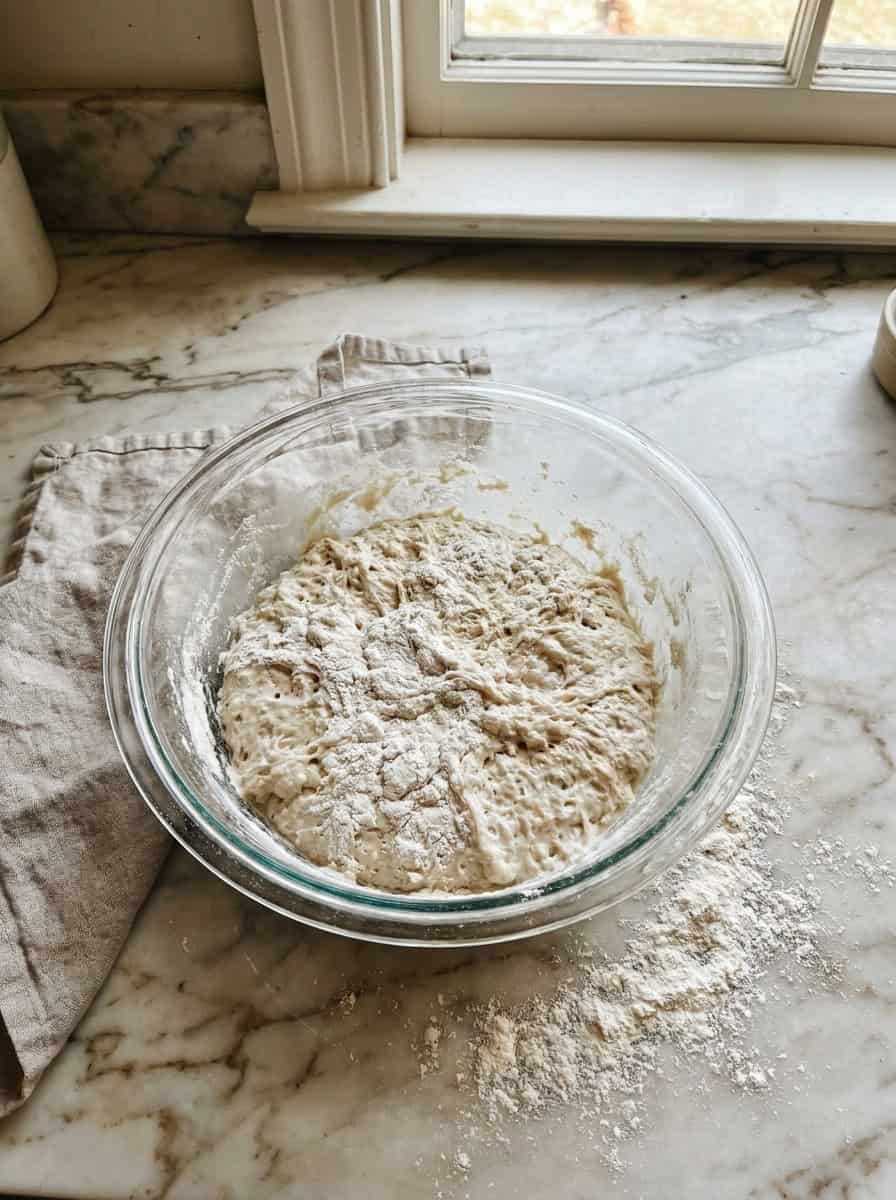
- In a large bowl, stir the granulated yeast and kosher salt into the lukewarm water.
- Add the flour and mix just until a wet, shaggy dough forms with no dry patches. Do not knead it.
- Cover the bowl loosely and let the dough rise at room temperature for about 2 hours, until it rises and begins to flatten on top.
- Use the dough right away, or refrigerate it in a lidded container for up to two weeks, scooping off pieces as you need them.
- When ready to bake, cut off a grapefruit-sized piece, shape it into a smooth ball, and let it rest on parchment for about 40 minutes.
- Preheat the oven to 450 degrees Fahrenheit with a baking stone or pan inside and a separate pan for water. Slash the top of the loaf, slide it in, add a cup of hot water to the empty pan for steam, and bake about 30 minutes until deep golden and crusty.
Recipe Tips & Tricks
- Use lukewarm, not hot, water. Water that is too hot will kill the yeast and the dough will not rise.
- Do not knead. The wet dough develops structure on its own as it rests. Just stir until combined.
- Add steam. A pan of hot water in the oven is the secret to a crackly, bakery-style crust.
- Let the dough age. The flavor improves after a day or two in the fridge, much like sourdough.
- Slash the top with a sharp knife so the loaf can expand evenly as it bakes.
- Cool before slicing. Let the bread rest at least 20 minutes so the inside finishes setting up.
- Double up for gatherings. Serve it alongside our fairy bread and watch both disappear.
- Double up for gatherings. Serve it alongside our challah bread and watch both disappear.
- Make it a full spread. Our homemade white bread rounds out the table.
- Double up for gatherings. Serve it alongside our garlic cheese bread and watch both disappear.
Serving Ideas and Suggestions
This Artisan Bread is made for soup. Tear off hunks to dunk into a bowl, or slice it thick for toast and sandwiches.
This loaf was made for dunking, especially next to a bowl of our New England clam chowder.
Slather warm slices with butter, drizzle with olive oil and balsamic for dipping, or use it as the base for the best garlic bread and bruschetta. A fresh loaf rarely lasts long around here.
Artisan Bread FAQs
Correct, no kneading at all. The dough is wetter than traditional bread dough, which lets the gluten develop on its own during the long rest. Just stir the ingredients together.
Stored in a lidded (not airtight) container in the fridge, the dough keeps for up to two weeks. Scoop off and bake fresh loaves whenever you like, and the flavor deepens over time.
The most common culprit is water that was too hot and killed the yeast, or old, expired yeast. Use lukewarm water and fresh yeast, and give the dough a full warm rise.
Steam is the key. Bake with a pan of hot water in the oven, and use a preheated baking stone or heavy pan so the loaf gets an immediate blast of heat.
Yes. This recipe uses a baking stone or sheet plus a separate pan of water for steam, so no Dutch oven is required. If you do have one, you can preheat it and bake the loaf inside covered for the first 20 minutes, then uncovered, for an even crispier crust. Either method gives you a beautiful crusty loaf.
Mix in rosemary, roasted garlic, shredded cheese, olives, or dried fruit and nuts before the rise. Just fold your add-ins into the shaggy dough. For a sweeter loaf, cinnamon and raisins are wonderful, and a handful of everything bagel seasoning on top before baking is always a hit.
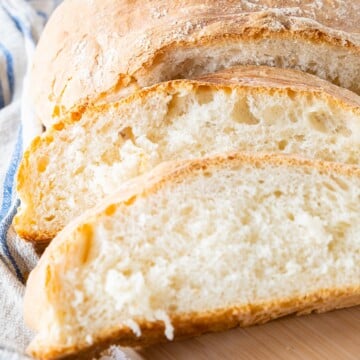



Serve a warm slice with a bowl of our cozy Italian wedding soup next.
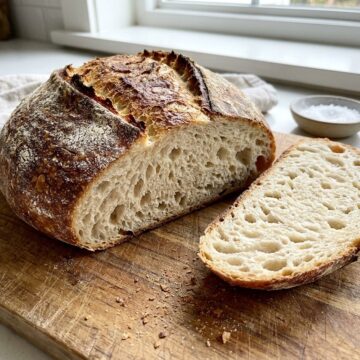

Easy 5 Minute Artisan Bread (No Knead)
Ingredients
- 3 cups 1 1/2 pounds lukewarm water (you can use cold water, but it will take the dough longer
- to rise. Just don’t use hot water or you may kill the yeast)
- 1 tablespoon granulated yeast
- *If you use cake yeast you will need 1.3 ounces.
- 1 to 1 1/2 tablespoons Morton Kosher Salt
- 6 1/2 cups 2-pounds all-purpose flour
Instructions
Mixing and Storing the Dough
- Warm the water slightly and mix with yeast and salt to a 5 or 6 quart bowl or container (lidded, but not airtight plastic container). You don’t need to let the yeast rise.
- Mix in the flour- kneading is unnecessary: Add all of the flour at once, Mix with a wooden spoon or a danish dough hook (wish I had one). If you’re hand mixing and it becomes too difficult to incorporate all the flour with the spoon, you can reach into your mixing bowl with very wet hands and press the mixture together. It isn’t necessary to knead. When done, everything should be uniformly moist.
- Allow to rise: Cover with a lid (not airtight). If using a bowl, cover with towel or plastic wrap loosely; you want the gases to be able to escape Allow the mixture to rise at room temperature for about 2 hours or until dough flattens. This might take longer depending on the initial water or air temperature. DON’T PUNCH DOUGH DOWN; like I said, it will flatten on it own. Longer rising times (up to 5 hours) will not harm the result. You can use a portion of the dough any time after this period. Fully refrigerated wet dough is less sticky and is easier to work with than dough at room temperature. The authors recommend that the first time you try this recipe, you refrigerate the dough overnight (or at least 3 hours) before shaping a loaf. The next day when you pull it out of the fridge, you will notice that the rising dough has gone down a little, totally normal. It won’t rise again like it initially did.
Baking the Bread
- The gluten cloak: don’t knead, just “cloak” and shape a loaf in 30 to 60 seconds. I like to place a piece of parchment paper on a flat cookie sheet and sprinkle flour on it. If you have a pizza peel, that works great too. But make sure you liberally cover it with flour or cornmeal. Sprinkle the surface of your refrigerated dough with flour. Pull up and cut off a 1-pound (grapefruit-sized) piece of dough, using a serrated knife. Hold the mass of dough in your hands and add a little more flour as needed so it won’t stick to your hands. Gently stretch the surface of the dough around to the bottom on all four sides, rotating the ball a quarter-turn as you go. Most of the dusting flour will fall off; it’s not intended to be incorporated into the dough.The entire process in this step should take no longer than 30 to 60 seconds.
- Rest the loaf and let it rise: Place your shaped dough ball on prepared parchment paper on cookie sheet or pizza peel. Allow the loaf to rest on the peel for about 40 to 90 minutes. The book says the longer rising time the more holes in the bread (holes are a good thing in artisan bread – makes the bread lighter). The bread won’t rise much doing this time, that will happen during the baking process.
- Twenty minutes before baking, preheat the oven to 500 degrees F (the book says 450, but I’ve read other recipes that suggest 500 and then bring the temp down)., at the same time, preheat your baking stone, cast iron skillet or other bread dish placed on the middle rack *they don’t recommend glass because of high temps, but I’ve used oven safe glass bowls and I’ve never had an issue; I’ve read other recipes that recommends using them…so up to you. Place an empty broiler tray (or bread pan works too) for holding water on shelf below the bread.
- Dust and slash: Dust the top of the loaf liberally with the flour and slash a pattern on top of bread. This will help the bread expand better.
- Baking with steam: After a 20 minute preheat, you’re ready to bake. BRING the temp down to 450! I hate the idea of sliding my loaf into the preheated baking stone, so I just lift the parchment and place it right into the stone/iron skillet and call it good (also recommended on their site). Quickly but carefully pour about 1 cup of hot tap water into your broiler tray or bread pan and close the oven door to trap the steam. If using parchment paper, bake for about 20 minutes then remove the parchment paper and bake for another 10, or until the crust is nicely browned and firm to the touch. Because you’ve used wet dough, there is little risk of drying out the interior, despite the dark crust. Allow the loaf to cool completely, preferably on a wire rack.
Notes
airtight) container and use it over the next 14 days. The dough
“matures” over the 14 day period, improving flavor and texture of
your bread. Cut off, shape and bake more loaves as you need them.
Nutrition
Love This Recipe?
Follow @ThisSillyGirlsKitchen on Instagram and @ThisSillyGirlsKitchen on Pinterest for more!










Not sure where the 5 minutes is but sounds like some yummy bread.
I love a good crusty loaf of artisan bread. Once I eat through the loaf I have I will give this one a try.
#sitsblogging
I love bread this looks so good would go with so many delicious fall meals
come see us at http://shopannies.blogspot.com
Looks sooo good! Love fresh artisan bread. Thanks for linking up to Show Me Saturday!
Your bread looks so delicious! I love bread, but lately I’ve been attempting to eat less of it – you’re tempting me now… 😉
Gah! I have been dying to try this! Never would have thought to look for the book at the library though! Thanks for the idea! 🙂
This was so interesting to read. There really are a couple of tricks to getting it right. I had no idea you baked it with steam… kind of like cheesecake in a water bath, right? It came out so beautifully – lucky people in your household!!
Yum, I love artisan bread! I have to try this! I haven’th had the greatest turn out with my bread baking, might be one of those things you just get better at with practice!