This post may contain affiliate links.
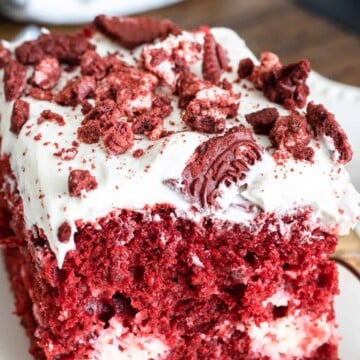
Red Velvet Cheesecake Cake is the showstopper dessert that looks like you spent hours on it, but it starts with a boxed cake mix and a simple cheesecake swirl. Moist red velvet cake ribboned with creamy cheesecake, topped with fluffy cream cheese frosting and crushed red velvet Oreos, it is pure magic. I made it for a Valentine’s dinner and Maddie gasped at that pretty marbled slice. If you love a cream cheese topping, you will also adore our chocolate cream cheese frosting.
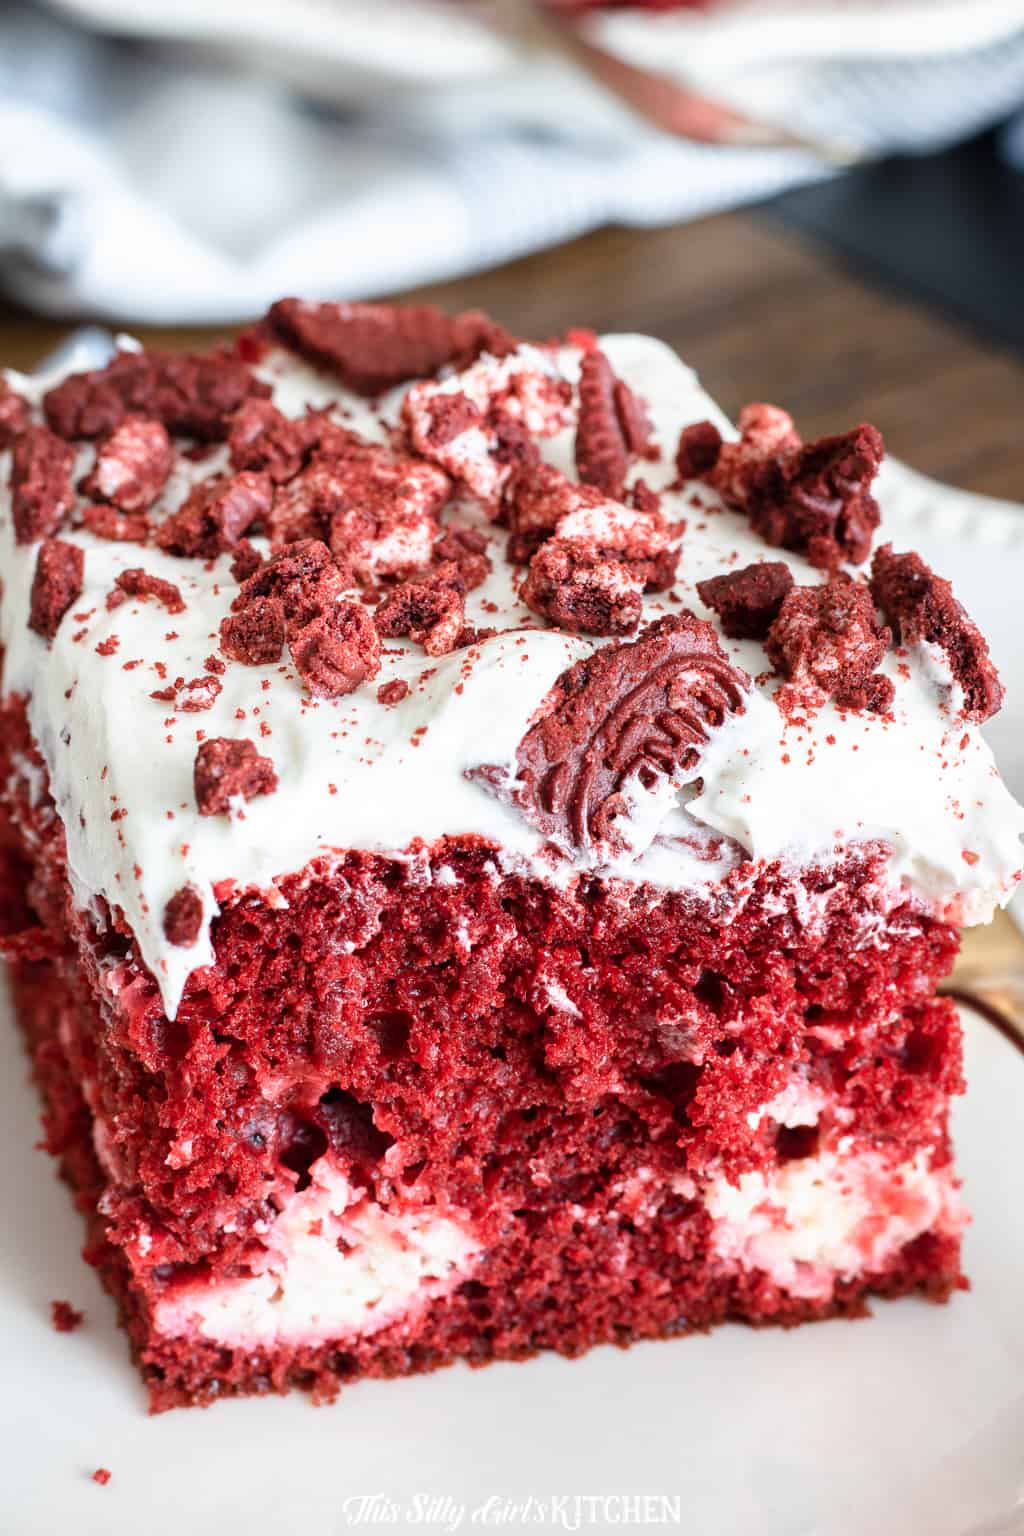
One forkful of that red velvet cake swirled with tangy cheesecake and you will understand why this is a guaranteed crowd pleaser.
Red Velvet Cheesecake Cake Quick Look
- 🕒 Prep Time: 20 minutes
- 🌡️ Cook Time: 35 minutes
- ⏳ Total Time: 55 minutes
- 🍽️ Serving: 15 servings
- ⚡ Calories: 520kcal
- 🌶️ Flavor Profile: Rich, tangy, and sweet (a red velvet and cheesecake dream)
- ✋ Difficulty: Easy, starts with a cake mix, like our mini cheesecakes
Quick Answer
To make a red velvet cheesecake cake, mix up a red velvet cake batter and a simple cheesecake batter. Layer half the cake batter in a pan, dollop on the cheesecake, repeat, then swirl the two together. Bake until set, cool completely, and top with fluffy cream cheese frosting and crushed red velvet Oreos.
Jump to:
- Red Velvet Cheesecake Cake Quick Look
- Quick Answer
- Why This Recipe Works
- Why You’ll Love This Recipe
- Key Ingredients
- Variations and Substitutions
- How to Make Red Velvet Cheesecake Cake
- Recipe Tips & Tricks
- Serving Ideas and Suggestions
- Red Velvet Cheesecake Cake FAQs
- Other Recommended Cake and Dessert Recipes
- Red Velvet Cheesecake Cake Recipe
Why This Recipe Works
Click to see the technique science
- Boxed mix shortcut. Starting with a red velvet cake mix means you get that classic flavor and color with almost no effort.
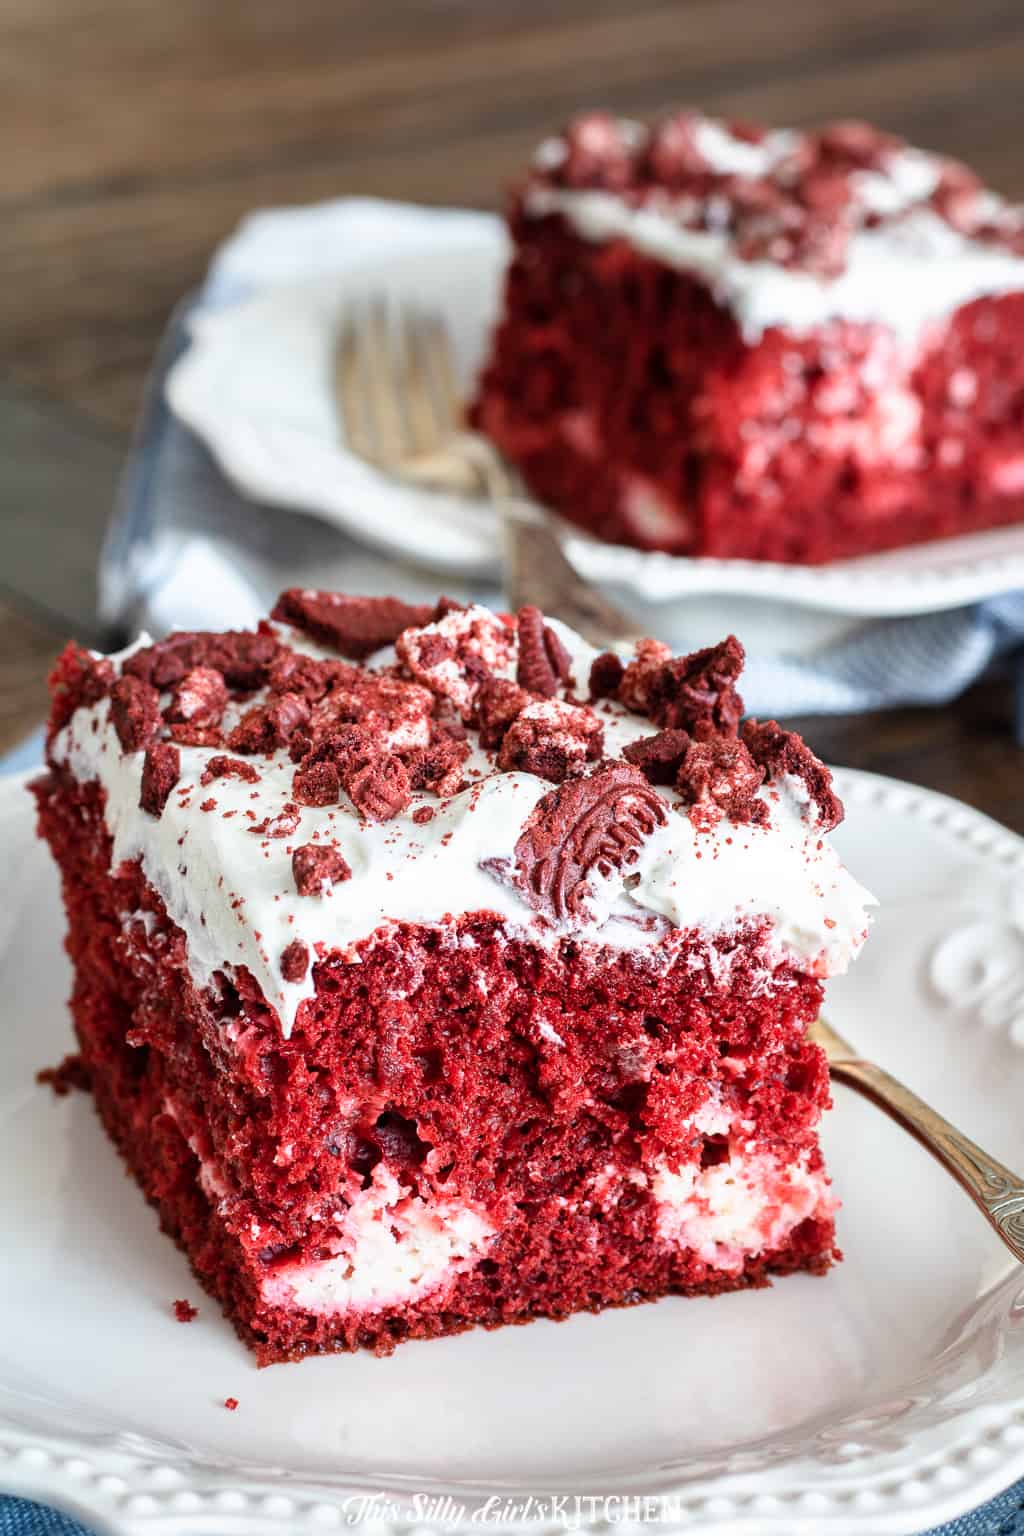
- A cheesecake swirl. Dolloping and swirling a quick cheesecake batter right into the cake gives every slice creamy, tangy ribbons.
- One pan, no layers. Baking it as a single 9 by 13 cake skips the fuss of stacking and frosting layers.
- Cream cheese frosting. A fluffy homemade cream cheese frosting adds the tangy, sweet finish that red velvet is famous for.
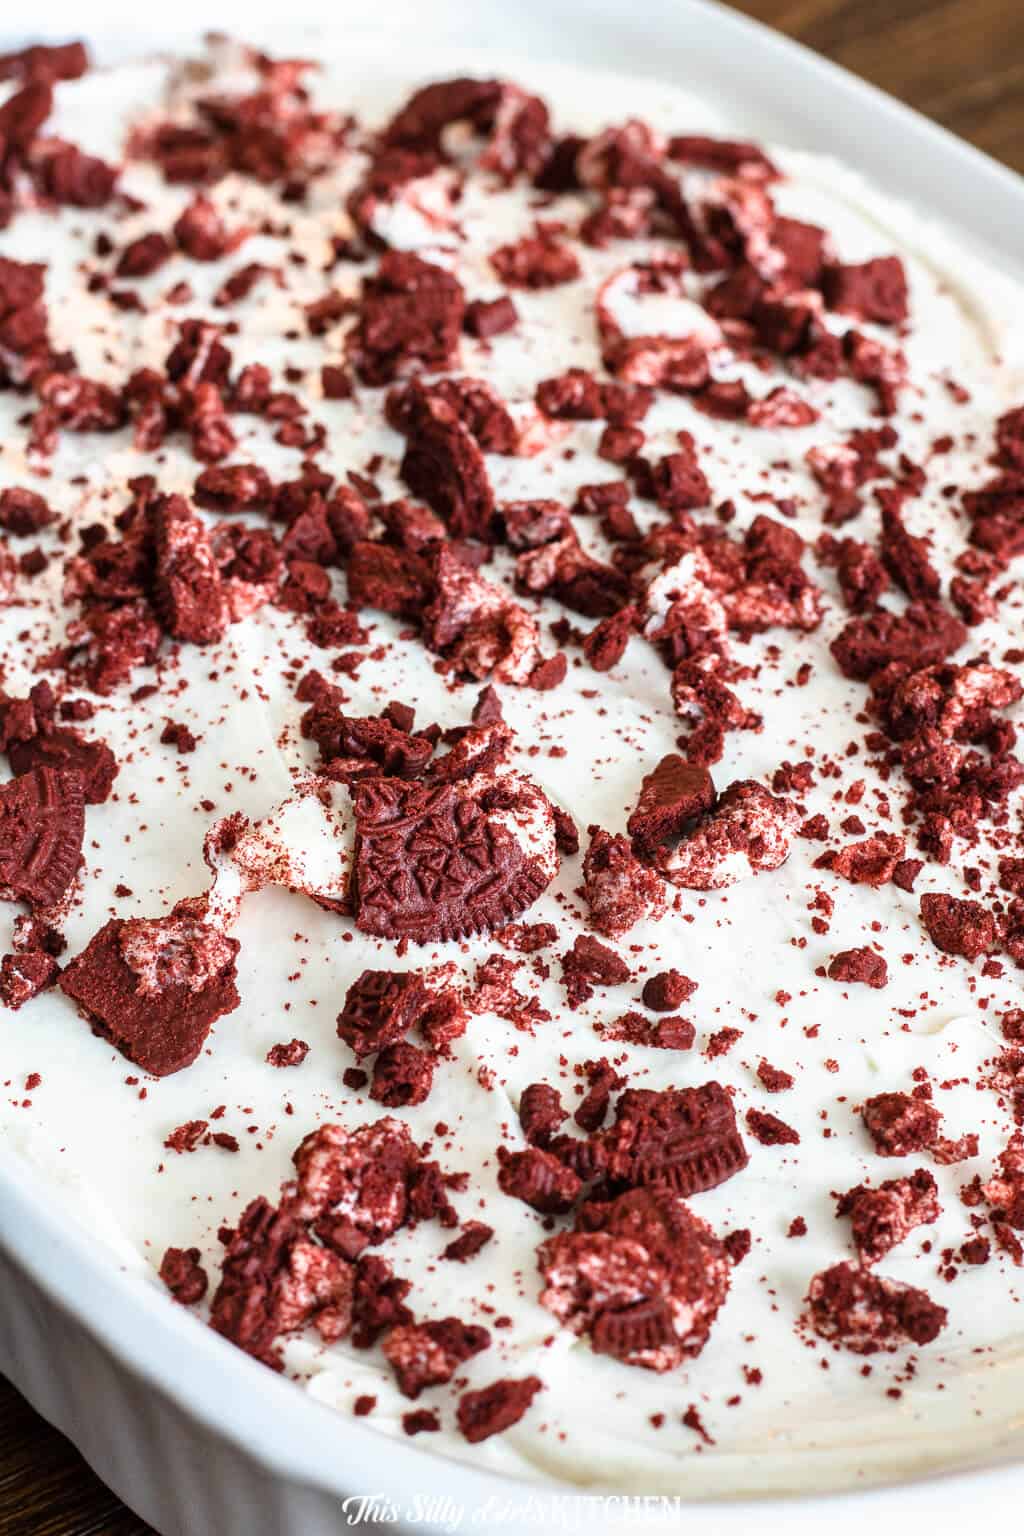
- An Oreo garnish. Crushed red velvet Oreos on top add crunch and make the whole cake look bakery worthy.
- Make ahead friendly. It actually tastes better chilled, so you can bake it a day ahead and frost when you are ready.
Why You’ll Love This Recipe
- It looks impressive but starts with an easy boxed cake mix.
- The cheesecake swirl makes every bite creamy, tangy, and rich.
- It feeds a crowd and is perfect for holidays and celebrations.
- It has earned a permanent spot in our rotation, right up there with our red velvet bundt cake.
- It has earned a permanent spot in our rotation, right up there with our red velvet cookies and cream brownies.
- It earns a spot in the rotation right next to our red velvet blossom cookies.
Key Ingredients
This stunning cake comes together with a few simple ingredients. Here are the ones that matter most.
- Red Velvet Cake Mix: The easy base that delivers classic red velvet flavor and that signature deep red color.
- Cream Cheese: Used in both the cheesecake swirl and the frosting for that rich, tangy flavor throughout.
- Butter and Powdered Sugar: The base of the fluffy cream cheese frosting that crowns the cake.
- Vanilla Bean Paste: Adds warm, fragrant vanilla flavor with pretty flecks. Vanilla extract works too.
- Red Velvet Oreos: Crushed on top for crunch and a fun, festive finishing touch.
See recipe card for exact quantities.
Variations and Substitutions
This cake is easy to make your own. Try one of these twists.
- Layer it up: Bake in two round pans and stack with frosting between for a taller, layered cake.
- Chocolate drizzle: Add a drizzle of melted chocolate or a swipe of our chocolate cream cheese frosting for extra richness.
- Different garnish: Top with fresh raspberries, white chocolate curls, or sprinkles instead of the Oreos.
- From scratch: Use your favorite homemade red velvet cake batter in place of the boxed mix.
- Cupcakes: Divide the batter into a muffin tin for individual red velvet cheesecake cupcakes.
- Craving a different flavor next time? Our strawberry shortcake cheesecake cake delivers the same easy comfort with its own twist.
- Craving a different flavor next time? Our red velvet ice cream delivers the same easy comfort with its own twist.
- In the mood for something different? Our chocolate chip red velvet banana bread scratches a similar itch.
How to Make Red Velvet Cheesecake Cake
- Make the red velvet cake batter by mixing the cake mix, water, oil, and eggs until smooth and well combined.
- Beat the cheesecake layer by creaming the cream cheese with the egg, vanilla, flour, and sugar until smooth and lump free.
- Spread half the cake batter in a 9 by 13 dish, dollop on half the cheesecake batter, repeat with the rest, then swirl with a knife in figure eights.
- Bake at 350 degrees for 30 to 35 minutes until a toothpick comes out mostly clean, then cool completely on a rack.
- Beat the cream cheese frosting by whipping the butter, cream cheese, powdered sugar, and vanilla until light and fluffy.
- Frost the cooled cake and top with crushed red velvet Oreos before slicing and serving.
Recipe Tips & Tricks
- Soften the cream cheese. Room temperature cream cheese blends smooth and lump free for both the swirl and the frosting.
- Swirl, do not mix. Use gentle figure eights with a knife so you keep distinct ribbons of cheesecake instead of blending it all together.
- Cool completely before frosting. A warm cake melts the frosting, so let it cool fully on a rack first.
- Check for doneness. A toothpick should come out mostly clean. The cheesecake swirl may leave a few moist crumbs, and that is okay.
- Chill for clean slices. Refrigerating the frosted cake makes it much easier to cut neat, pretty squares.
- Crush the Oreos last. Add the crushed Oreos just before serving so they stay crunchy.
- Make it a spread. When you are feeding a crowd, round out the table with our red velvet cupcake.
- Make it a spread. When you are feeding a crowd, round out the table with our red velvet pancakes with cream cheese fluff.
- Make it a full spread. Our woolworth cheesecake recipe rounds out the table.
Serving Ideas and Suggestions
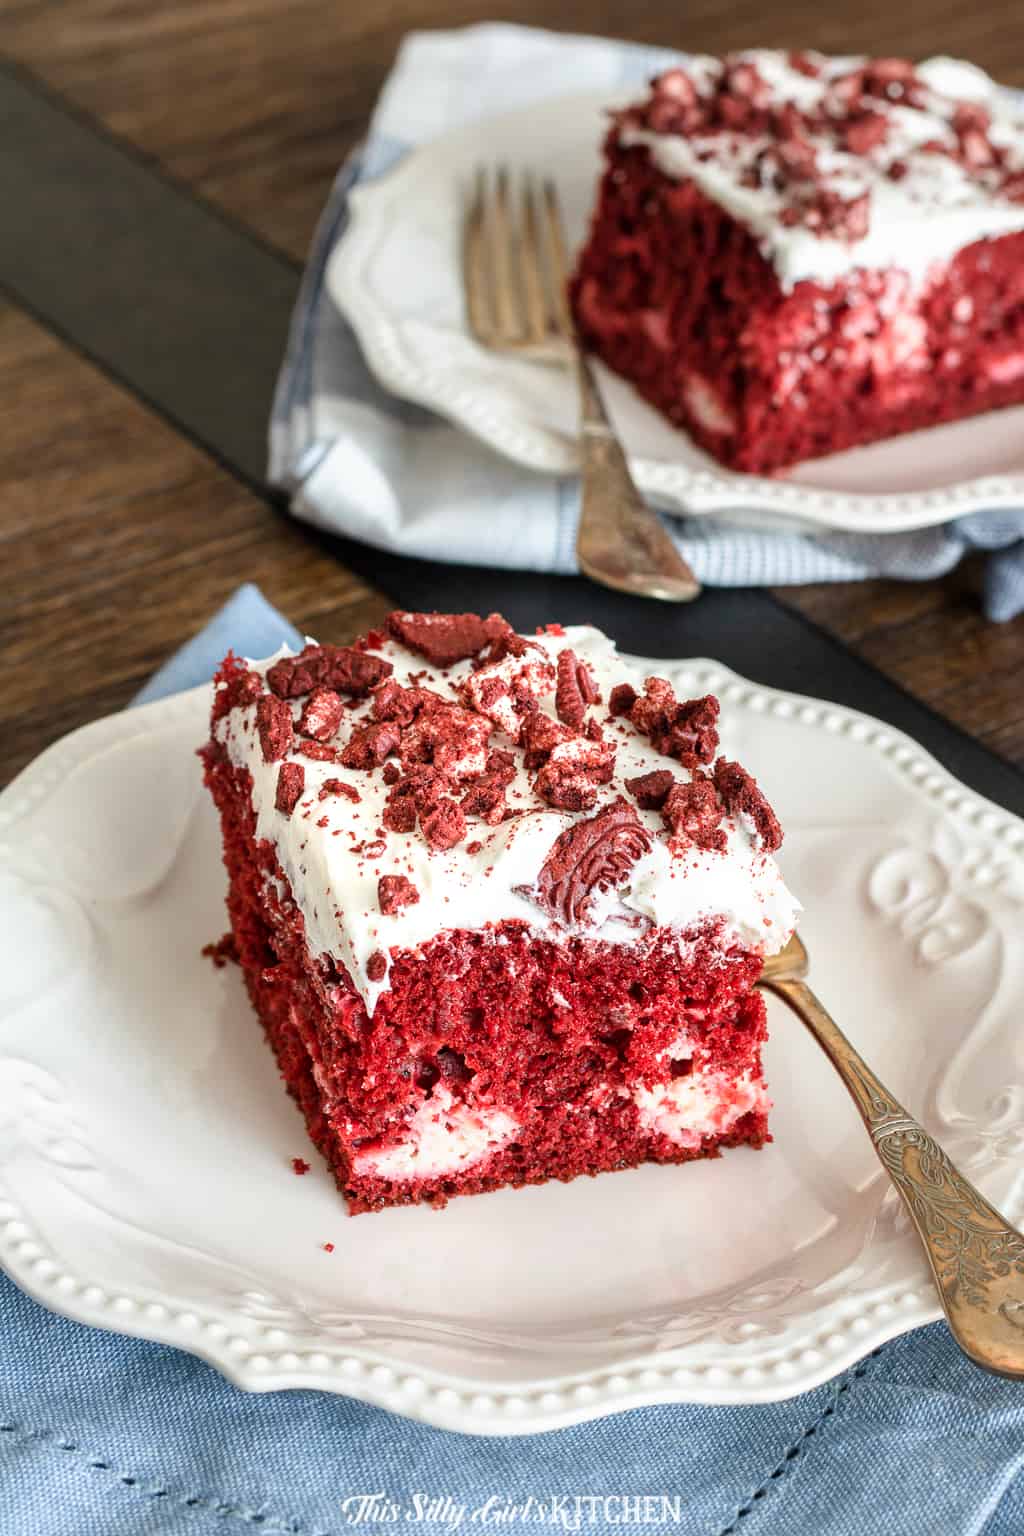
This red velvet cheesecake cake is a celebration in dessert form, perfect for Valentine’s Day, Christmas, birthdays, or any time you want to wow a crowd. Serve generous squares slightly chilled with a hot cup of coffee or a cold glass of milk.
Still filling out the menu? Readers love pairing this one with our strawberry cheesecake dump cake, lemon raspberry cake balls, frosted cookie bars, and lemon blueberry trifle.
Garnish each slice with a little extra crushed Oreo or a dollop of whipped cream for a bakery worthy presentation. However you serve it, this red velvet cheesecake cake is guaranteed to disappear fast, so save yourself a slice.
Red Velvet Cheesecake Cake FAQs
Classic red velvet is a single cake with cream cheese frosting. This red velvet cheesecake cake bakes a creamy cheesecake swirl right into the red velvet cake, so every slice has tangy ribbons of cheesecake running through it.
Yes, and it is even better made ahead. Bake and cool the cake, then frost it and refrigerate for up to two days. The flavors meld and the cheesecake swirl firms up beautifully.
Because of the cream cheese, store this cake covered in the refrigerator for up to four days. Let slices sit at room temperature for a few minutes before serving for the best texture.
Yes. Freeze the unfrosted cake, wrapped well, for up to three months. Thaw it in the fridge overnight, then frost and garnish before serving.
Not at all. A boxed red velvet mix keeps this easy, but you can absolutely use your favorite homemade red velvet cake batter in its place.
Regular Oreos, white chocolate curls, fresh berries, or festive sprinkles all make great garnishes. The Oreos are optional, so use whatever you have on hand.
Hungry for more sweets? Whip up a batch of our mini cheesecakes next for another easy, crowd pleasing dessert.
Our swirled white chocolate raspberry cheesecake is another special occasion stunner.
For a smaller-scale showstopper, our Valentine cupcakes reveal a hidden heart when you cut them open.

Red Velvet Cheesecake Cake Recipe
Ingredients
- 1 box red velvet cake mix
- 1 1/4 cup water
- 1/2 cup vegetable oil
- 3 eggs
Cheesecake filling
- 8 ounces cream cheese softened
- 1 egg
- 1 teaspoon vanilla bean paste or vanilla extract
- 2 teaspoons all-purpose flour
- 1/3 cup granulated sugar
Cream cheese frosting
- 8 ounces unsalted butter softened
- 8 ounces cream cheese softened
- 2 cups powdered sugar sifted
- 1 teaspoon vanilla bean paste or vanilla extract
- 5 red velvet oreos crushed for garnish, optional
Instructions
- Preheat oven to 350°, grease a 9×13 inch baking dish, set aside. Make the red velvet cake batter first by combining the cake mix, water, oil, and eggs in a large bowl. With an electric hand mixer, mix for 30 seconds until combined. Mix for 2 additional minutes on medium speed, set aside.1 box red velvet cake mix, 1 1/4 cup water, 1/2 cup vegetable oil, 3 eggs
- In a medium-sized bowl, cream the cream cheese with an electric hand mixer until smooth, add the remaining ingredients and mix until combined with no lumps. Pour half of the red velvet cake batter into the baking dish and spread evenly with a spatula. Dollop half of the cheesecake batter all over the top. Pour the remaining cake batter on top, and dollop the remaining cheesecake mixture. Using a butter knife, make figure eights throughout the whole cake to swirl the cheesecake mixture into the cake mix.8 ounces cream cheese, 1 egg, 1 teaspoon vanilla bean paste, 2 teaspoons all-purpose flour, 1/3 cup granulated sugar
- Bake for 30-35 minutes, until a toothpick inserted into the center of the cake, comes out mostly clean with no wet batter. Place on a wired rack to cool completely.
Cream Cheese Frosting
- Cream together the butter and cream cheese in a medium-sized bowl with an electric hand mixer until smooth. Add the powdered sugar a little at a time until fully incorporated. Add the vanilla and whip until light and fluffy about 2 minutes.8 ounces unsalted butter, 8 ounces cream cheese, 2 cups powdered sugar, 1 teaspoon vanilla bean paste
- Make sure the cake is completely cooled before adding the frosting. Frost the cake, top with crushed Oreos for garnish, optional.5 red velvet oreos
Notes
- We use a box mix with this recipe, if you want to make your own red velvet cake you can sure do that as well.
- If you can’t find red velvet Oreos, then you can substitute regular Oreos or golden Oreos for them.
- This has to be refrigerated since it contains cream cheese, make sure it is not left at room temperature any longer than two hours.
- If you are not a fan of cream cheese frosting just top with some regular buttercream if you’d like, a canned frosting would work well.
- Also if you are not a fan at making your own frosting you can buy a can of cream cheese frosting and use that.
Nutrition
Love This Recipe?
Follow @ThisSillyGirlsKitchen on Instagram and @danadevolk on Pinterest for more!


You can divide the ingredients between two 8×8 or 9×9 pans, the baking time will vary so keep an eye on it and starting checking around the 23 minute mark.
I need to make this for my husband that is a fan of anything “ red velvet”. One question how could I make this on two smaller pans? Would like to eat one and freeze one. There is just the two of us. Thank you!!
A huge hit with the family! These were easy to make and delicious. I made a batch to try out (family are testers) before making for a Valentines Tea I am invited to, and these are perfect for the occasion. Thanks for sharing.
Wow! I’m so much in love with this red velvet cake! This is soooo cute! No doubt it’s really delicious because of the nice crunchy Oreos and the exquisite taste of cream cheese.
As you have already said, it’s a perfect dessert for a Christmas dinner. But I would serve it on Valentine’s Day for those people I love. I’ll make it soon by all means on February 14th. Really beautiful and lovely!
Thank you for sharing this recipe, Dana! And for other ones as well!