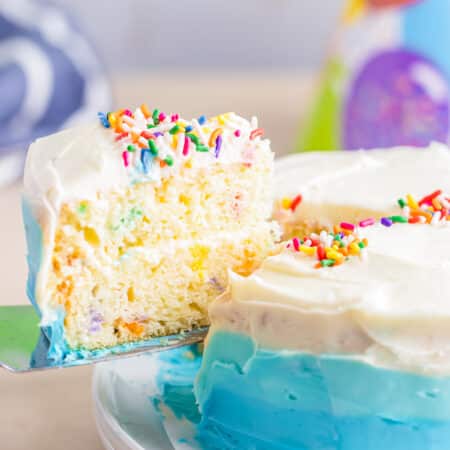
If you’re gearing up for your little one’s first birthday party and want to make it extra special, I’ve got a great recipe for you on How To Make a Smash Cake!
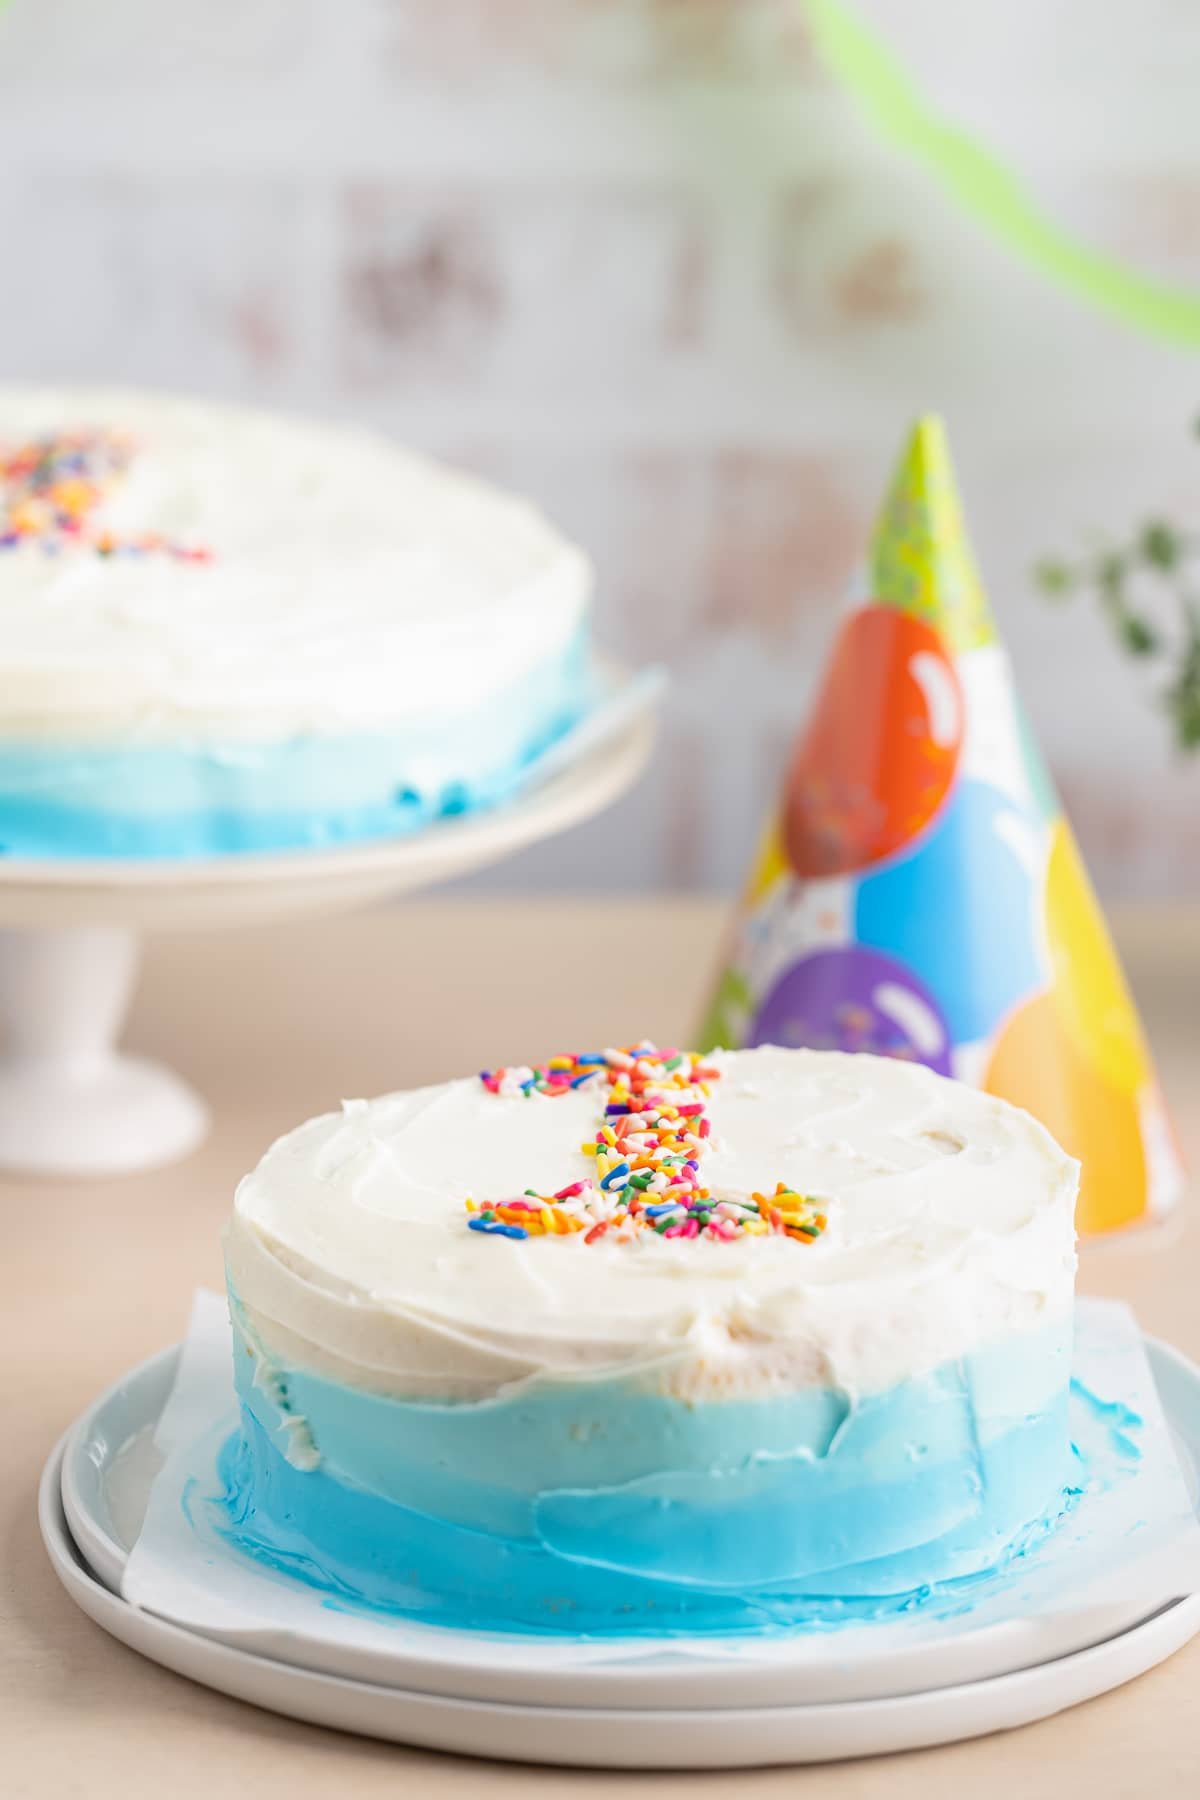
Learning how to make a smash cake is no problem. I’ve got some simple steps for you that will get you the best first birthday cake ever!
It’s not just any cake; it’s a fun, colorful treat designed just for your baby to dig into, smash, and enjoy on their very first birthday.
Imagine the adorable photos and the giggles that will come with it! When we did this with Lily, we got some of the best photos and memories ever. I love being super mom!!
A Smash Cake is usually a small cake, just the perfect size for those tiny hands. Making one at home can be a fun way to add a personal touch to your baby’s big day.
And guess what? It’s easier than you might think! Today, I’m going to share with you a super simple yet absolutely adorable Smash Cake recipe that’s going to steal the show.
Your baby will have their very own cute smash cake to make a mess with. It’s a semi homemade cake that was made to be felt just as much as tasted, haha!
Let’s dive into how to make a smash cake for your big celebration!
Some of our other favorite cake recipes we have on our site include: Banana Cupcakes Recipe with Cream Cheese Frosting, Strawberry Shortcake Cheesecake Cake Recipe, and Lemon Blueberry Coffee Cake.
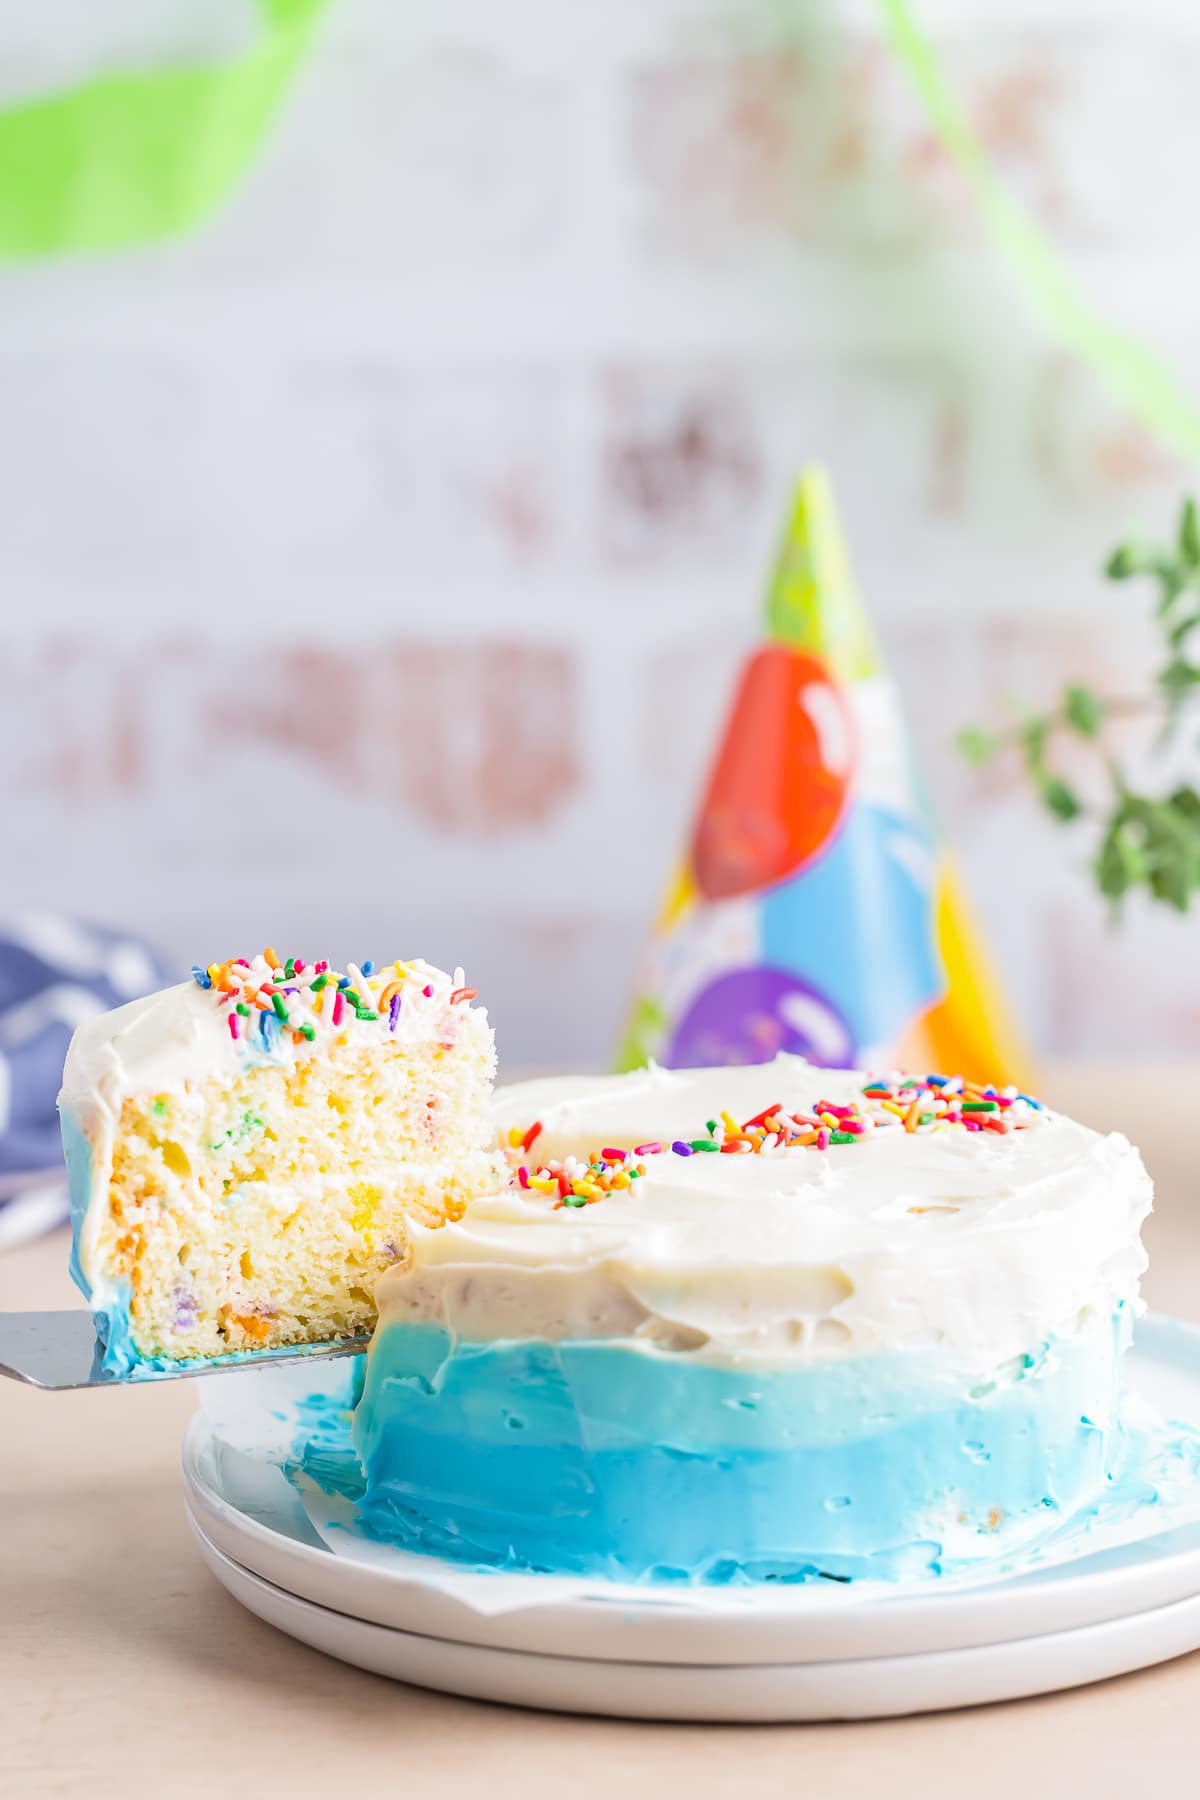
WHY THIS RECIPE WORKS:
- Simple Ingredients: Uses basic ingredients that are easy to find.
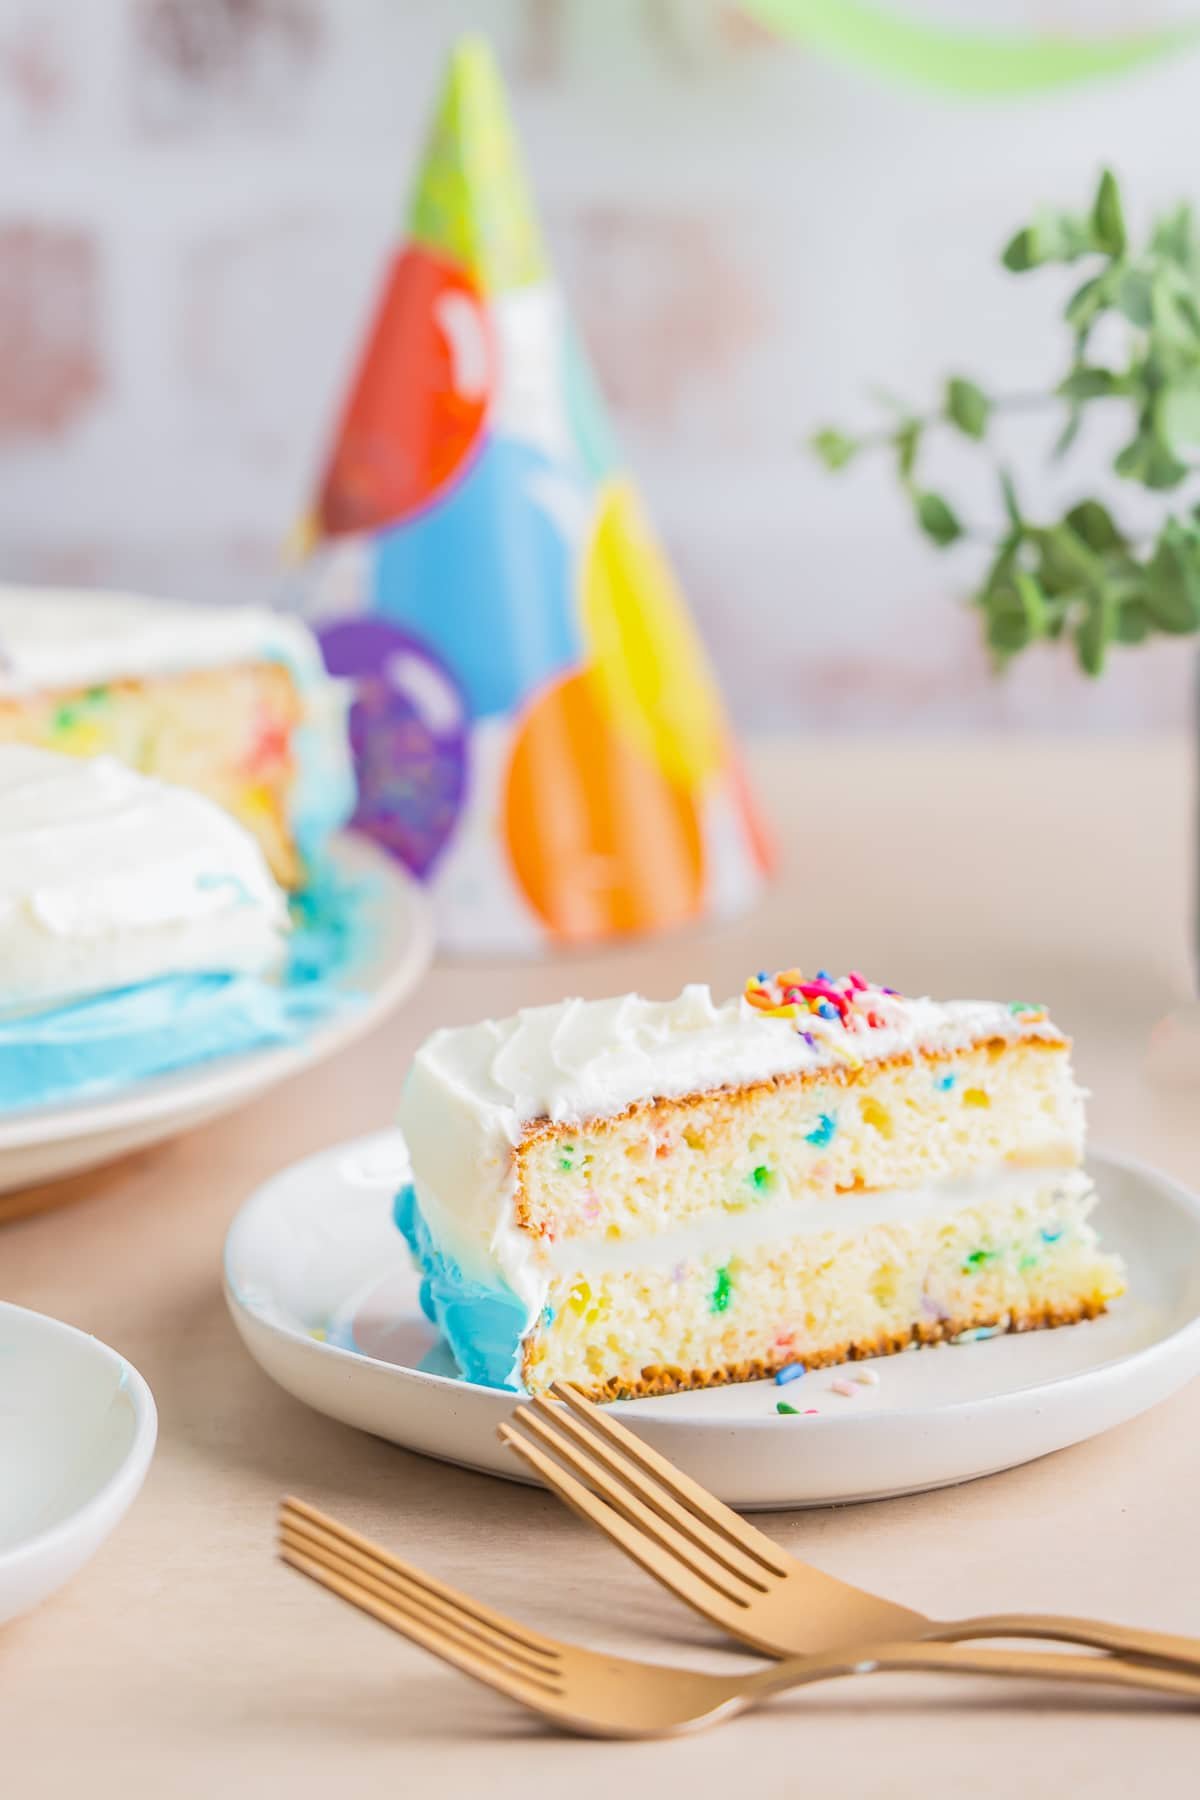
- Photo-Ready: Designed to look great in photos from your baby’s first birthday cake smash.
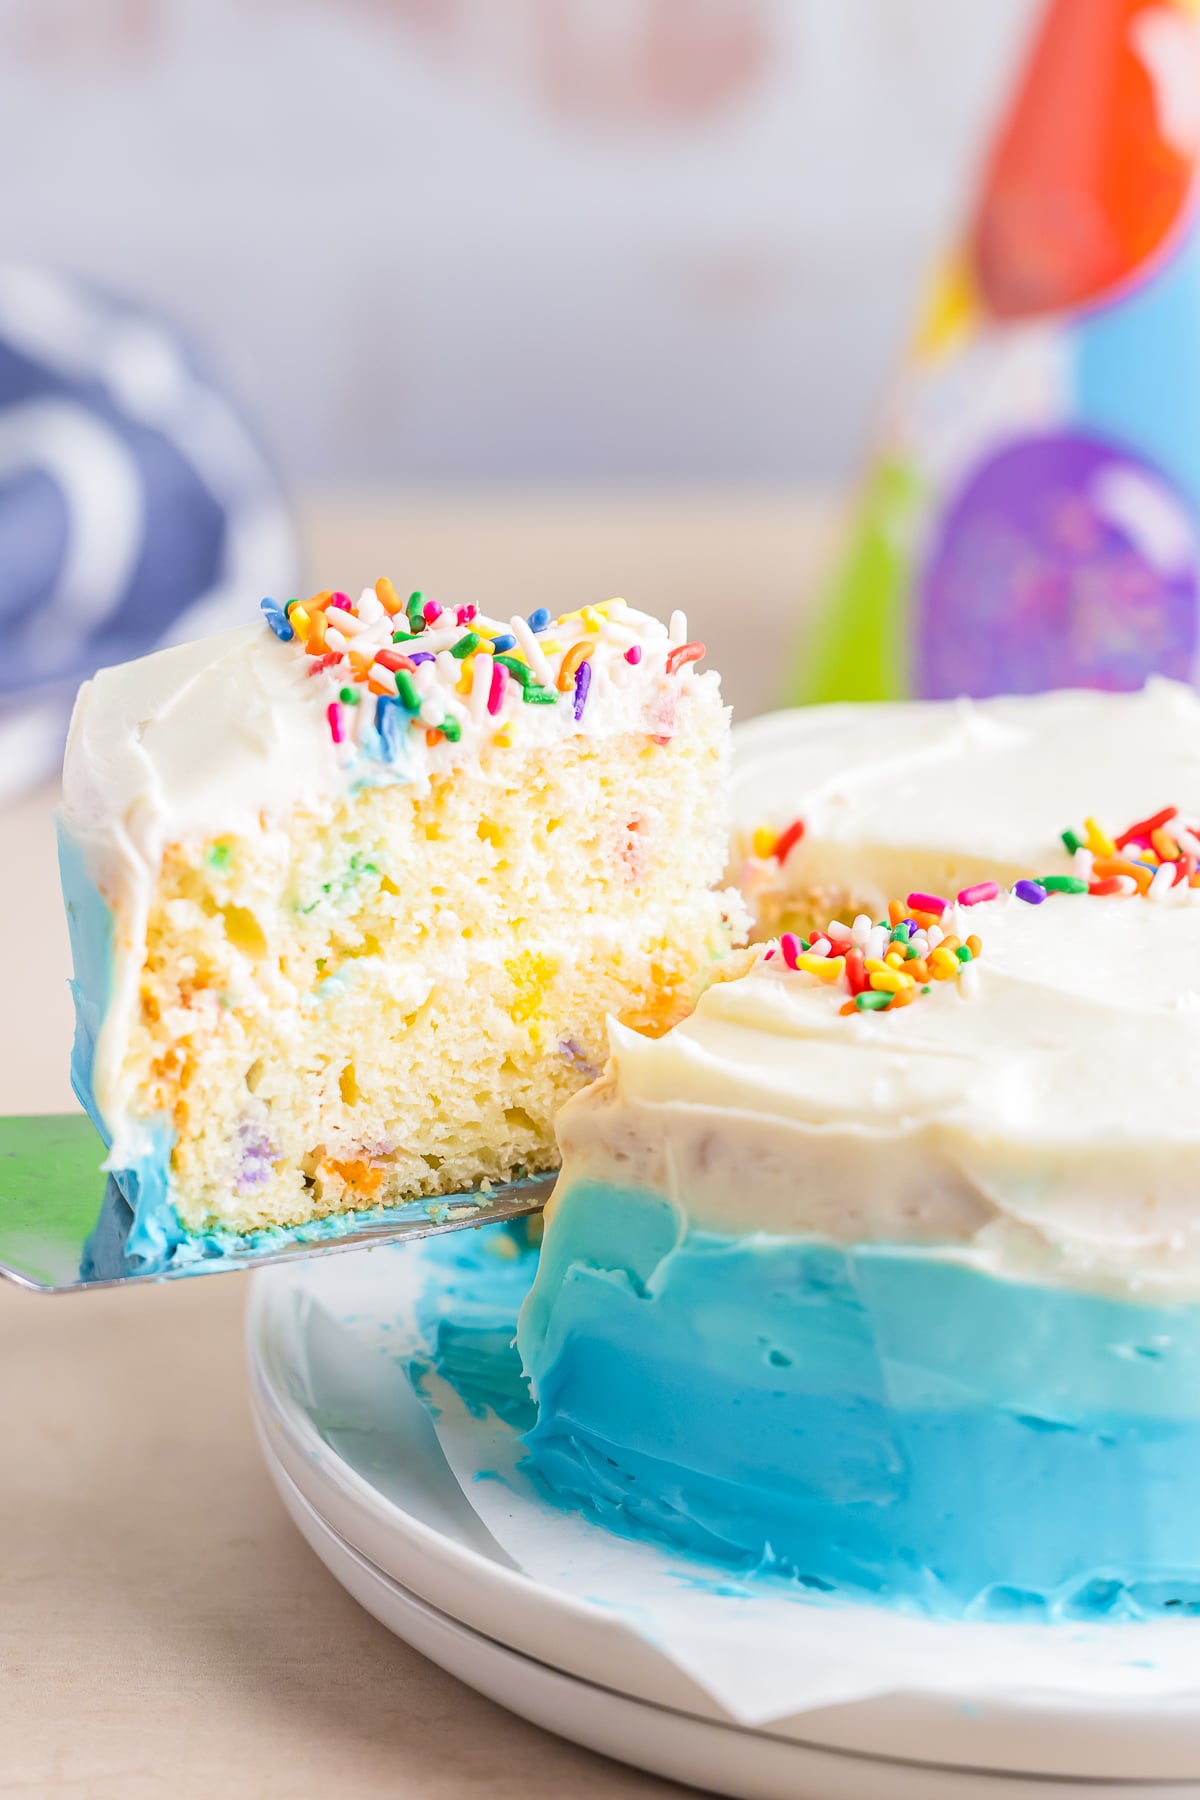
- Delicious Taste: It’s not just cute; it tastes great too, so party guests can enjoy a piece.
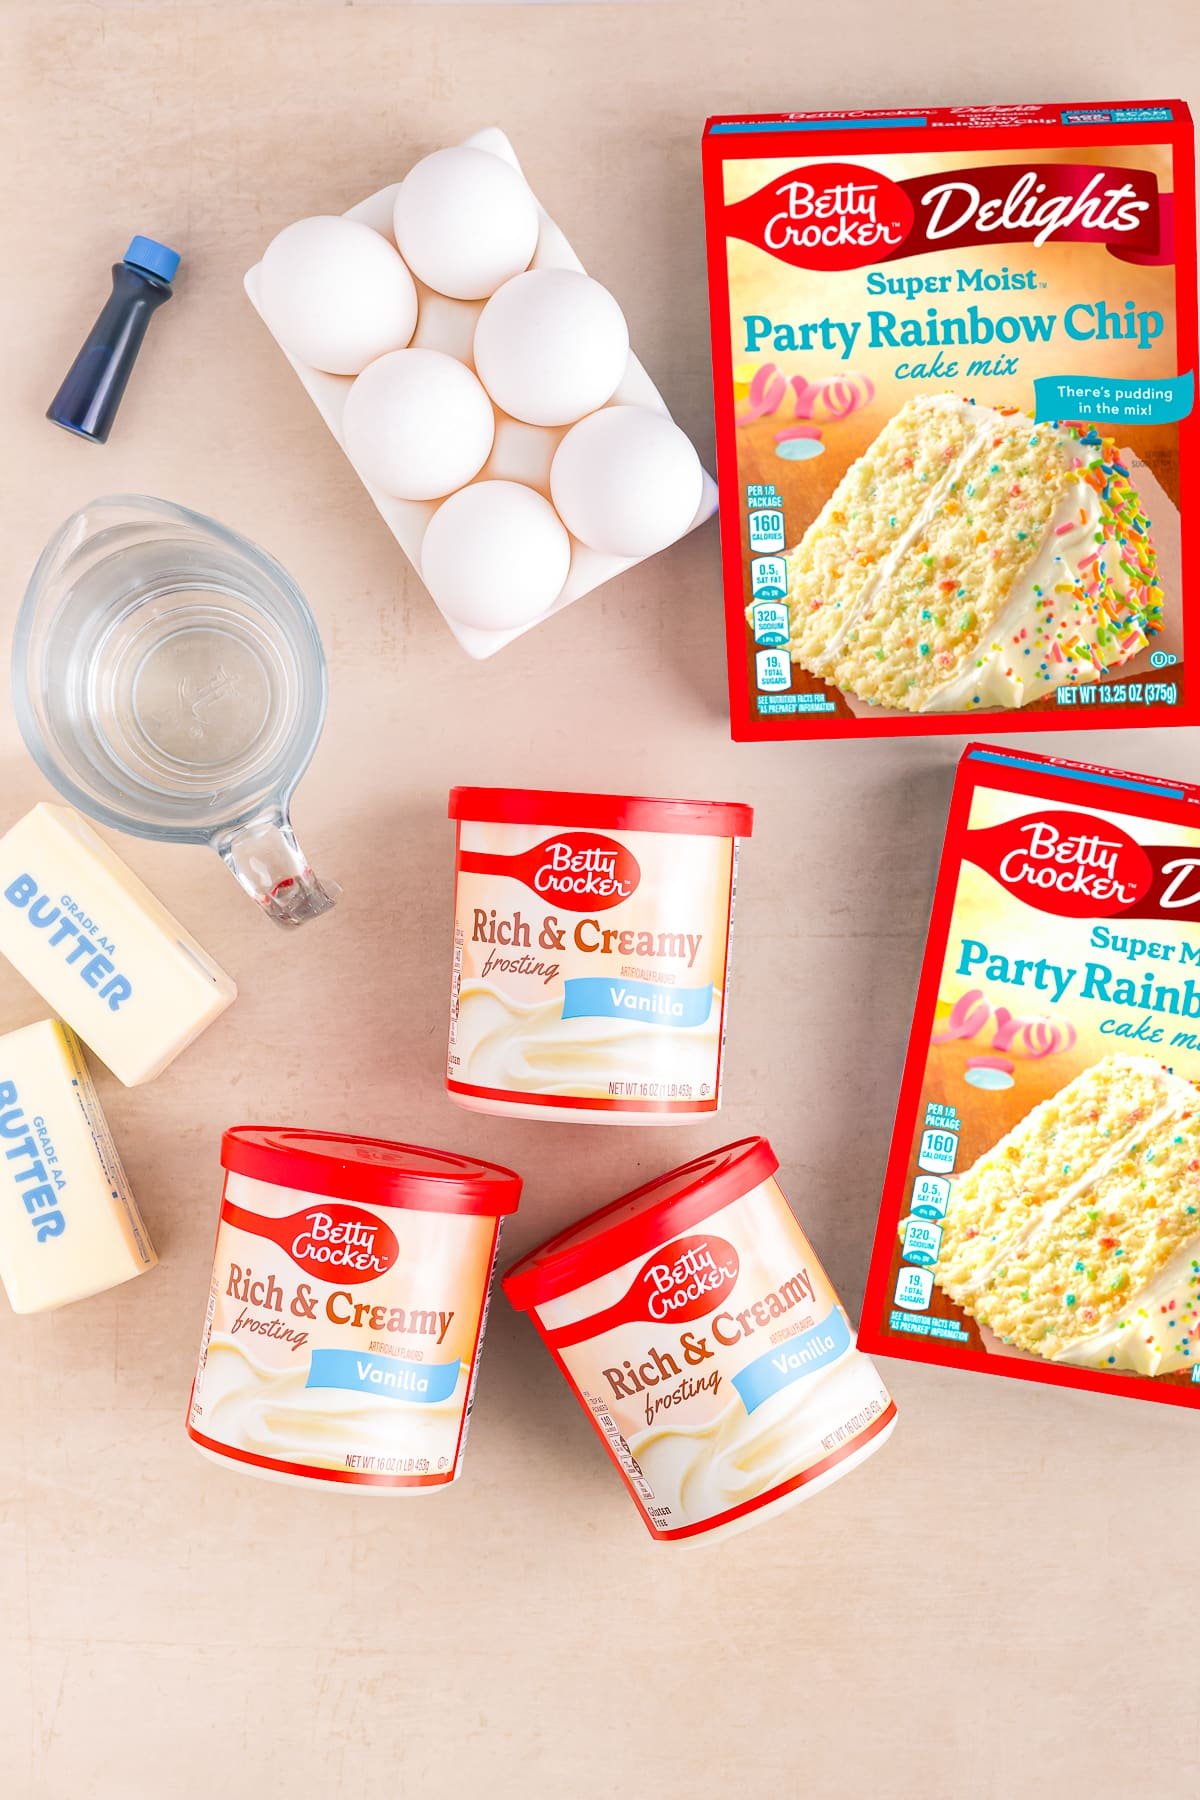
INGREDIENTS NEEDED (SCROLL TO THE BOTTOM OF THIS POST FOR THE FULL RECIPE CARD):
- Party Rainbow Chip cake mix
- Water
- Butter (melted)
- Eggs
- Canned Vanilla Frosting
- Blue gel food coloring
- Sprinkles (optional)
HOW TO MAKE A SMASH CAKE:
- Preheat the oven to 350°F. Spray 2 9-inch round cake pans and 2 6-inch round cake pans with baking spray and set aside.
- Add the two cake mixes with the water, butter (melt butter in the microwave and let cool on the counter for about 10 minutes before adding to batter), and eggs.
- Mix with a hand mixer on medium speed for 30 seconds until moistened. Mix on high speed for two minutes.
- Spread 2 3/4 cups batter in each 9-inch round pan. Spread 1 3/4 cups batter in each 6-inch round pan. Bake 9-inch pans for 24 to 29 minutes and 6-inch pans for 22 to 27 minutes, or until a toothpick inserted in the center comes out clean.
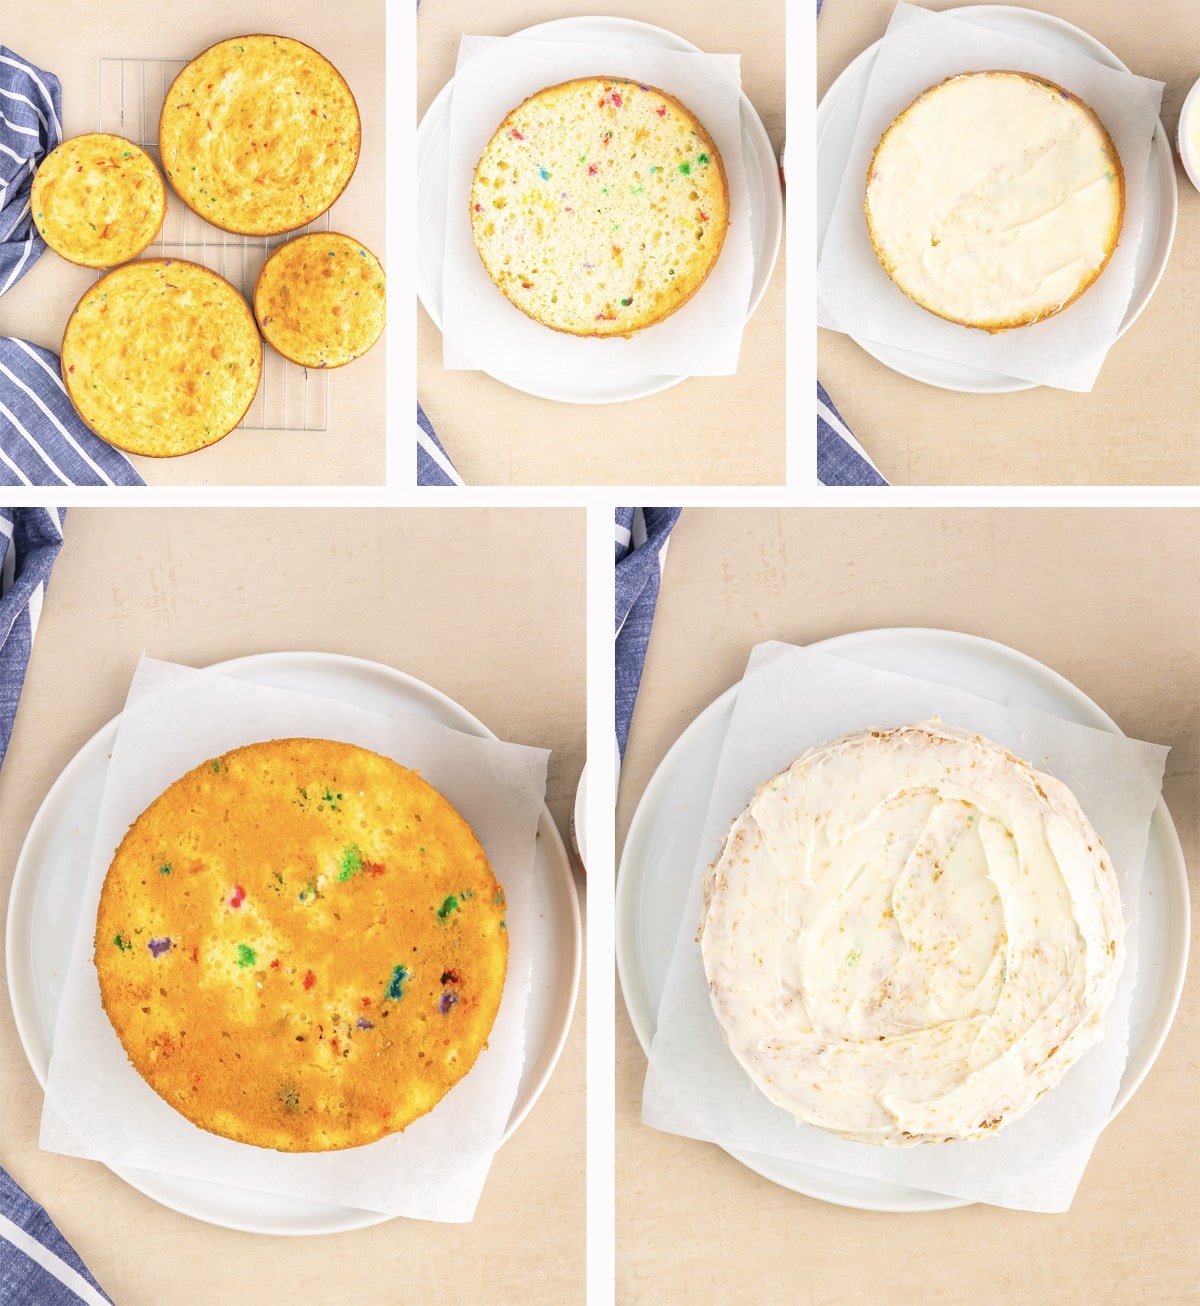
- Let cool for 10 minutes in the pan, then flip them out of the pan and let cool completely on a wired rack before frosting.
- (You will repeat the next steps for the two different cake sizes) Carefully cut off any doming on the cakes so there is a flat surface.
- Place the first cake bottom side down onto your serving platter. Top with a thin layer of white frosting.
- Place the second layer on top of the first, bottom side up, so it is nice and flat. Add an extremely thin layer of frosting over the entire cake using a flexible spatula—place in the fridge for at least 10 minutes to set.
- Repeat with the other cake layers.
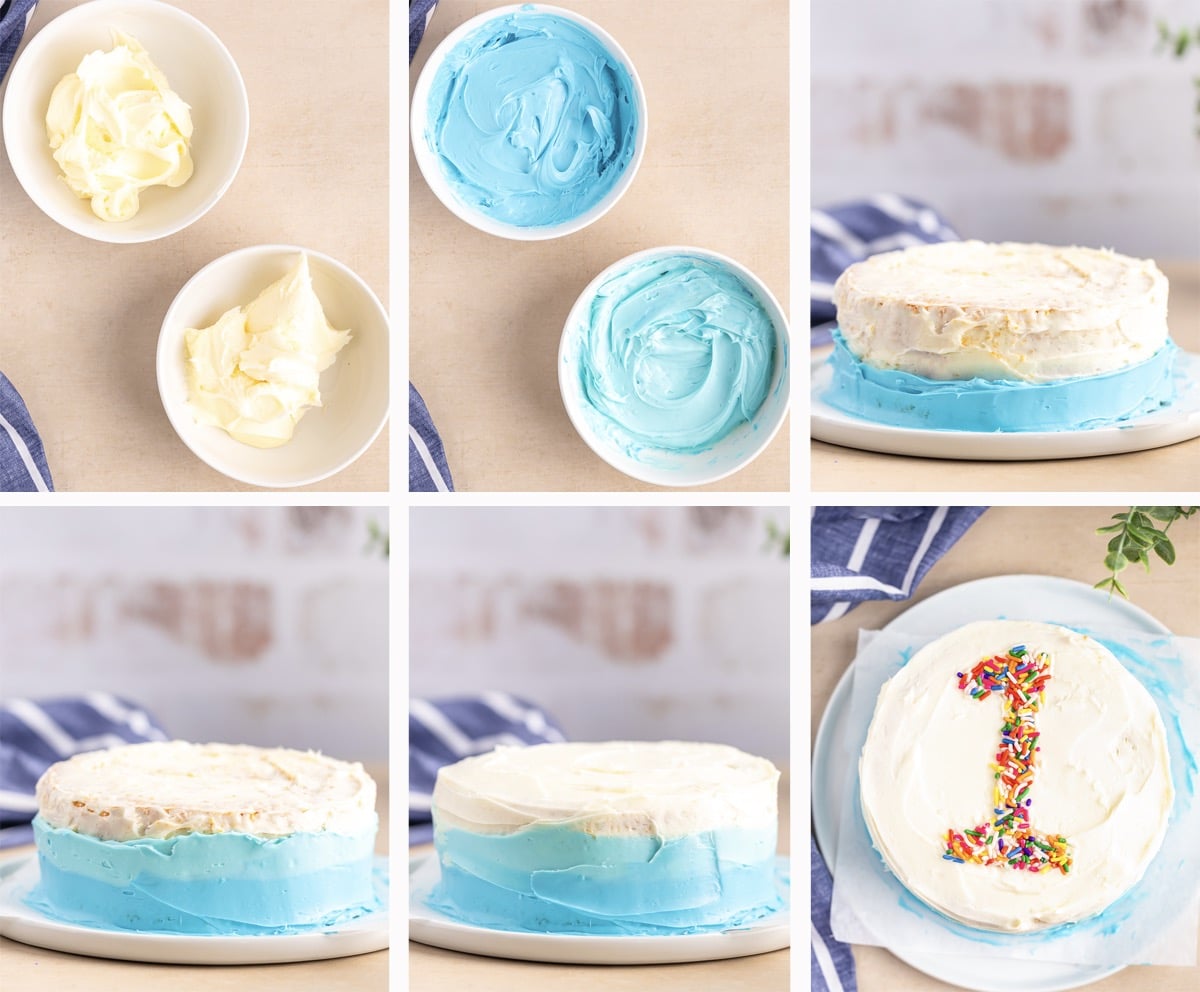
- Taking one jar of the vanilla frosting, place 1/2 of the frosting in a bowl and the other 1/2 in another bowl.
- Add food coloring to the first bowl until you reach your desired shade. To the second bowl, add about half less of the same food coloring so there is one darker and one lighter.
- Using the darker color, frost the bottom 1/3 of the cake with an off-set spatula or flexible spatula.
- With the medium shade, frost the middle third of the cake.
- Add the plain vanilla frosting to the top 1/3 of the cake and a thicker layer on top. Don’t worry if it looks messy at this point; so did mine!
- Using an off-set or flexible spatula, you are going to smooth down the sides and blend the colors. Have a clean bowl nearby to scrap off any excess frosting.
- Starting at the bottom, apply light pressure enough to smooth the frosting and go around the entire bottom of the cake. Once you go around the whole cake, move the spatula up the side just above the smooth spot and go around the cake again until you have done the entire cake. Your ombre frosting is done!
- Repeat with the second cake.
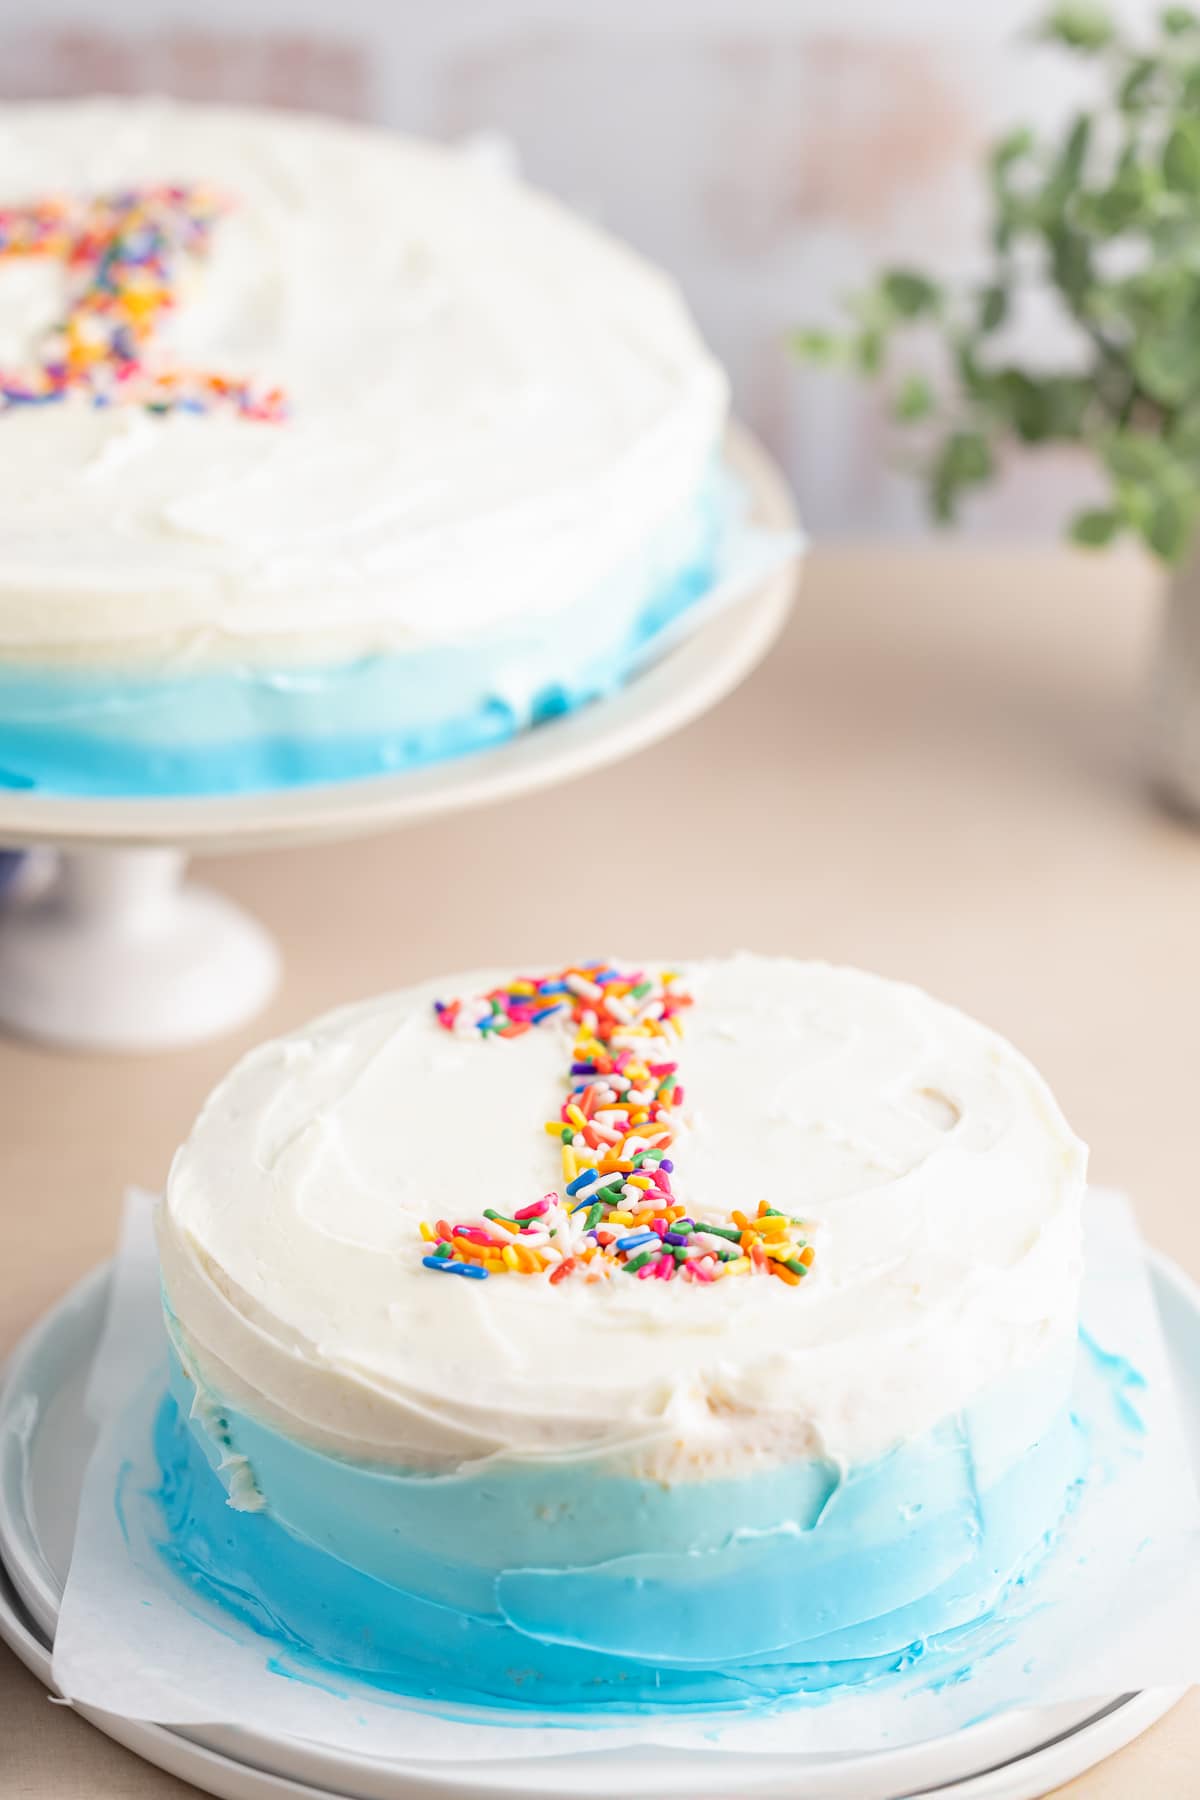
- I also put the “1″ as decoration on the top in place of a candle. I just drew out a stencil of the number how I wanted it to look. Gently pressed it to the top of the cake and filled in the stencil with sprinkles.
FREQUENTLY ASKED QUESTIONS ABOUT THIS RECIPE:
WHAT KIND OF FOOD COLORING SHOULD I USE?
I like gel food coloring because it’s vibrant, and you only need a little bit to achieve the perfect color.
You’ll get vibrant hues that are perfect for any photoshoot with the little one!
WHAT SIZE CAKE IS A SMASH CAKE?
A smash cake is typically a small cake, around 6 inches in diameter, making it the perfect size for your little one to enjoy.
Make sure you save that recipe card for later. You can pass that full recipe on to family and friends!
ANY ADDITIONS?
I think every kid should have their own cake. At least for that first time birthday experience!
- Rainbow sprinkles for a fun topping
- Edible glitter for a sparkly effect
- Fresh fruit like strawberries or blueberries
- Mini marshmallows for a soft, chewy texture
- Chocolate chips for a surprise inside
- Crushed cookies for added crunch
- Diced peaches for a sweet, juicy layer
- Whipped cream dollops around the edge
- Small candy pieces for decoration
- A cute topper or number “1” for the special day
ANY SUBSITUTIONS?
Sure thing! This little cake can definitely handle some easy swaps. You can make your own healthy smash cake!
- Gluten-free cake mix for those with allergies
HOW TO STORE:
Room Temp: Keep the cake in an airtight container for up to 3 days.
Freezer: Wrap the cake well in plastic wrap and store in the freezer for up to a month.
DANA’S TIPS AND TRICKS:
- Use a serrated knife to level the cake layers for an even look.
- Chill the cake layers before assembling to make handling easier.
- Apply a crumb coat of frosting and chill before adding the final coat for a cleaner look.
- Practice the frosting technique on the side of a bowl or cup before moving on to the cake.
- Let the cake come to room temperature before serving to ensure the best flavor and texture.
- Have fun with it! This cake is all about making memories, so don’t stress over perfection.
My tutorial for How to Make a Smash Cake for your little one’s first birthday is a fun and rewarding way to celebrate this huge milestone.
With a little bit of creativity and some basic baking supplies, you can create a cake that’s not only adorable but also delicious and perfect for those smash cake photos.
Remember, the best part about a smash cake is seeing the joy on your baby’s face, so relax and enjoy the process. Happy baking and happy first birthday to your little star!
If you like this recipe, you might also like:
If you’ve tried my recipe on HOW TO MAKE A SMASH CAKE, let me know how it turned out in the comments! You can follow me over on PINTEREST, INSTAGRAM OR FACEBOOK to find some more of our mouthwatering recipes!
How To Make a Smash Cake (Box Mix Tutorial)
Ingredients
- 2 boxes Party Rainbow Chip cake mix or cake flavor of your choice
- 2 cups water
- 1 cup butter melted
- 6 large eggs
- 3 – 16 ounce cans Vanilla Frosting
- blue gel food coloring or color of your choice
- sprinkles optional
Instructions
- Preheat the oven to 350°F. Spray 2 9-inch round cake pans and 2 6-inch round cake pans with baking spray and set aside.
- Add the two cake mixes with the water, butter (melt butter in the microwave and let cool on the counter for about 10 minutes before adding to batter), and eggs.2 boxes Party Rainbow Chip cake mix, 2 cups water, 1 cup butter, 6 large eggs
- Mix with a hand mixer on medium speed for 30 seconds until moistened. Mix on high speed for two minutes.
- Spread 2 3/4 cups batter in each 9-inch round pan. Spread 1 3/4 cups batter in each 6-inch round pan. Bake 9-inch pans for 24 to 29 minutes and 6-inch pans for 22 to 27 minutes, or until a toothpick inserted in the center comes out clean.
- Let cool for 10 minutes in the pan, then flip them out of the pan and let cool completely on a wired rack before frosting.
- (You will repeat the next steps for the two different cake sizes) Carefully cut off any doming on the cakes so there is a flat surface.
- Place the first cake bottom side down onto your serving platter. Top with a thin layer of white frosting.3 – 16 ounce cans Vanilla Frosting
- Place the second layer on top of the first, bottom side up, so it is nice and flat. Add an extremely thin layer of frosting over the entire cake using a flexible spatula—place in the fridge for at least 10 minutes to set.
- Repeat with the other cake layers.
- Taking one jar of the vanilla frosting, place 1/2 of the frosting in a bowl and the other 1/2 in another bowl.blue gel food coloring
- Add food coloring to the first bowl until you reach your desired shade. To the second bowl, add about half less of the same food coloring so there is one darker and one lighter.
- Using the darker color, frost the bottom 1/3 of the cake with an off-set spatula or flexible spatula.
- With the medium shade, frost the middle third of the cake.
- Add the plain vanilla frosting to the top 1/3 of the cake and a thicker layer on top. Don’t worry if it looks messy at this point; so did mine!
- Using an off-set or flexible spatula, you are going to smooth down the sides and blend the colors. Have a clean bowl nearby to scrap off any excess frosting.
- Starting at the bottom, apply light pressure enough to smooth the frosting and go around the entire bottom of the cake. Once you go around the whole cake, move the spatula up the side just above the smooth spot and go around the cake again until you have done the entire cake. Your ombre frosting is done!
- Repeat with the second cake.
- I also put the “1″ as decoration on the top in place of a candle. I just drew out a stencil of the number how I wanted it to look. Gently pressed it to the top of the cake and filled in the stencil with sprinkles.sprinkles
Notes
- Use a serrated knife to level the cake layers for an even look.
- Chill the cake layers before assembling to make handling easier.
- Apply a crumb coat of frosting and chill before adding the final coat for a cleaner look.
- Practice the frosting technique on the side of a bowl or cup before moving on to the cake.
- Let the cake come to room temperature before serving to ensure the best flavor and texture.
- Have fun with it! This cake is all about making memories, so don’t stress over perfection.
Nutrition
Originally Posted August 2014, Updated with new photos February 2024




Comments & Reviews
Mandee Thomas says
Awesome! I love using cake mixes: they taste great, and it makes everything so much faster 🙂 Beautiful ombre too. Pinned! I would love for you to share this post at my Create & Share Link Party tonight (7:00 PM MST)! Hope to see you there 🙂 http://designsbymissmandee.blogspot.com/
Karly says
Totally adorable! Thanks for linking up with What’s Cookin’ Wednesday!