
This post may contain affiliate links.
Let’s talk about Dirt Cake Cups! You know, those fun, creamy, chocolatey little cups of joy that make everyone smile!
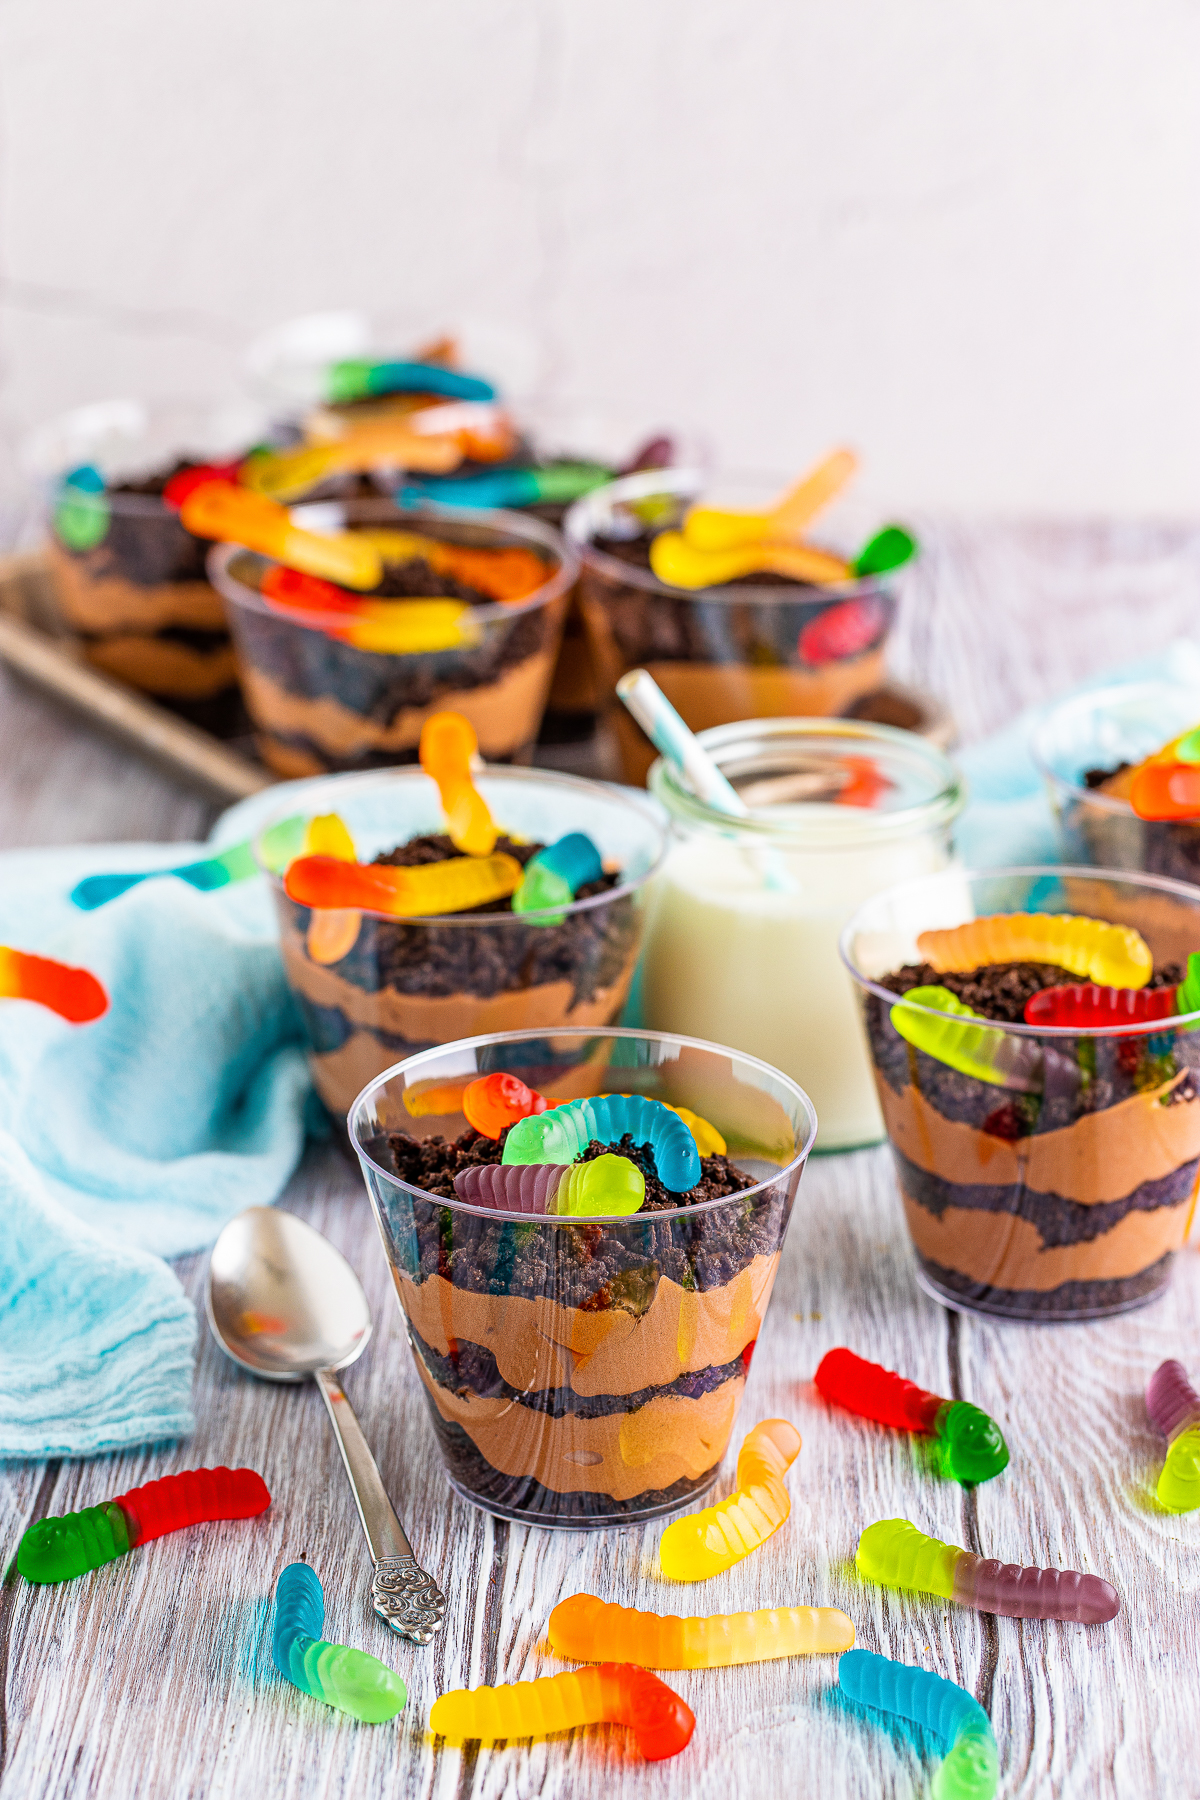
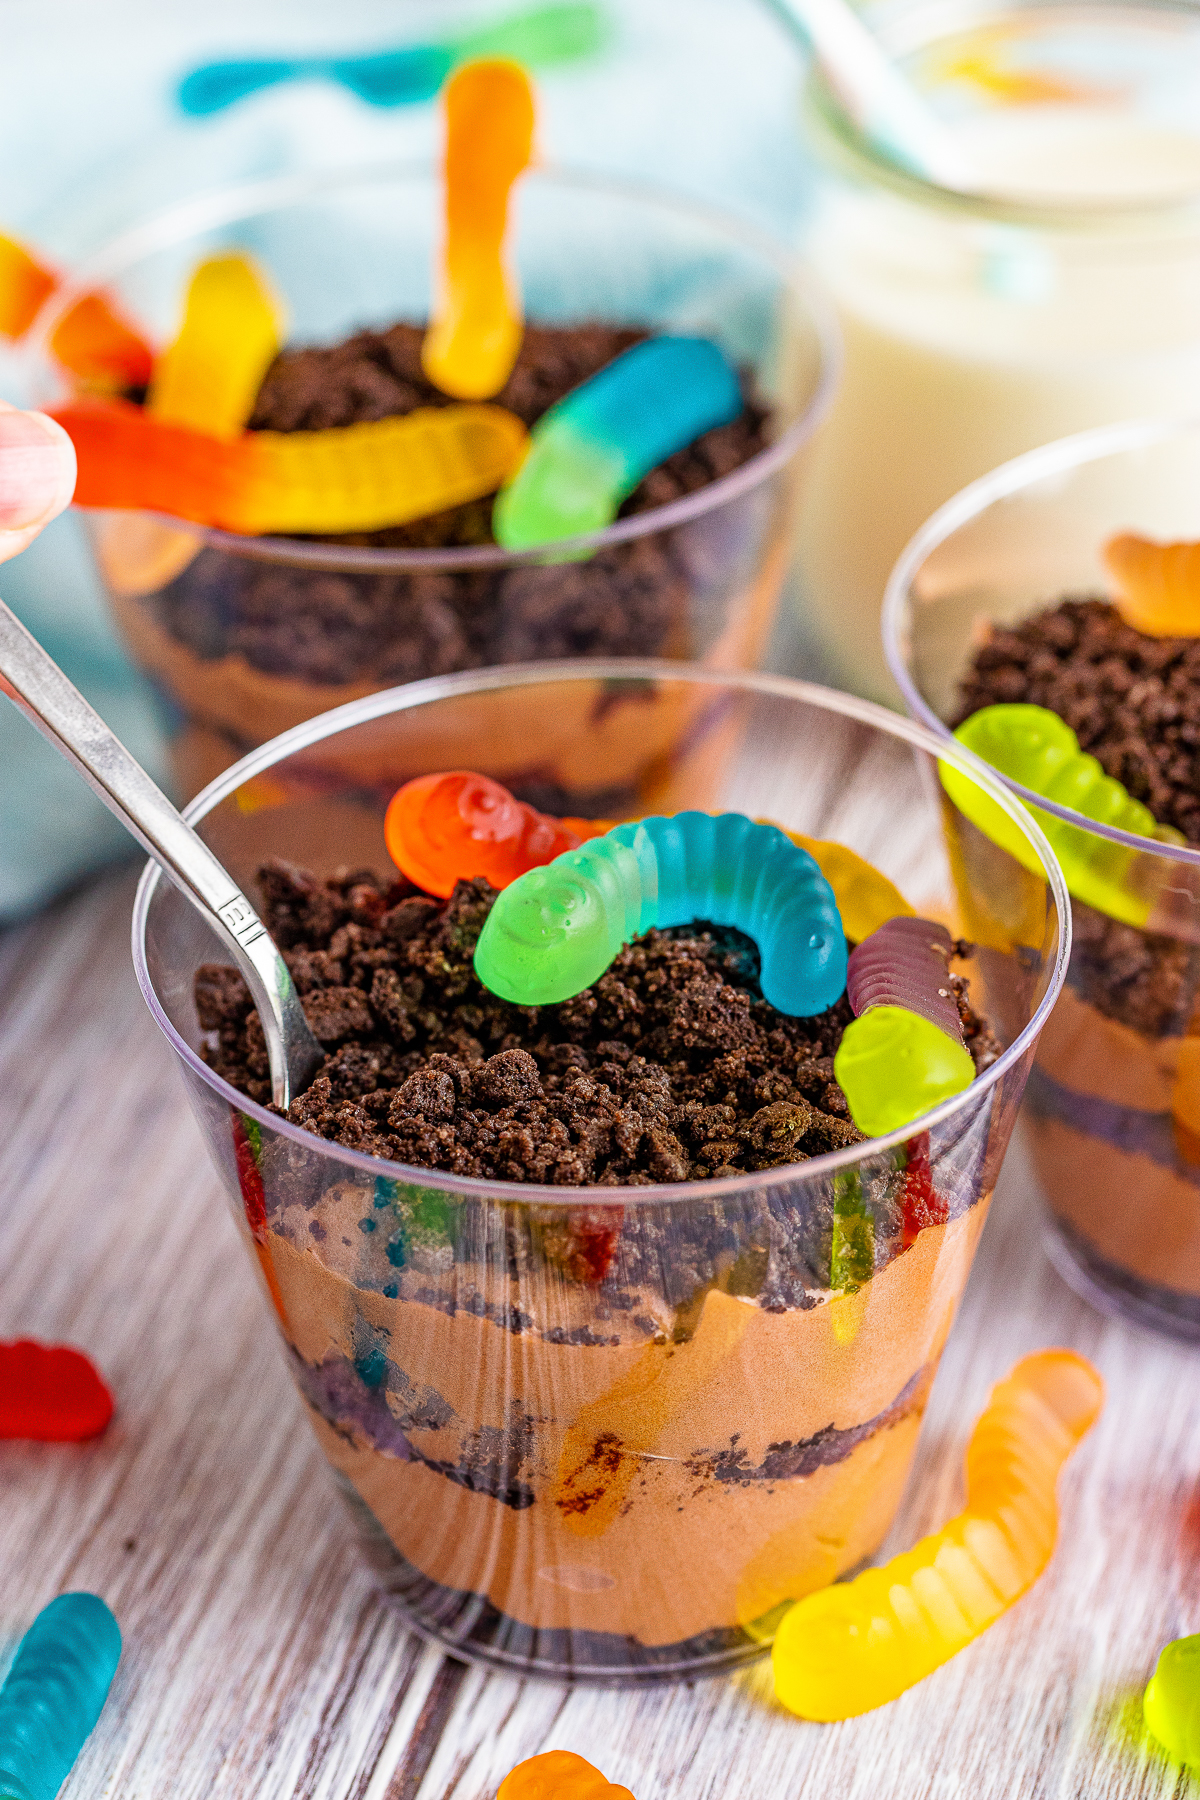
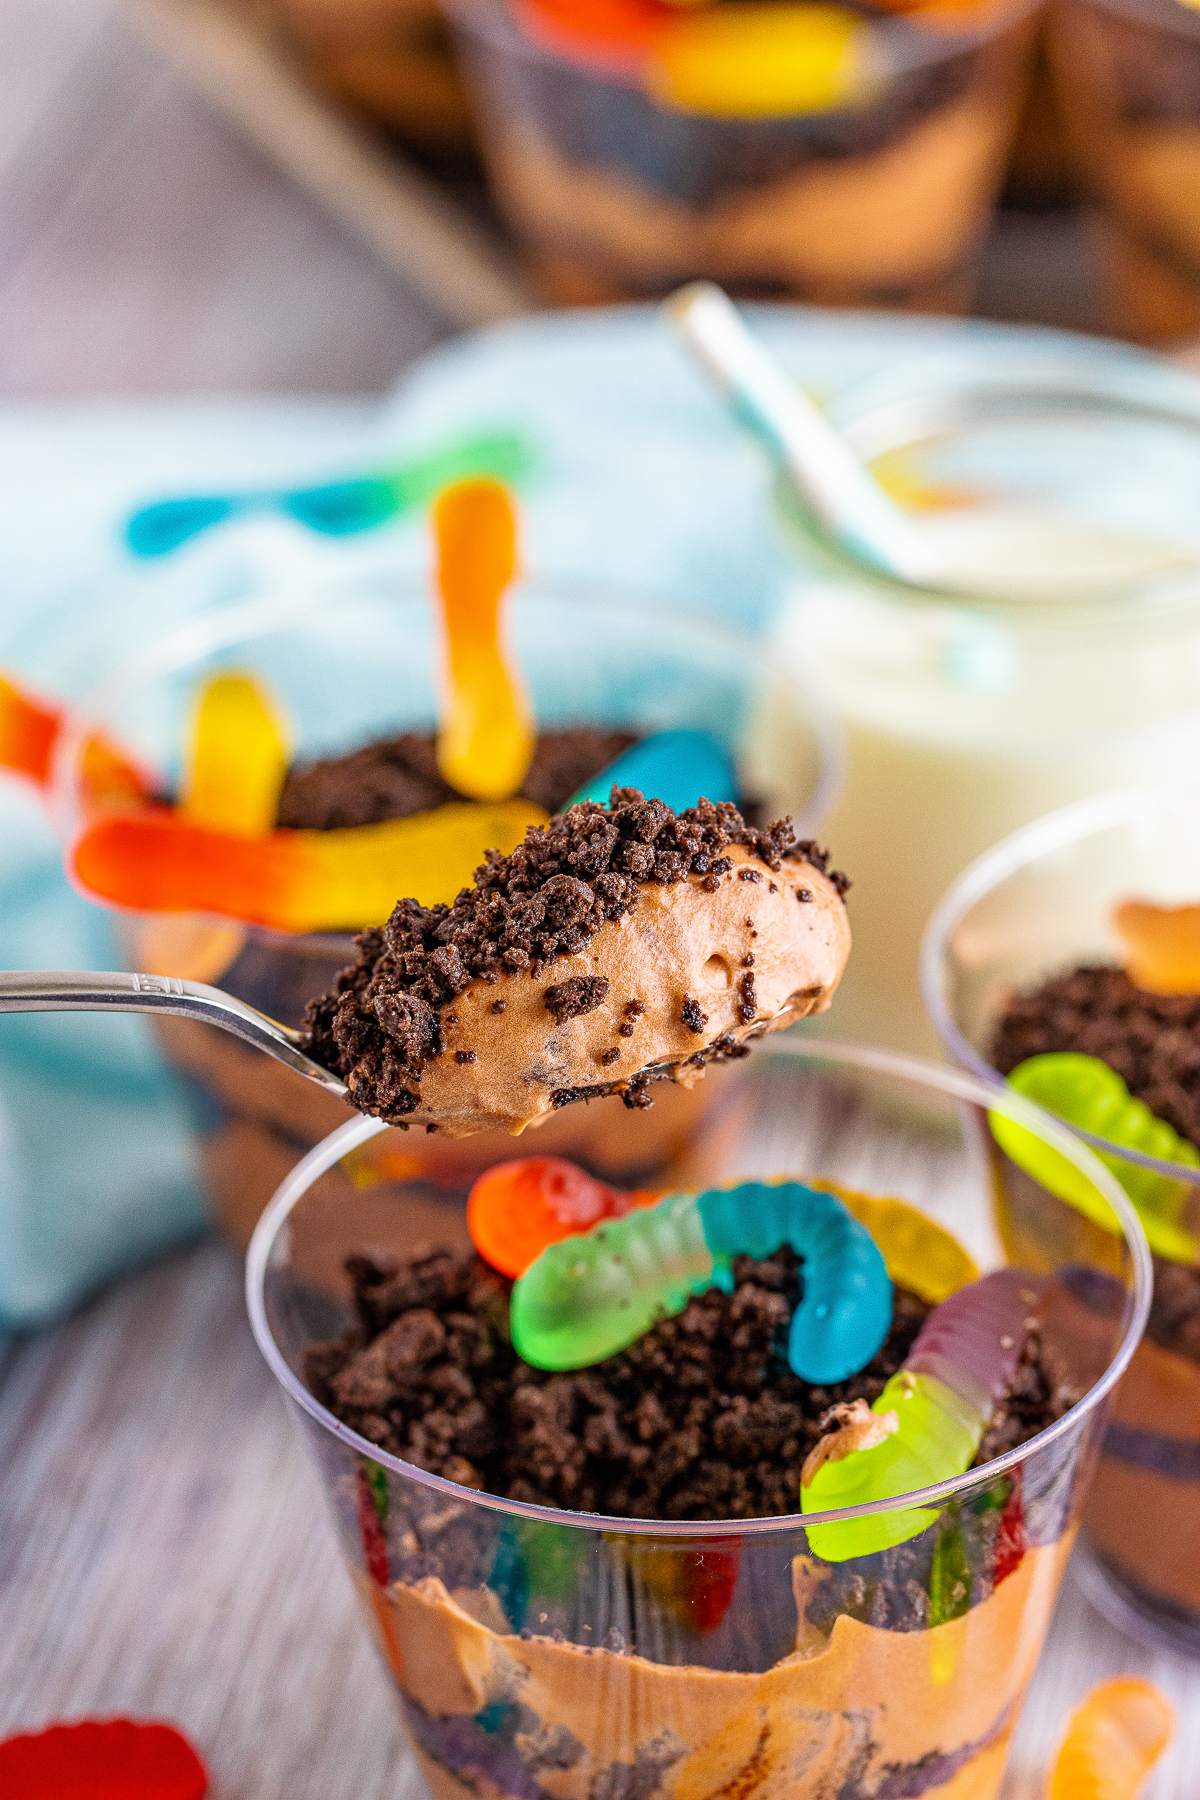
These cute individual dirt cake cups are made with layers of smooth chocolate pudding, fluffy whipped cream, and crushed Oreo cookies that look just like real dirt.
Then, to top it all off, we add gummy worms to give it that perfect garden vibe. Dirt cake cups are one seriously fun treat that just add that special something to a kids party.
Let’s face it, though. Adults love them too.
I mean, it’s not just me right?
I seriously can’t help myself when I’m around these things.
And this dirt dessert is simple!
You don’t need to turn on the oven, and you only need a few easy ingredients.
Everything comes together in just about 15 minutes, and then it chills in the fridge until it’s time to serve.
Want to change it up?
You totally can!
Try using Golden Oreos and vanilla pudding for a beach style twist.
Or add candy bugs or eyeballs for a spooky Halloween version!
No matter what, this Oreo dirt cake recipe is a great recipe to keep in your back pocket for parties or just for fun.
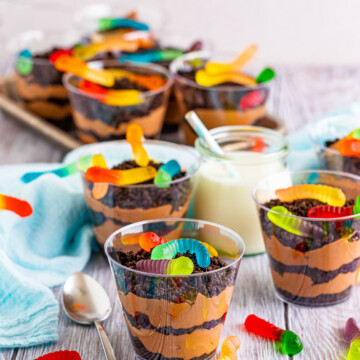
Dirt cake cups will get gobbled up wherever you serve them.
Use the clear plastic cups so everyone can see all the fun layers!
Some of our other favorite DESSERT RECIPES we have on our site include: Golden Oreo Strawberry Cheesecake Bars (Easy Recipe), Chocolate Chip Cookie Sandwich Recipe, and Cherry Dump Cake.
Jump to:
- WHY THIS RECIPE WORKS:
- INGREDIENTS NEEDED (SCROLL TO THE BOTTOM OF THIS POST FOR THE FULL RECIPE CARD):
- HOW TO MAKE DIRT CAKE CUPS:
- FAQ: FREQUENTLY ASKED QUESTIONS ABOUT THIS RECIPE:
- CAN I USE WHIPPED TOPPING INSTEAD?
- CAN THIS BE MADE AHEAD?
- ANY ADDITIONS?
- ANY SUBSTITUTIONS?
- HOW TO STORE:
- DANA’S TIPS AND TRICKS:
- Easy Dirt Cake Cups Recipe
WHY THIS RECIPE WORKS:
- Simple Ingredients, No Baking
No oven needed! Just a few pantry staples, a food processor, and a little mixing. Great for kids to help with. - Tastes Like a Creamy, Chocolate Dream
The mix of fluffy whipped cream and instant pudding makes the pudding mixture so light and yummy! - Perfect for Parties or Make-Ahead Treats
These dessert cups look adorable in clear plastic cups and can be made ahead and chilled until party time.
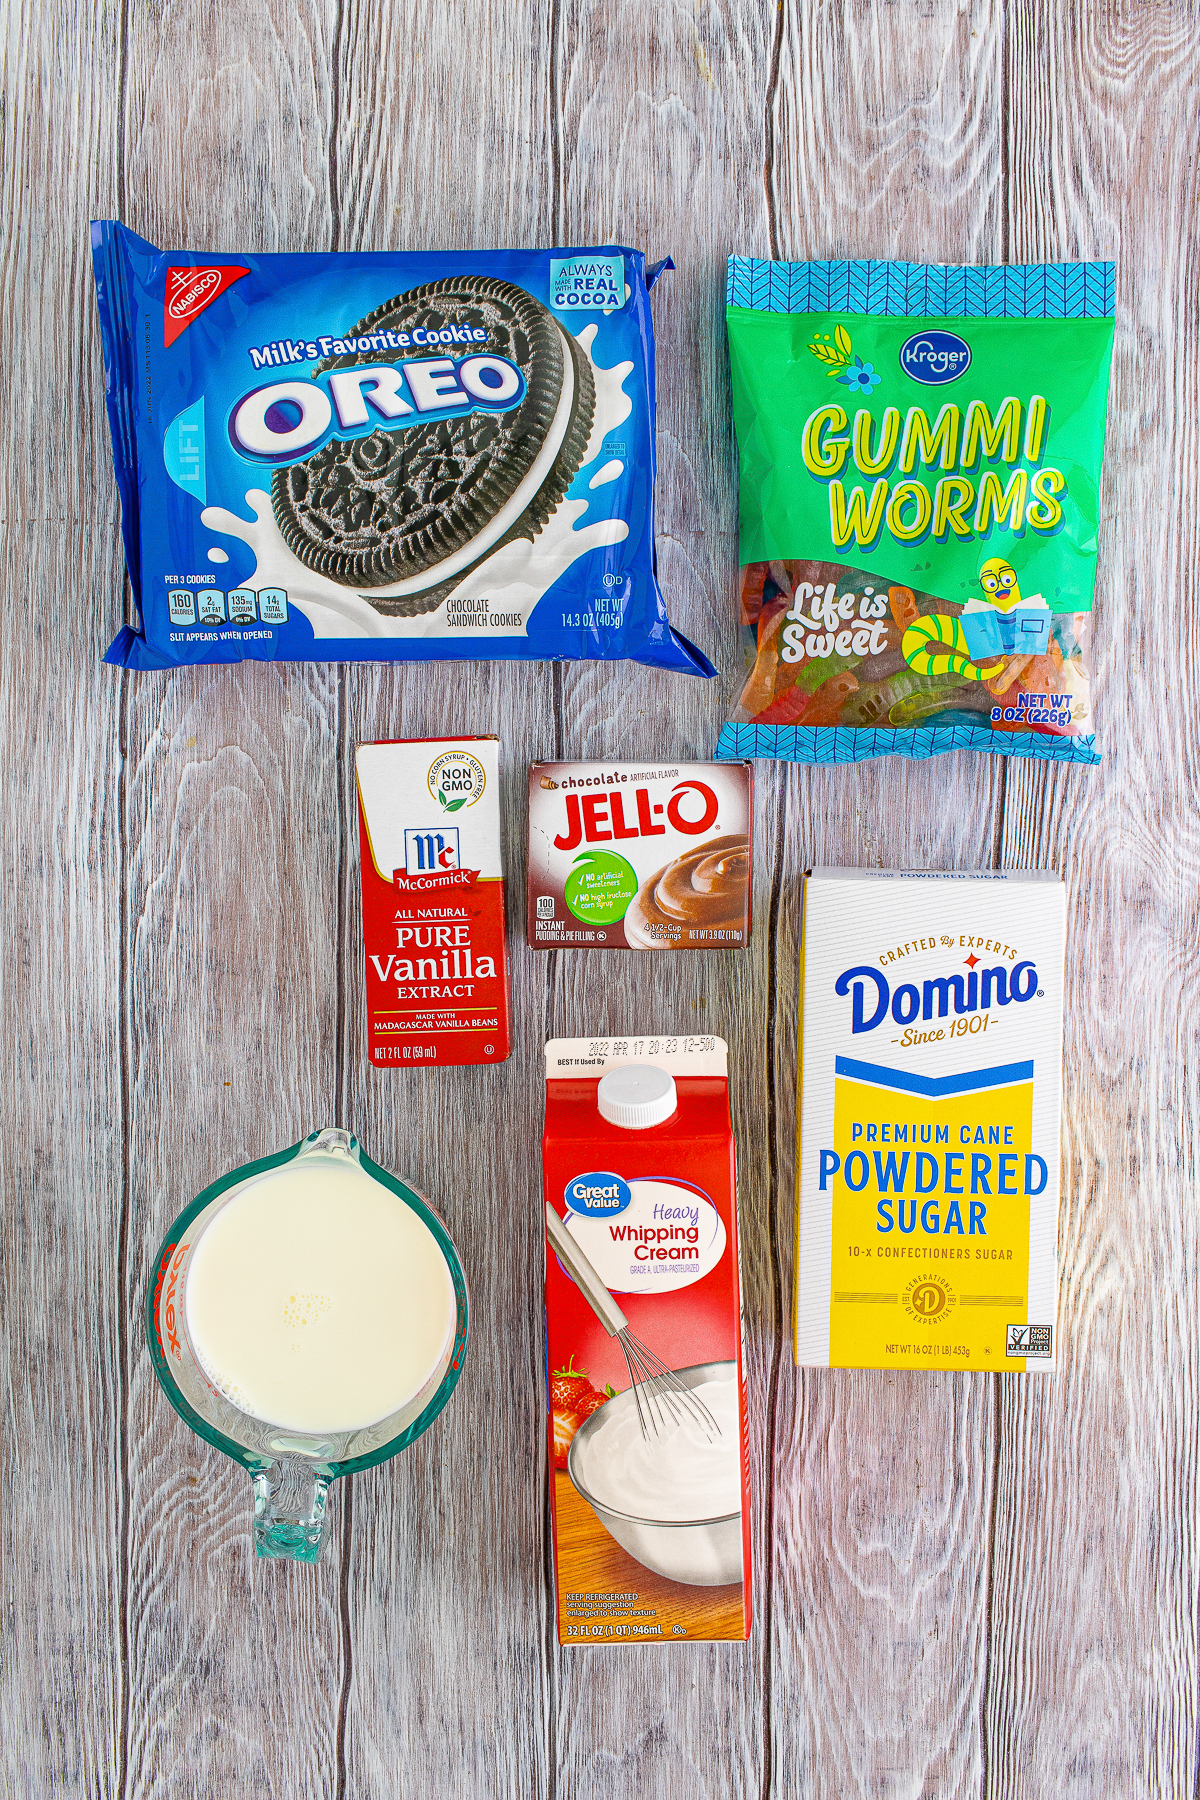
INGREDIENTS NEEDED (SCROLL TO THE BOTTOM OF THIS POST FOR THE FULL RECIPE CARD):
- Oreo cookies
- Heavy whipping cream
- Powdered sugar
- Vanilla extract
- Whole milk
- Instant chocolate pudding mix
- Gummy worms
HOW TO MAKE DIRT CAKE CUPS:
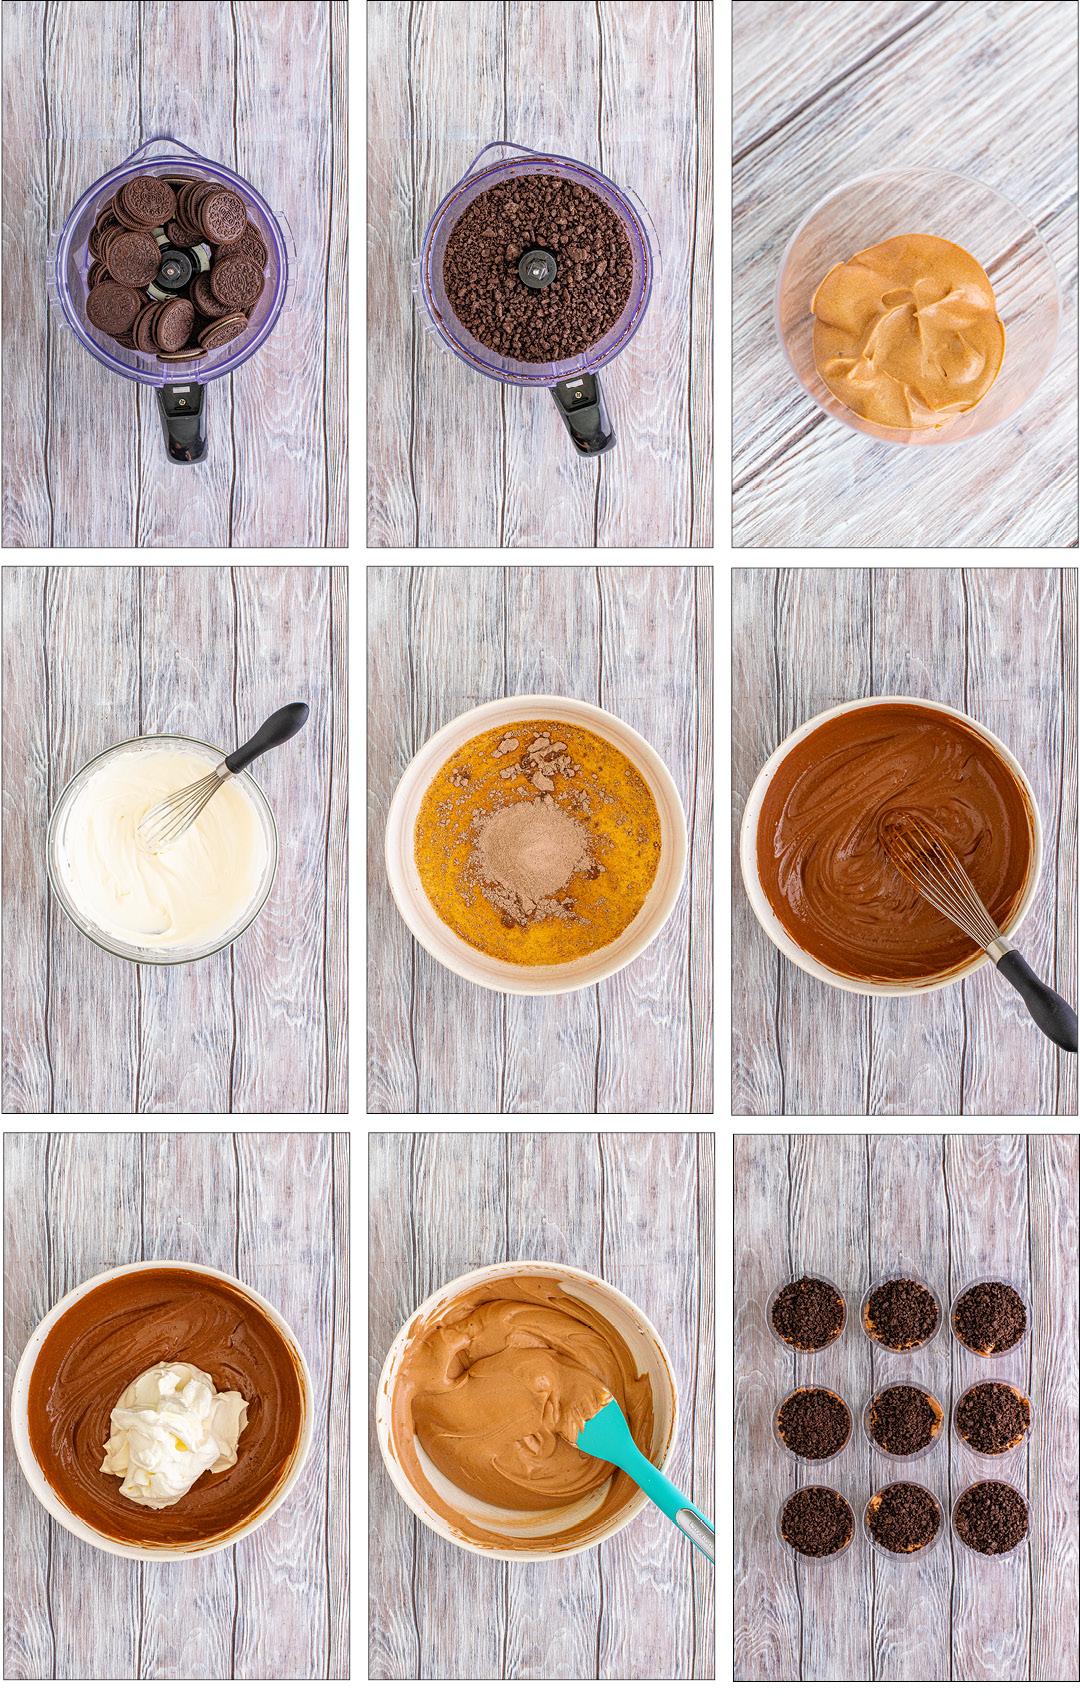
- Place the Oreos in a food processor and process until they become crumbs, set aside.
- Place the heavy cream, powdered sugar, and vanilla in a large bowl. Whip with an electric hand mixer to stiff peaks, do not overmix. Set aside.
- In a large bowl, whisk together the milk and chocolate pudding mix for 2 minutes until thickened.
- Add the whipped cream to the pudding and fold it in until there are no streaks.
- Place 9 9 ounce or similar size disposable cups or glass jars on your work surface.
- Place 2 tablespoons of the cookie crumbs on the bottom. Add just under ¼ cup of the pudding mixture on top of the cookie crumbs. Repeat 1 more time, then top them all off with the remaining cookie crumbs.
- Cover and place in the refrigerator to chill for 1 hour.
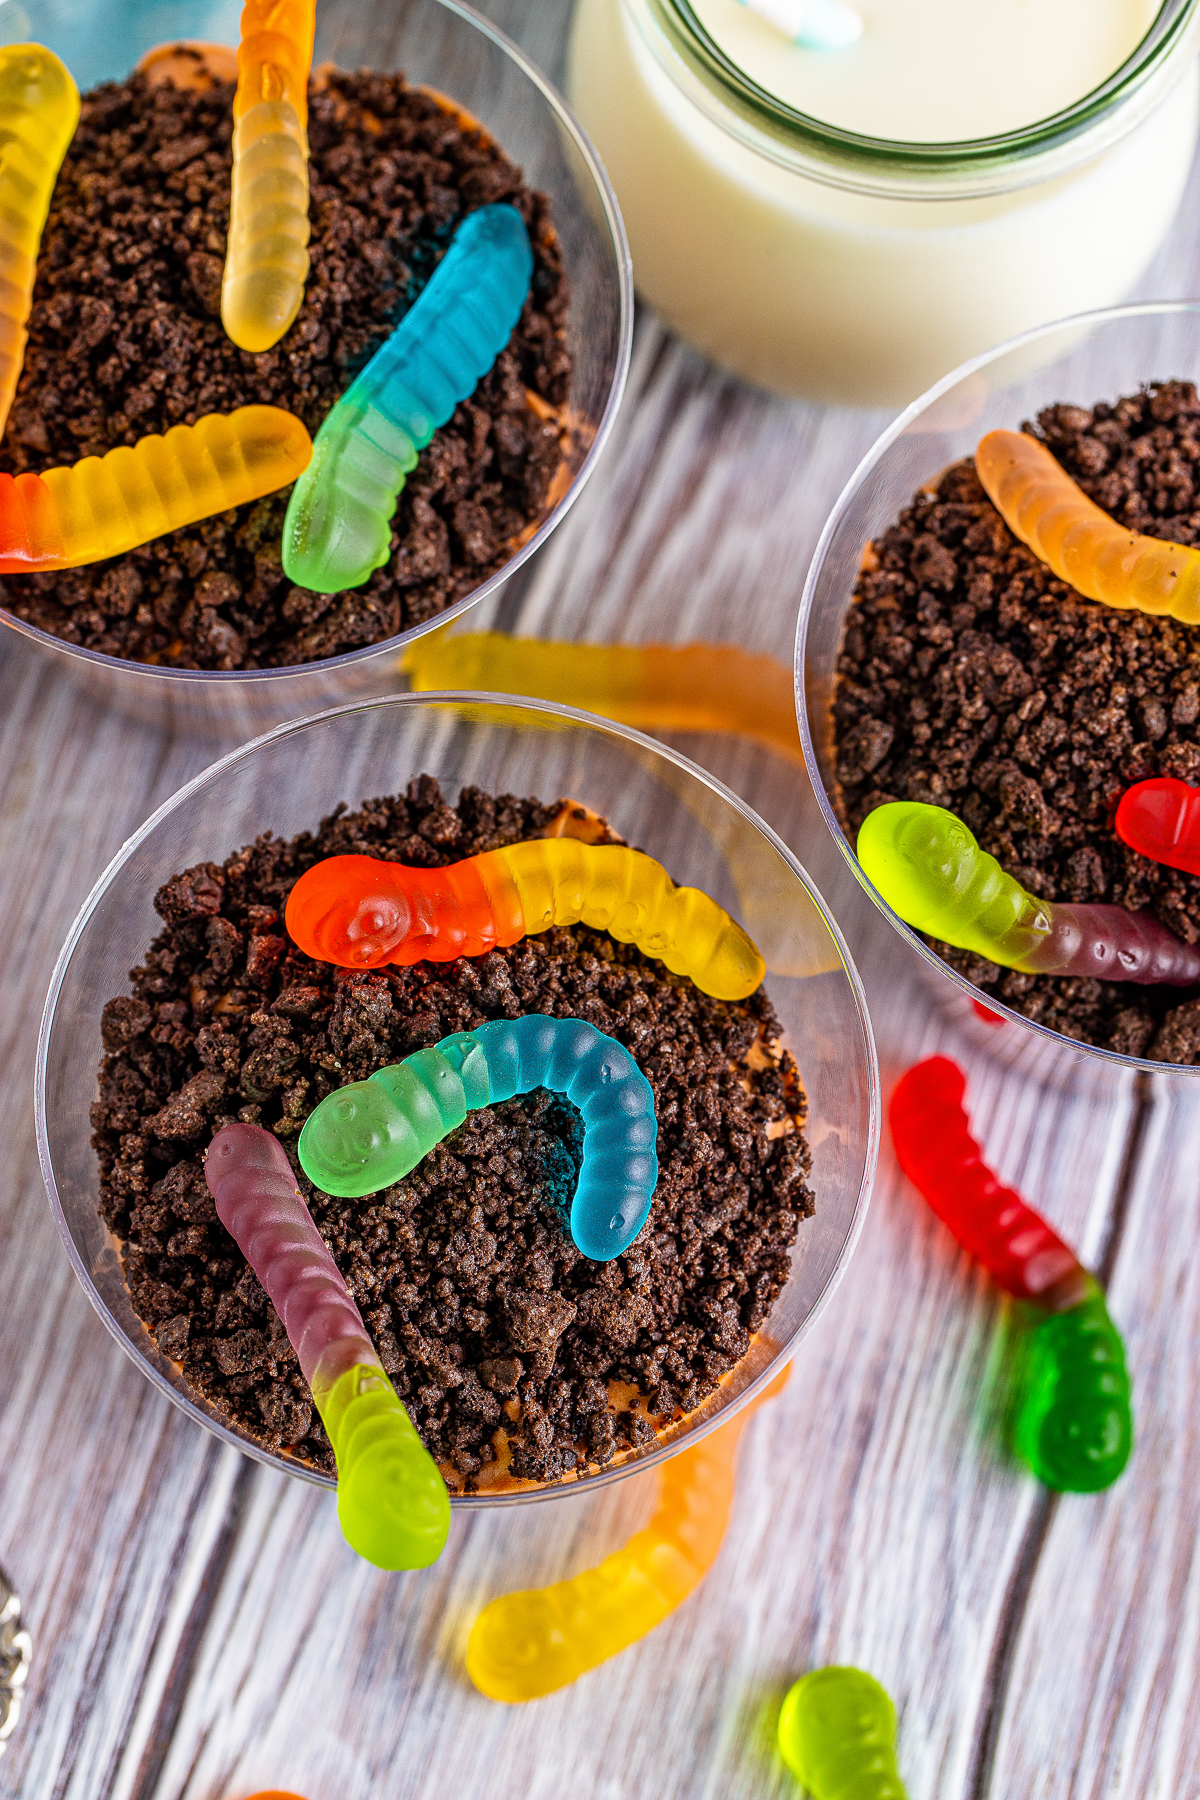
- Garnish with gummi worms and serve.
FAQ: FREQUENTLY ASKED QUESTIONS ABOUT THIS RECIPE:
CAN I USE WHIPPED TOPPING INSTEAD?
Yes! You can swap the heavy cream, powdered sugar, and vanilla for 1 (8-ounce) tub of Cool Whip.
I know I’ve done it myself when I’m short on time.
No need for extra whipping.
Just fold it right into the pudding for that same fluffy texture.
CAN THIS BE MADE AHEAD?
Absolutely. In fact, it’s better that way!
These oreo dirt cups need to chill for at least an hour, so making them ahead gives the flavors time to come together.
Just keep them covered with plastic wrap or in an airtight container in the fridge until serving time.
Keep in mind that making them TOO far ahead will make the cookie crumbles soggy.
There is a happy medium here, haha!

ANY ADDITIONS?
I’d say that these can fit multiple holidays, not to mention birthdays and such. Adjust as you will!
- Crushed chocolate cookies or chocolate chips
- Mini marshmallows
- Cream cheese blended into the pudding for extra richness
- Crushed candy bars (like Reese’s or Twix)
- Sprinkles for color
- Edible flowers or leaves for spring themes
- Mini gummy frogs or bugs for a fun twist
- Mini teddy grahams for a beach theme
- Toasted coconut for “grass” or “sand” look
- Layers of chocolate cake for extra texture
ANY SUBSTITUTIONS?
Oh yeah! As simple as they are, these Individual Dirt Cake Cups are also simple to swap out ingredients.
- Use cool whip instead of homemade whipped cream
- Try vanilla pudding or other flavors of pudding
- Use dairy-free milk and whipped topping for allergy-friendly cups
- Swap gummy worms for gummy candies of any kind
- Use crushed cookies other than Oreos, like chocolate grahams
- Use smaller cups for younger kids or bigger groups
HOW TO STORE:
ROOM TEMPERATURE: These need to be kept cold, so don’t leave them out longer than 30 minutes.
REFRIGERATOR: Store in the fridge covered with plastic wrap or in an airtight container for up to 5 days.
FREEZER: Freezing is not recommended. The pudding mixture and cookie crumbs will get soggy once thawed.
DANA’S TIPS AND TRICKS:
- Use a food processor to crush the Oreos into fine crumbs fast—no mess.
- No food processor? Put the cookies in a zip-top bag and crush them with a rolling pin.
- Whip the cream until it holds peaks but don’t overmix—it can turn into butter!
- Layer gently so the pudding and cookies don’t mix together too much.
- Use clear cups so you can see the pretty layers—it adds to the fun!
- Make smaller servings if you’re feeding a group of younger kids—this recipe easily stretches to 18 individual cups.
Dirt Cake Cups are one of those desserts that bring back memories and big smiles with every spoonful.
They’re creamy, chocolatey, and just a little bit silly with those gummy worms peeking out of the “dirt.”
Get your fun and your YUM all at once!
If you like this recipe, you might also like:
Learn more about the author, Dana DeVolk, on our ABOUT ME page!

Easy Dirt Cake Cups Recipe
Ingredients
- 14.3 ounce package of regular Oreos
- 1 cup heavy whipping cream
- 2 tablespoons powdered sugar
- 1 teaspoon vanilla extract
- 2 cups whole milk
- 3.9 ounce package instant chocolate pudding mix
- Gummi worms for garnish
Instructions
- Place the Oreos in a food processor and process until they become crumbs, set aside.14.3 ounce package of regular Oreos
- Place the heavy cream, powdered sugar, and vanilla in a large bowl. Whip with an electric hand mixer to stiff peaks, do not overmix. Set aside.2 tablespoons powdered sugar, 1 teaspoon vanilla extract
- In a large bowl, whisk together the milk and chocolate pudding mix for 2 minutes until thickened.2 cups whole milk, 3.9 ounce package instant chocolate pudding mix
- Add the whipped cream to the pudding and fold it in until there are no streaks.1 cup heavy whipping cream
- Place 9 9 ounce or similar size disposable cups or glass jars on your work surface.
- Place 2 tablespoons of the cookie crumbs on the bottom. Add just under ¼ cup of the pudding mixture on top of the cookie crumbs. Repeat 1 more time, then top them all off with the remaining cookie crumbs.
- Cover and place in the refrigerator to chill for 1 hour.
- Garnish with gummi worms and serveGummi worms for garnish
Notes
- Use a food processor to crush the Oreos into fine crumbs fast—no mess.
- No food processor? Put the cookies in a zip-top bag and crush them with a rolling pin.
- Whip the cream until it holds peaks but don’t overmix—it can turn into butter!
- Layer gently so the pudding and cookies don’t mix together too much.
- Use clear cups so you can see the pretty layers—it adds to the fun!
- Make smaller servings if you’re feeding a group of younger kids—this recipe easily stretches to 18 individual cups.
Nutrition
Love This Recipe?
Follow @ThisSillyGirlsKitchen on Instagram and @danadevolk on Pinterest for more!


These were so much fun to make and tasted delicious.