This post may contain affiliate links.
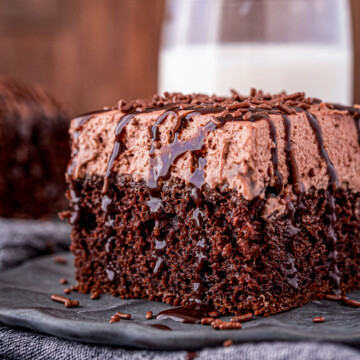
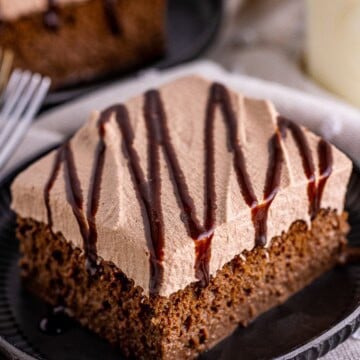
Chocolate Tres Leches Cake takes the beloved Latin American three milk cake and gives it a rich chocolate twist, with a tender cocoa sponge soaked in sweet chocolate milk and crowned with fluffy chocolate whipped cream. I made this for the girls’ birthday weekend and it vanished before I could sneak a second slice, which is exactly how you know it is a keeper. If you love a soaked, ultra moist dessert like our chocolate poke cake, this one is pure indulgence.
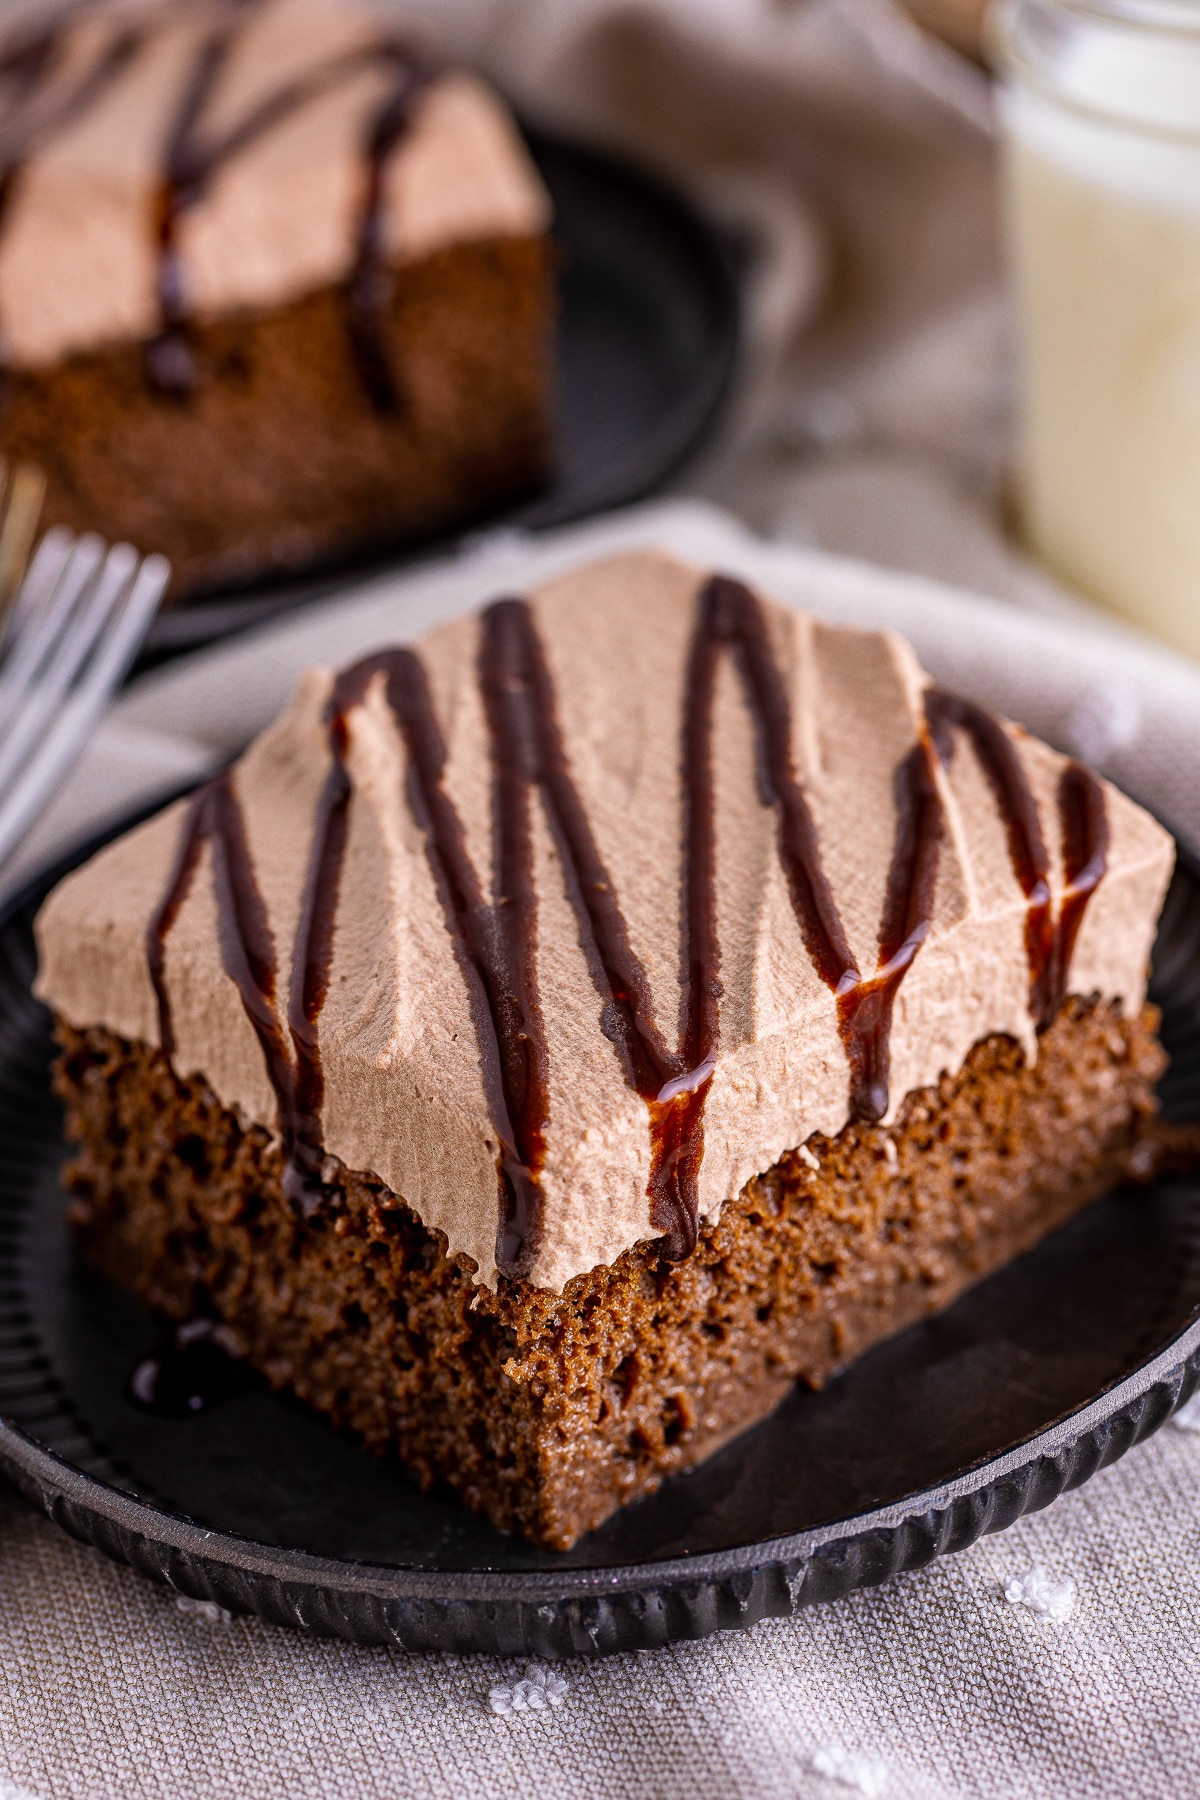
Every forkful of this chocolate tres leches cake is cool, creamy, and soaked through with chocolate milk for the most decadent make ahead dessert.
Chocolate Tres Leches Cake Quick Look
- 🕒 Prep Time: 10 minutes
- 🌡️ Cook Time: 30 minutes
- ⏳ Total Time: 8 hours 40 minutes
- 🍽️ Serving: 12 servings
- ⚡ Calories: 449kcal
- 🌶️ Flavor Profile: Rich, moist, and chocolatey (cocoa sponge, chocolate milk soak, whipped topping)
- ✋ Difficulty: Easy, a soak and chill cake like our chocolate poke cake
Quick Answer
To make chocolate tres leches cake, bake a light cocoa sponge cake made with whipped egg whites. Poke holes all over the cooled cake, then pour over a mixture of sweetened condensed milk, evaporated milk, heavy cream, and cocoa powder. Chill it for at least 8 hours so it soaks through, then top with homemade chocolate whipped cream before serving.
Jump to:
- Chocolate Tres Leches Cake Quick Look
- Quick Answer
- Why This Recipe Works
- Why You’ll Love This Recipe
- Key Ingredients
- Variations and Substitutions
- How to Make Chocolate Tres Leches Cake
- Recipe Tips & Tricks
- Serving Ideas and Suggestions
- Chocolate Tres Leches Cake FAQs
- Other Recommended Easy Cake Recipes
- Chocolate Tres Leches Cake Recipe
Why This Recipe Works
Click to see the technique science
- Whipped egg whites keep it light. Folding stiff egg whites into the batter creates a tender, airy sponge that soaks up all that chocolate milk without turning dense or gummy.
- Cocoa in every layer. Cocoa powder goes into the cake, the milk soak, and the whipped topping, building deep chocolate flavor from top to bottom.
- Poking holes lets it drink the milk. Poking the cooled cake all over gives the three milk mixture channels to soak in evenly for that signature moist texture.
- An overnight chill does the work. Resting in the fridge lets the cake fully absorb the chocolate milk so every bite is rich and saturated.
- Homemade chocolate whipped cream tops it. A light, cocoa sweetened whipped cream is the perfect airy contrast to the dense, soaked cake below.
- Three milks make it ultra moist. Sweetened condensed milk, evaporated milk, and heavy cream together give tres leches cake its famous melt in your mouth richness.
Why You’ll Love This Recipe
- The ultimate make ahead dessert. It needs to chill overnight, so the work is done long before your guests arrive.
- Unbelievably moist. Soaked through with chocolate milk, it is even more decadent than our chocolate poke cake.
- A chocolate lover’s dream. Cocoa in the cake, the soak, and the topping means chocolate in every single bite.
Key Ingredients
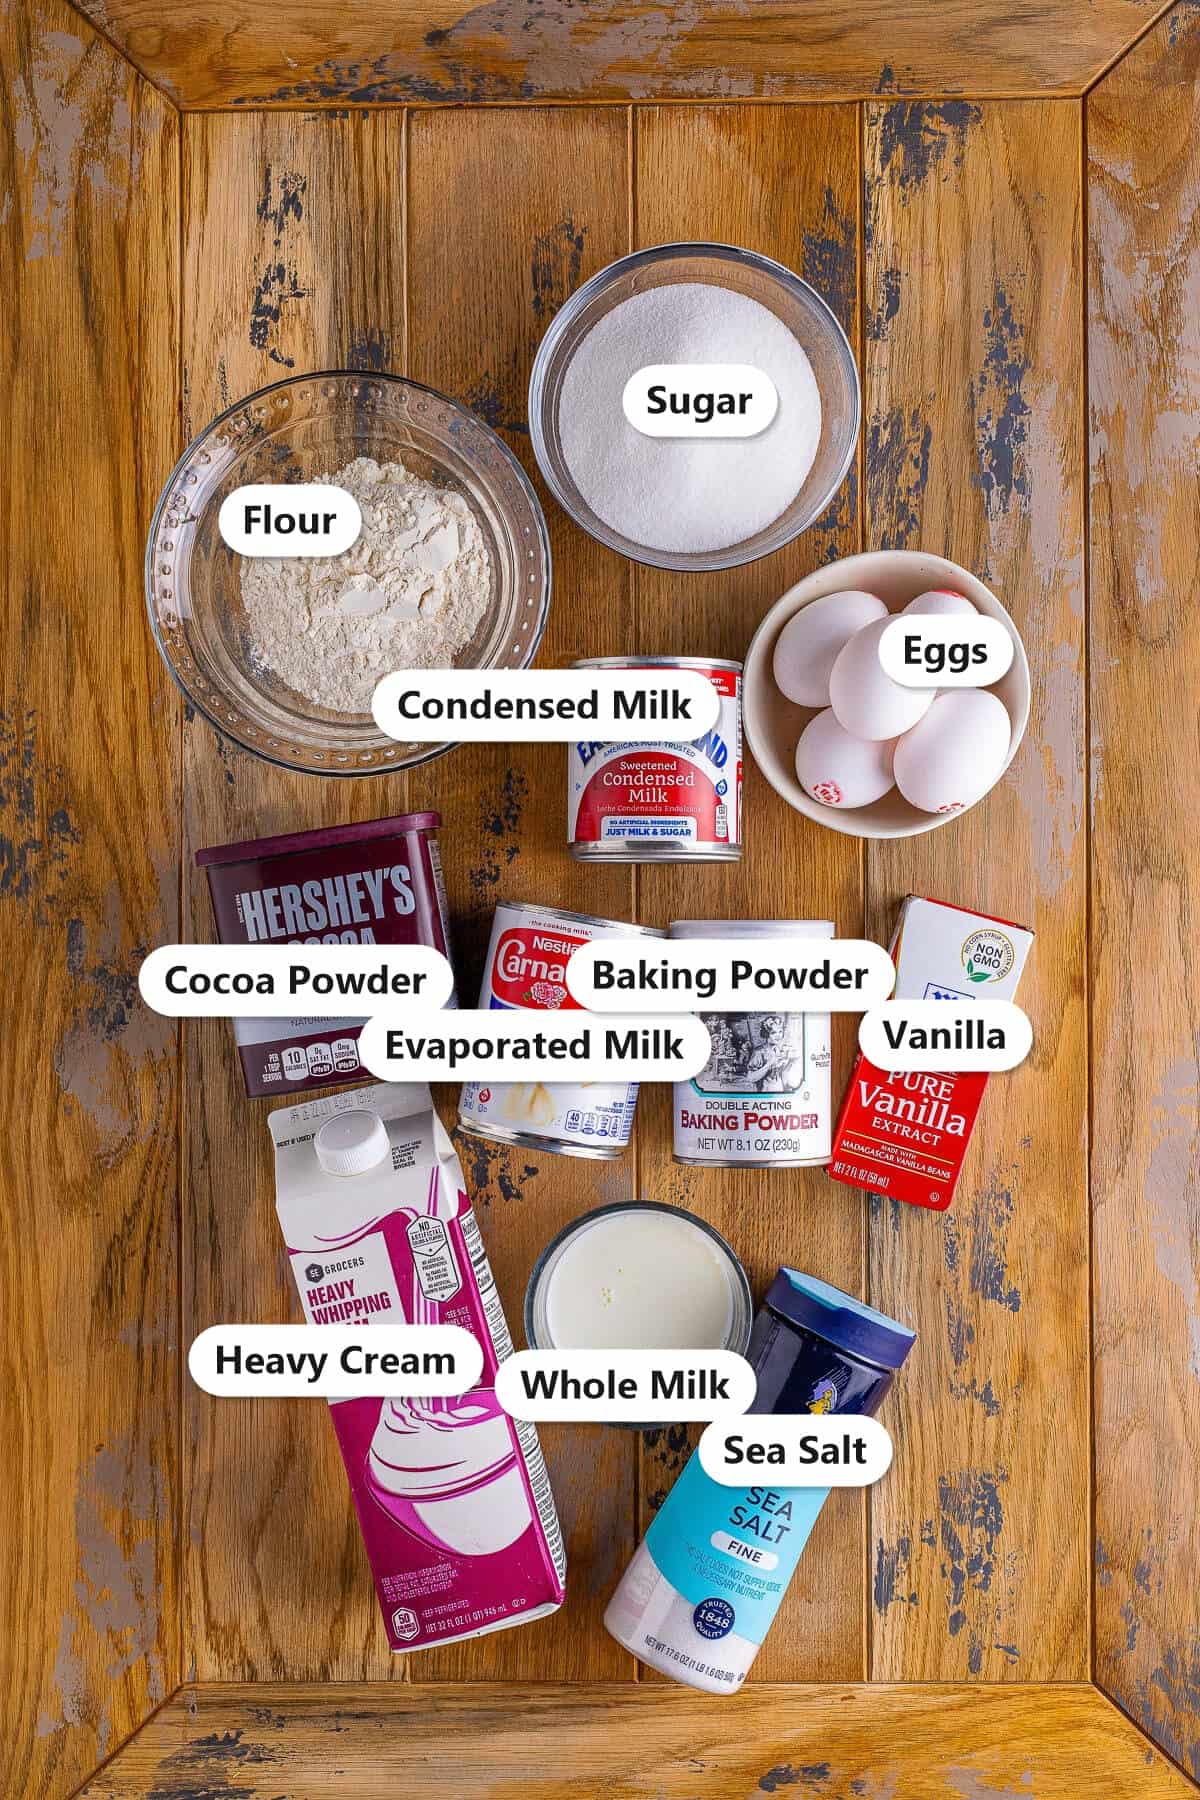
Chocolate tres leches cake comes together from pantry staples plus the three milks that make it famous. Here is what each one does.
- Cocoa Powder: Unsweetened cocoa flavors the cake, the milk soak, and the whipped topping for triple the chocolate.
- Eggs: Separated and the whites whipped to stiff peaks, they give the sponge its light, soak ready texture.
- Sweetened Condensed Milk: The sweet, thick first milk that makes the soak rich and luscious.
- Evaporated Milk: The second milk adds creamy body without being too sweet.
- Heavy Cream: The third milk in the soak, plus more whipped into the chocolate topping.
- Flour and Sugar: The simple base of the tender cocoa sponge cake.
See recipe card for exact quantities.
Variations and Substitutions
This chocolate tres leches cake is easy to make your own. Here are a few favorite twists.
- Add a teaspoon of espresso powder to the soak for a rich mocha flavor.
- Use dark or Dutch process cocoa for an even deeper, more intense chocolate cake.
- Top with chocolate shavings, curls, or mini chocolate chips for extra decadence.
- Stir a pinch of cinnamon into the batter for a Mexican chocolate vibe.
- Drizzle the slices with caramel or dulce de leche along with the chocolate syrup.
- Add fresh raspberries or strawberries on top for a fruity, chocolate covered cherry feel.
How to Make Chocolate Tres Leches Cake
- Whisk the dry ingredients, then beat the egg yolks with sugar until pale, mix in the milk and vanilla, and stir into the dry ingredients to make the chocolate batter.

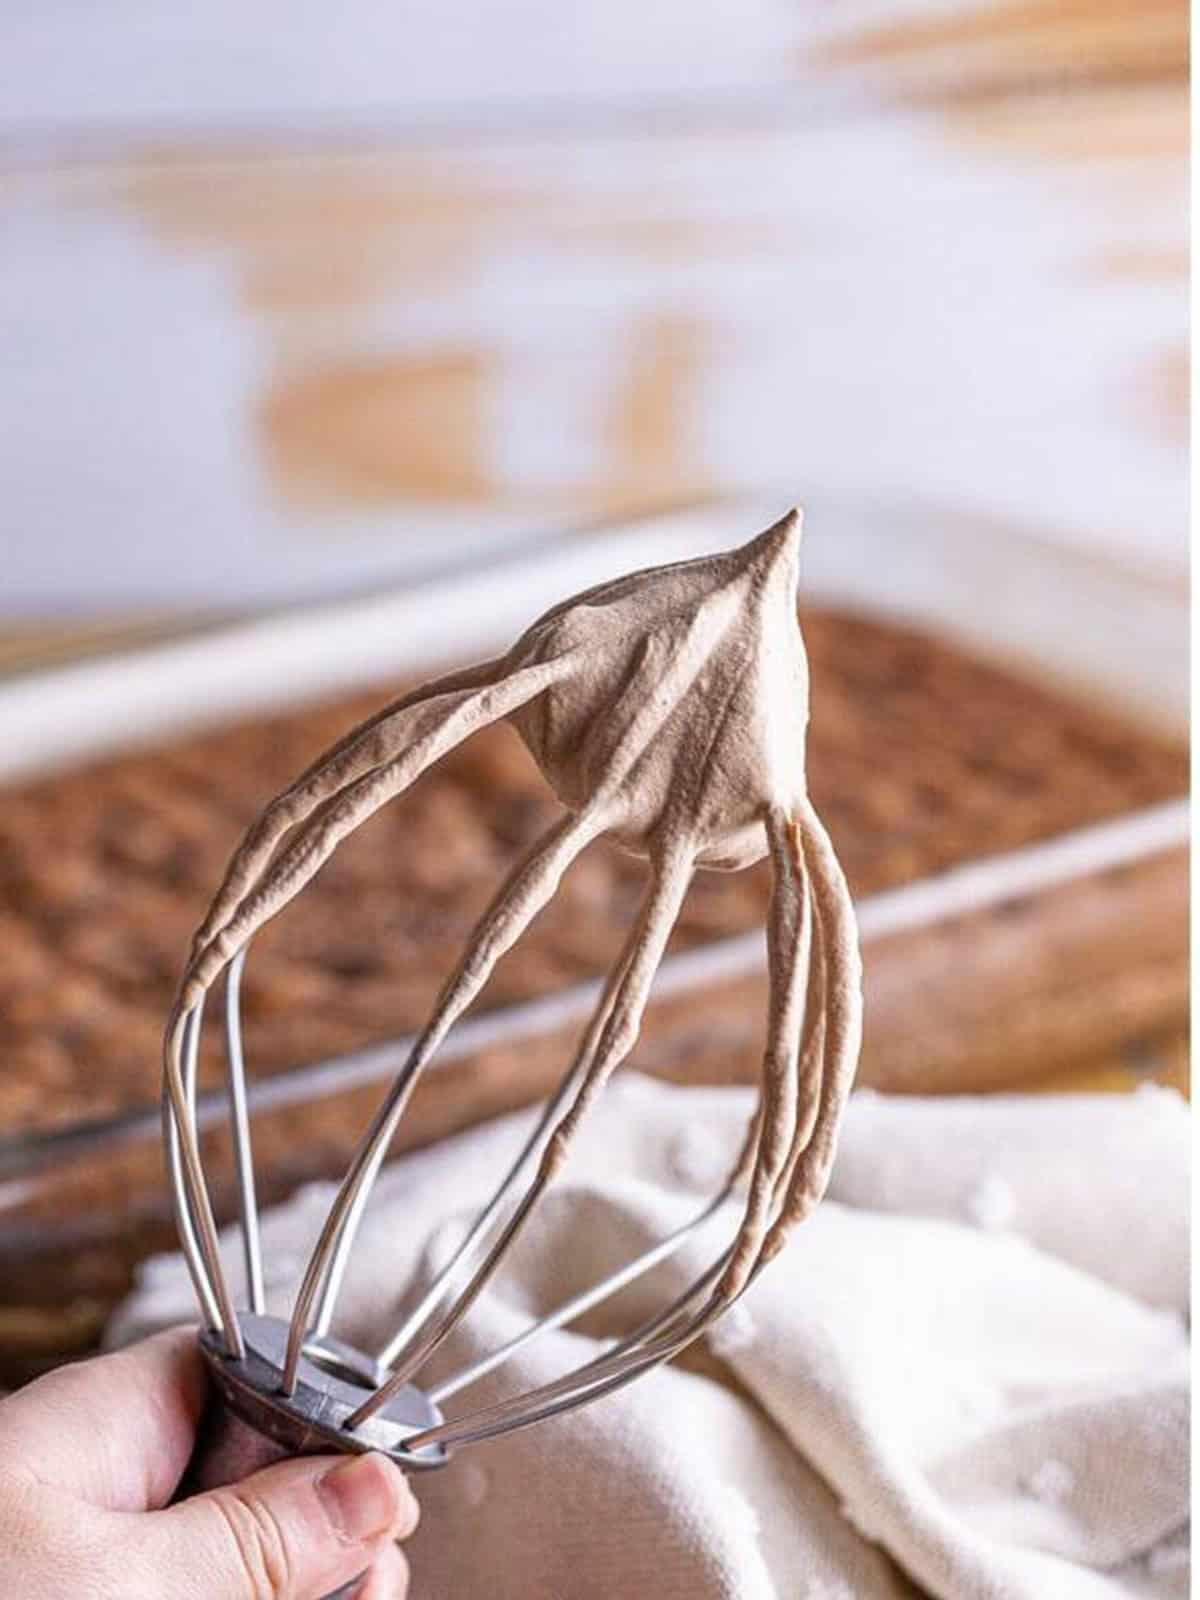
- Beat the egg whites until frothy, slowly add the remaining sugar, and whip to stiff peaks. Gently fold them into the batter in thirds until no streaks remain.
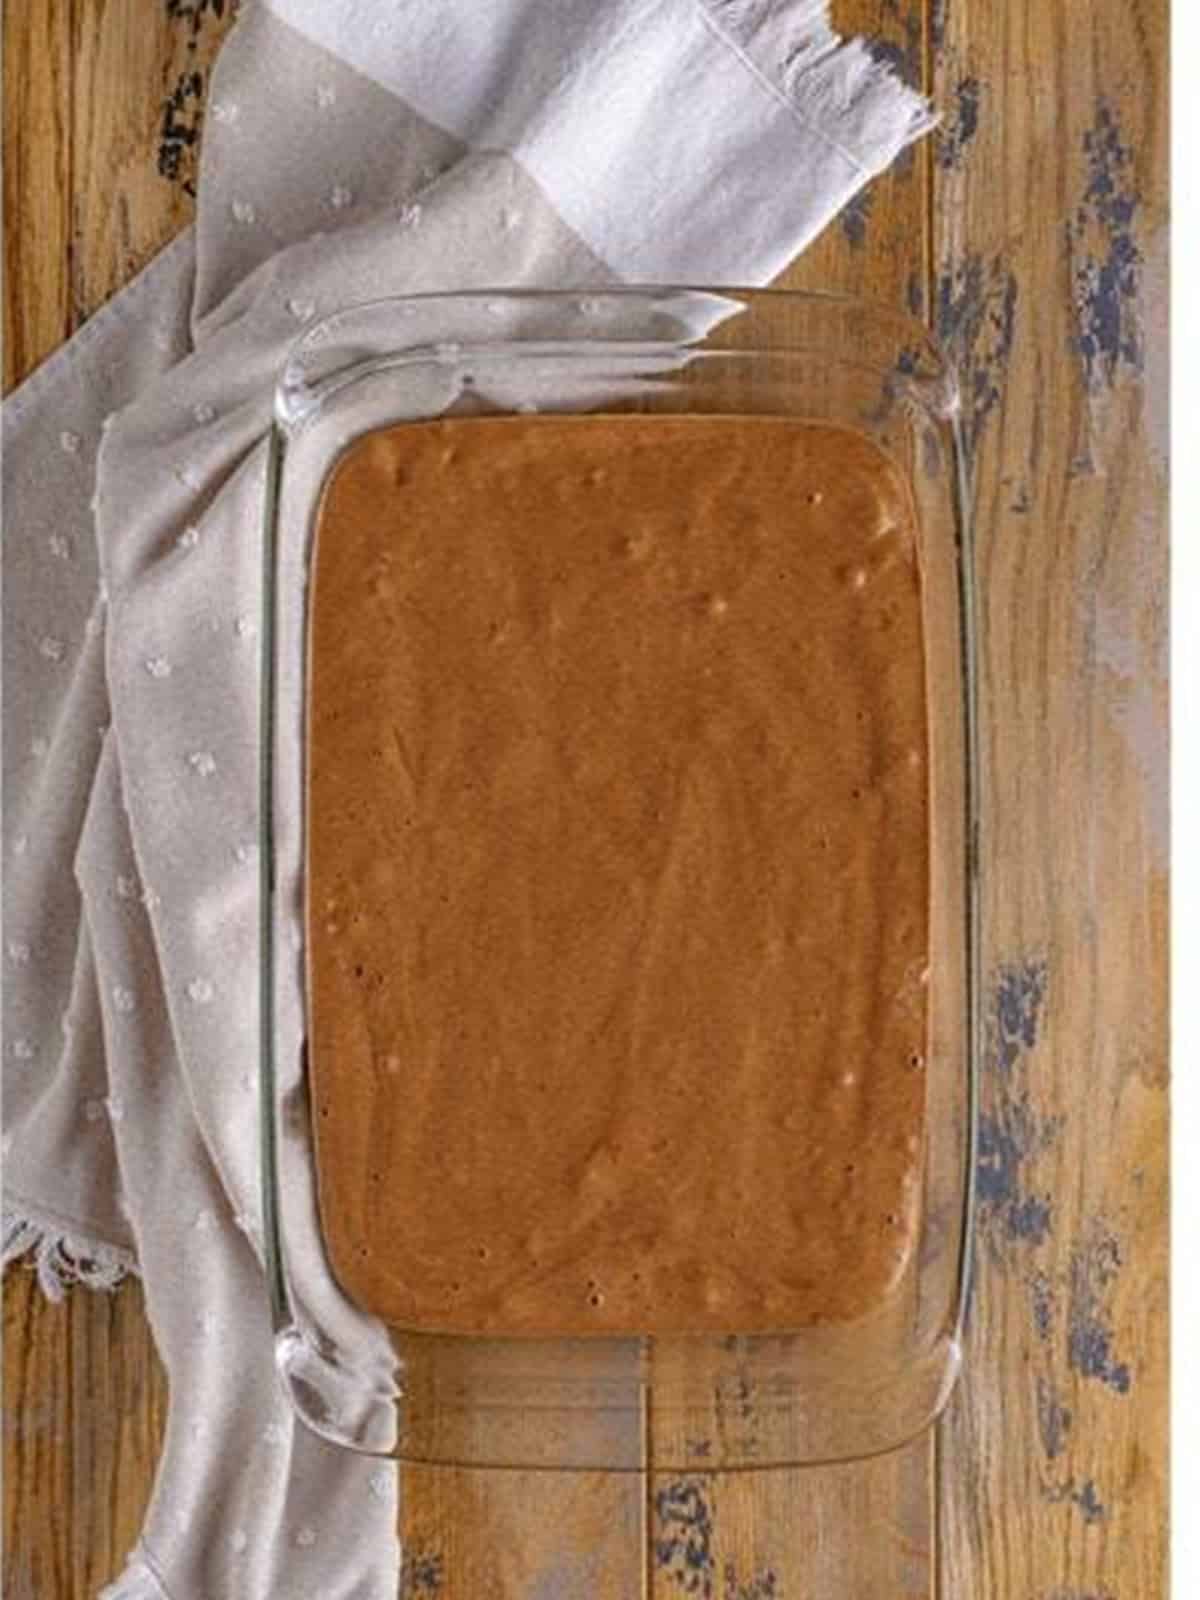
- Pour the batter into a greased 9 by 13 dish, smooth the top, and bake at 350 degrees for about 30 minutes until a toothpick comes out clean. Cool completely.
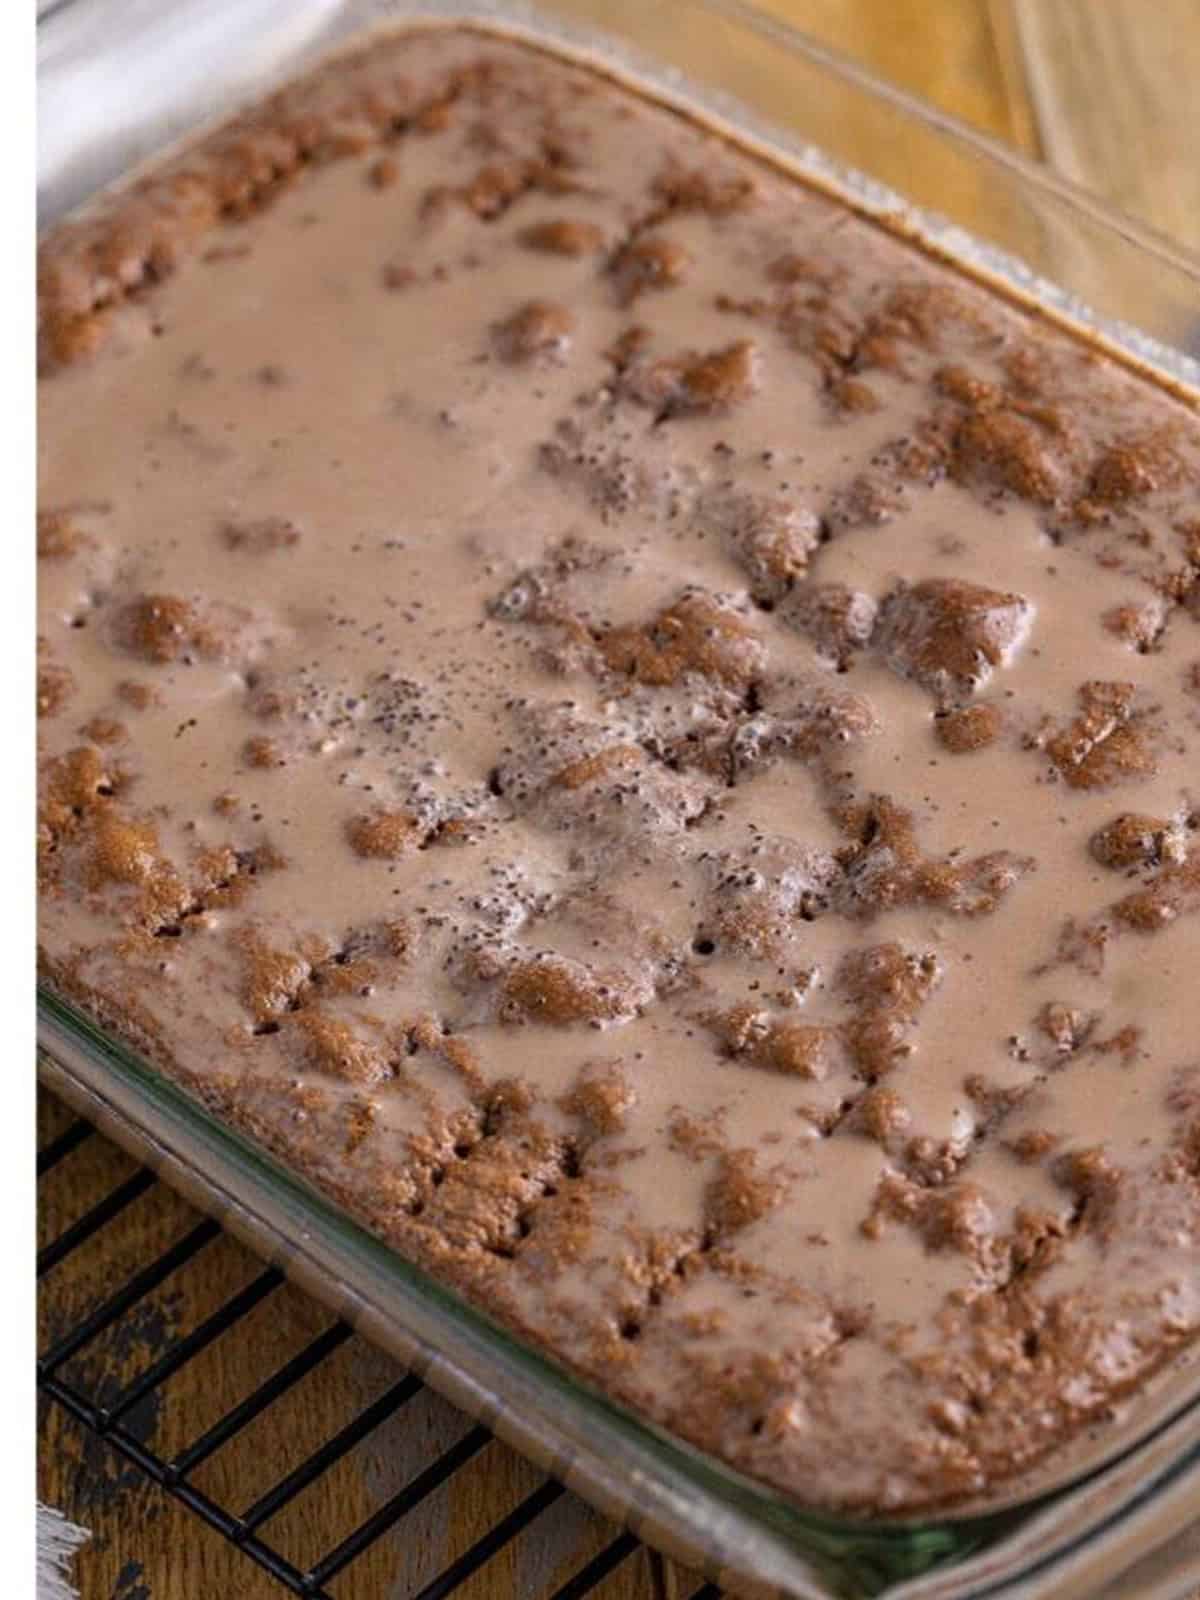
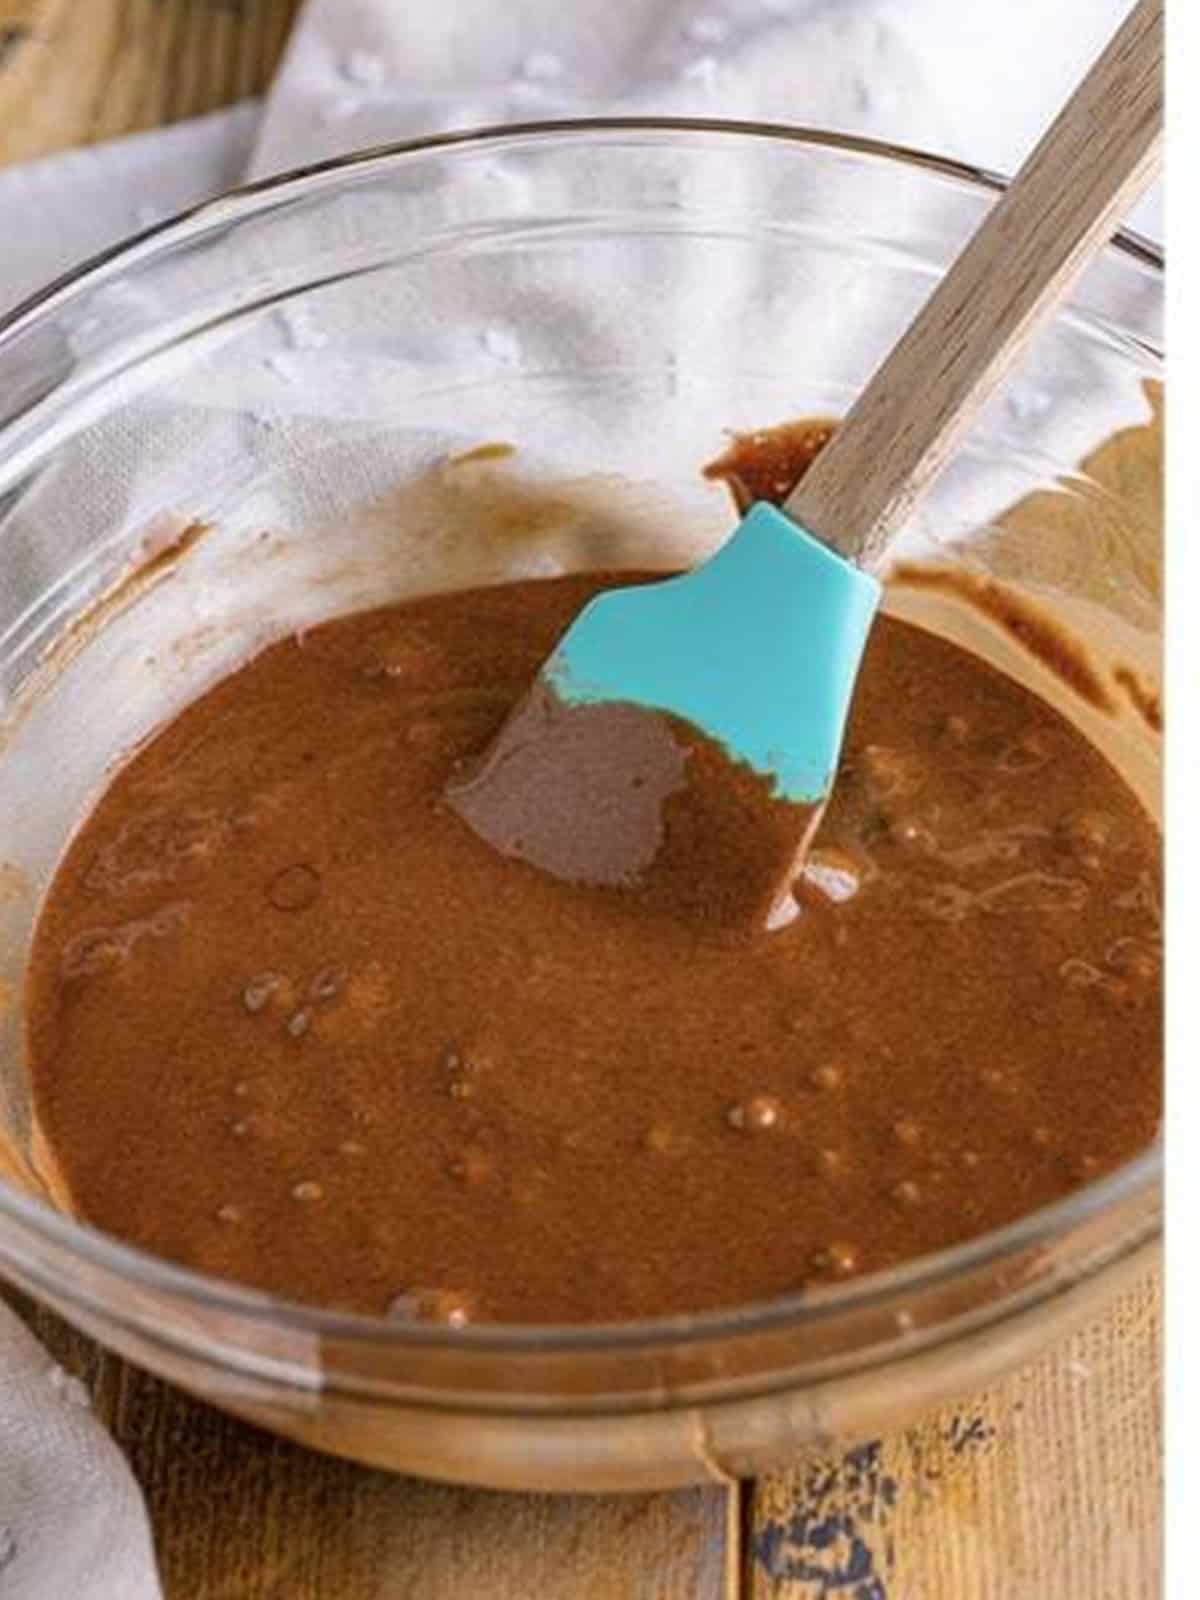
- Whisk the condensed milk, evaporated milk, heavy cream, and cocoa powder together. Poke holes all over the cooled cake and pour the chocolate milk mixture evenly over the top, using all of it.
- Cover and refrigerate at least 8 hours or overnight. When ready to serve, whip the heavy cream, sugar, cocoa powder, and vanilla to stiff peaks.

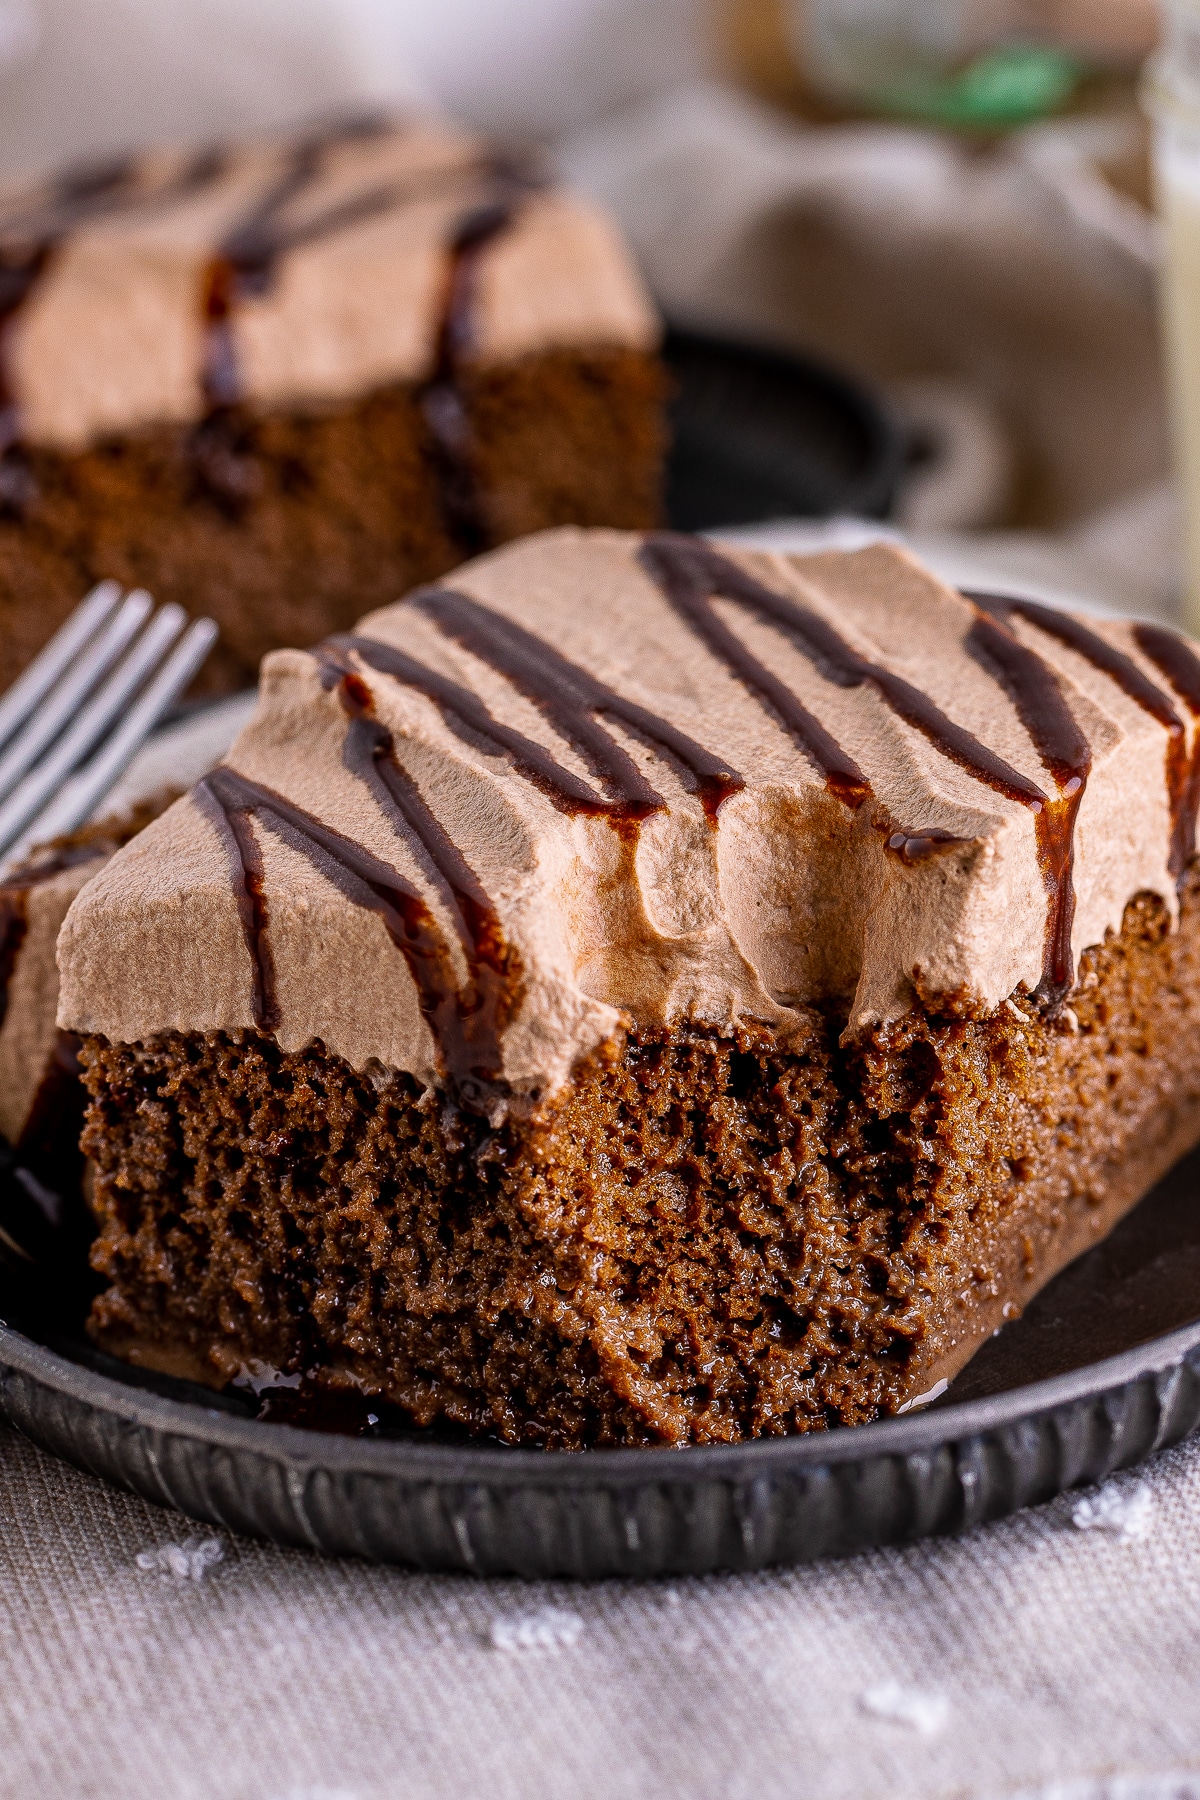
- Spread the chocolate whipped cream over the soaked cake, slice, and serve with a drizzle of chocolate syrup if desired.
Recipe Tips & Tricks
- Whip the egg whites to stiff peaks so the sponge is light enough to soak up all the milk.
- Fold the whites in gently in thirds to keep the batter airy.
- Cool the cake completely before soaking so it absorbs the milk evenly instead of getting gummy.
- Poke lots of holes all over with a fork so the chocolate milk soaks all the way through.
- Use all of the milk mixture. It looks like a lot, but the cake drinks it up as it chills.
- Chill overnight for the most moist, flavorful results.
- Add the whipped topping just before serving so it stays fresh and fluffy.
Serving Ideas and Suggestions
Chocolate tres leches cake is best served cold, straight from the fridge, cut into squares with a generous swirl of chocolate whipped cream and a drizzle of chocolate syrup. A few chocolate shavings or fresh berries make it extra special.
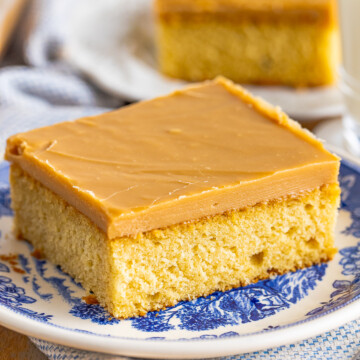
It is the perfect make ahead dessert for birthdays, holidays, and potlucks. Set it out alongside our classic Mexican tres leches cake for a fun two cake comparison, or our chocolate caramel cake for the chocolate lovers.
Building a dessert table? Round it out with our old fashioned caramel cake, a batch of easy chocolate fudge, and a bowl of homemade chocolate whipped cream for everyone to pile on.
Chocolate Tres Leches Cake FAQs
Chocolate tres leches cake is a chocolate version of the classic Latin American three milk cake. A light cocoa sponge is soaked in a mixture of sweetened condensed milk, evaporated milk, and heavy cream blended with cocoa, then topped with chocolate whipped cream.
A dense chocolate tres leches cake usually means the egg whites were not whipped enough or were overmixed when folded in. Be sure to whip them to stiff peaks and fold gently so the sponge stays light enough to soak up the milk without collapsing.
Yes, and you should. Chocolate tres leches cake needs to chill at least 8 hours, and overnight is even better. Make it a day ahead, then add the whipped topping just before serving for the freshest results.
Chocolate tres leches cake keeps covered in the fridge for up to 4 days. The soaked cake actually gets more moist and flavorful over the first day or two. Keep it chilled until you are ready to serve.
You can freeze the soaked cake without the whipped topping for up to 2 months. Thaw it overnight in the fridge, then make and add the fresh chocolate whipped cream before serving.
Unsweetened natural cocoa powder works perfectly for chocolate tres leches cake. For an even richer, darker flavor, use Dutch process or dark cocoa in the cake, the milk soak, and the whipped topping.

Looking for what to make next? Try the classic Mexican tres leches cake for the original three milk cake that started it all.

Chocolate Tres Leches Cake Recipe
Ingredients
For the cake:
- ¾ cup all-purpose flour
- ⅓ cup unsweetened cocoa powder
- 1 ½ teaspoons baking powder
- ½ teaspoon fine sea salt
- 5 large eggs separated
- 1 cup granulated sugar divided
- ⅓ cup whole milk
- 1 ½ teaspoons vanilla extract
For the milk mixture:
- 14 ounce can sweetened condensed milk
- 12 ounce can evaporated milk
- ¼ cup heavy whipping cream
- 2 tablespoons unsweetened cocoa powder
For the topping:
- 2 cups heavy whipping cream
- ¼ cup granulated sugar
- ¼ cup unsweetened cocoa powder
- ½ teaspoon vanilla extract
- Chocolate syrup for serving optional
Instructions
- Preheat the oven to 350°F. Spray a 9×13 baking dish with baking spray and set aside.
- Whisk together the flour, cocoa powder, baking powder, and salt in a large bowl, and set aside.¾ cup all-purpose flour, ⅓ cup unsweetened cocoa powder, 1 ½ teaspoons baking powder, ½ teaspoon fine sea salt
- Separate the egg whites and egg yolks into two separate bowls.5 large eggs
- Add ¾ cups of sugar to the bowl with the egg yolks, beating for 2 minutes until the sugar is mixed in and the mixture becomes pale yellow.1 cup granulated sugar
- Whisk in the milk and vanilla until combined.⅓ cup whole milk, 1 ½ teaspoons vanilla extract
- Pour the egg yolk mixture into the dry ingredients and stir until combined.
- Beat the egg whites until frothy with an electric hand mixer or in a stand mixer with the whisk attachment. Once frothy, slowly add the remaining ¼ cup sugar. Continue to beat until stiff peaks form.
- Gently fold the egg whites into the yolk/flour mixture in 1/3 increments until fully combined. There should be no streaks.
- Pour the batter into the prepared baking dish and smooth out the top. Bake for 30 minutes or until a toothpick inserted into the center comes out clean. Set aside to cool completely.
- In a medium bowl, whisk the condensed milk, evaporated milk, heavy cream, and cocoa powder until combined. It will take a while to mix in the cocoa powder and some of it may not completely dissolve, this is normal.14 ounce can sweetened condensed milk, 12 ounce can evaporated milk, ¼ cup heavy whipping cream, 2 tablespoons unsweetened cocoa powder
- Once the cake is cooled, take a fork and poke holes all over the cake.
- Pour the milk mixture all over the cake and sides. It’s a lot, so use all of it.
- Cover with plastic wrap and refrigerate for at least 8 hours or overnight.
- When you are ready to serve, make the topping. Add the heavy cream, sugar, cocoa powder, and vanilla in the body of a stand mixer with the whisk attachment or in a large bowl with an electric hand mixer. Beat until stiff peaks form.2 cups heavy whipping cream, ¼ cup granulated sugar, ¼ cup unsweetened cocoa powder, ½ teaspoon vanilla extract
- Spread the chocolate whipped cream over the cake. Slice and serve with chocolate syrup if desired.Chocolate syrup for serving
Notes
- Use room temperature ingredients: This helps everything mix together smoothly.
- Beat the egg whites properly: Make sure they reach stiff peaks for a fluffy cake.
- Pour the milk mixture slowly: Let it soak in gradually for the best results.
- Use a wooden skewer: Poke holes all over the cake to help the milk mixture absorb better, a fork works just as well.
- Chill overnight: This cake tastes best when chilled overnight, allowing the flavors to meld.
- Whip the cream well: Beat the cream to stiff peaks for a stable and fluffy topping.
Nutrition
Love This Recipe?
Follow @ThisSillyGirlsKitchen on Instagram and @danadevolk on Pinterest for more!


